Arduino MIDI Sequencer Displays A Lot Of Data

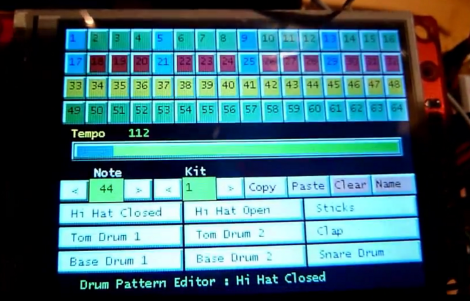
This Arduino MIDI sequencer has no shortage of ways to display loop info. The screen above is a touch-sensitive interface that acts as the user input. But if this screen is not visible, you can still see which tracks have activated samples for each beat and what effects are being used. That’s thanks to the collection of display boards which are shown in the video after the break.

The setup acts as the MIDI front end, relying on other hardware to generate the samples. It presents all of the options through several pages on the 320×240 touch screen display. The Ardunio Mega is responsible for monitoring the UI data, crafting and sending the MIDI commands, as well as updating the LED-based display boards. These include bar graphs for the various effects, a four row by sixteen pixel beat pattern display, and 7-segment displays to track the current location within the loop. All in that’s 368 LEDs driven by 18 shift registers.

Update: Link to a gallery can be found after the break as well.

Continue reading “Arduino MIDI Sequencer Displays A Lot Of Data”

Floppy Drive As An Audio Sampler

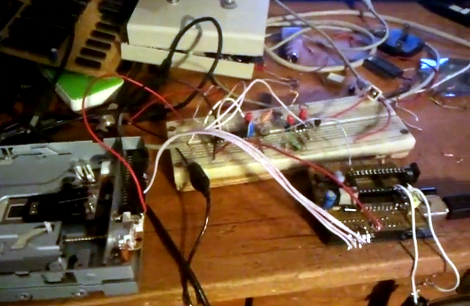
Here’s a floppy drive which is being used as an audio sampler. At first glance we thought this was another offering which drives the stepper motor at a specific frequency to generate that characteristic sound at a target pitch. But that’s not what’s happening at all. The floppy is actually being used as a storage device (go figure).

From what we can tell, it’s being used almost like an 8-track tape. A PWM signal is stored on one circular slice of the disk, then the head can be moved back to that same “track” to play back the wave form. The head doesn’t move during playback, but just keeps reading the same track of bits. To the right you can see an Arduino board. This allows for MIDI control of the track selection. [Alexis] shows off some keyboard control in the video after the break. There’s a buffer chip on the breadboard which allows the audio output to be quickly switched off as the floppy drive head is moved. This keeps garbage out of the sound until the new track can be read.

Continue reading “Floppy Drive As An Audio Sampler”

Gamelatron, A Fully Robotic Indonesian Gamelan Orchestra.

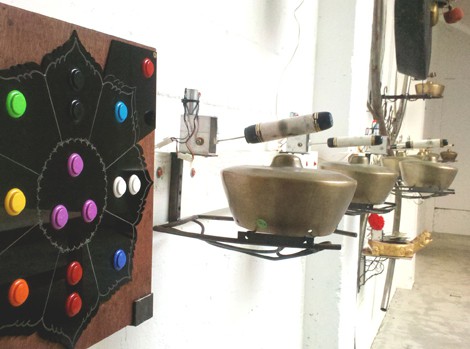
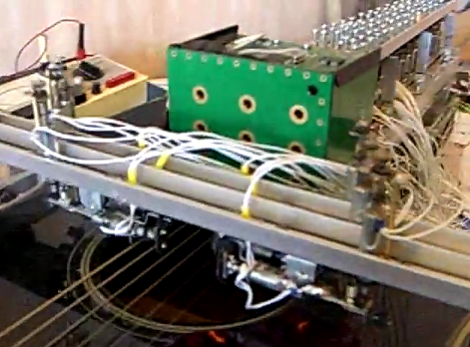
Last summer we got to have a little chat with [Aaron Taylor] about his automated Gamelan orchestra, Gamelatron. The robotic orchestra features a large collection of Indonesian gongs,  metallophones, xylophones and cymbals actuated using simple pull solenoids attached to mallets.  Gamelatron’s custom controller activates the various 24V solenoids using MIDI,  the whole thing is essentially a gigantic MIDI instrument that can be played by whatever sequencing device you so please.

[Aaron] has a variety of ways to pump MIDI into the controller including the “Padma Bhuwana”, a wooden box with 16 arcade buttons wired to an Arduino. The Arduino can either activate sequences on a computer running Ableton live or the MIDI sequence can be pumped directly out of the Arduino for a computer free interactive installation. [Aaron] also plugs his Akai MPD32 to the computer for live shows or he can just let the laptop do all the work for non-interactive installations.

The really interesting thing about having 170 or so simply actuated instruments is the ability to spread them out and fill every facet of a space. A great example of this was the Temple of Transition at Burning man 2011 where the gongs and what not else would span multiple floors. Here is a recent Wired magazine video published where [Aaron] gives a quick overview of the setup, or if you are too impatient for the ads check out a few videos of Gamelatron in at burning man and PEX summer festival after the jump. We also included [Aaron]’s kickstarter video which has a few more details on the setup (as well as irrelevant stuff about the kickstarter project that has since expired). With all the crazy midi instrument hacks we get around here it is not stretch of the imagination to see this has lots of interactive potential.

Continue reading “Gamelatron, A Fully Robotic Indonesian Gamelan Orchestra.”

Control MIDI With An Android Device

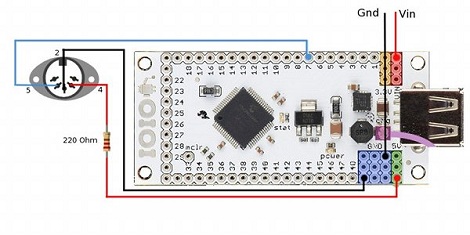
[Lewis] wanted to control MIDI devices with the huge touch screen that is his Android phone. After he couldn’t find a simple hardware implementation of MIDI out, he turned to an IOIO board to send MIDI notes to just about any imaginable musical hardware. It’s a clean build and fills a gap in the abilities of the Android platform.

Because of the woeful support of MIDI in Android, [Lewis] couldn’t find a good way to push MIDI notes from his phone to other devices. While there are a few high-overhead options like MIDI over wi-fi or a Bluetooth connection, there wasn’t much in the way of a straight-up hardware connection to other MIDI devices. [Lewis] got around this limitation by using an IOIO board and the right software to send MIDI notes though a DIN-5 connector.

Although the project works as intended, [Lewis]’ build could be made more permanent by building one of these MIDI interfaces and wiring that to the IOIO. All the Android code is up and available, along with a neat demo of [Lewis] controlling the delay time of an effects unit in his guitar rig. You can check that video out after the break.

Continue reading “Control MIDI With An Android Device”

Arduino Saves You A Bundle When It Comes To Guitar Pedal Effects

[Deadbird] wanted to recreate some guitar pedal effects that he heard on a music video. The thing is, you can end up spending a bundle on hardware unless you’re crafty like he was. He grabbed a Whammy 4 pedal, but decided to forego using a $125 MIDI controller and sourced an Arduino to perform MIDI-based alterations instead.

The Whammy 4 was chosen for its ability to perform the sound processing he desired, but also because it can be MIDI controller. By hooking up the Arduino to that port (as seen in the diagram above) he’s able to program changes that would be difficult or impossible with just the pedal. For instance, [Deadbird] illustrates a command which jumps from the lowest to highest setting of an effect without hitting any of the values in the middle. With that under his belt he goes about programming loops of changes with delays in between them. The best part is, you’re only limited by your ability to craft the MIDI commands as Arduino code.

Get Tons Of MIDI Knobs And Buttons With The Chomp

Although MIDI was originally designed for 1 MHz computers with 64 kB of RAM, it’s still an industry standard almost 30 years after its introduction. Even for electronic artists armed with a microcontroller, MIDI is old hat if you want to connect a few buttons up to a music workstation. What if you wanted to connect dozens of buttons and knobs to a bunch of MIDI hardware, though? Enter Chomp, the Configurable Hardware Open-source MIDI Platform.

[Max Justicz], an awesome pseudonym if we’ve ever heard one, built a MIDI controller that allows for 48 inputs for buttons, knobs, and any other electrical connection imaginable. The board is powered by an Arduino-fied ATMega328 and connects to your sensors through 2×5 ribbon cables.

If you’ve ever thought about building a monome MIDI controller, [Max Justicz] has started a Kickstarter campaign to put a few hundred Chomps out into the wild. It seems like a great way to build some controllers or simply to send stuff to MaxMSP. Either way, the Chomp is sure to be useful.

Modular Controllers You Can’t Wait To Show Off To Your Friends

Let’s get this straight, [Alex] is going to show us how to make controllers like this one? Where do we sign up? Even without seeing it in action we want one, but the urge to build is even greater after he shows it off (check the clip after the break). He’s a design student who made an open source project aimed at making it easier to build hardware controllers that pair with just about any software application.

The need for external controllers is on the rise, starting with music-based applications like DJ tools, and Midi controllers for musicians (we’re thinking Monome clones). But anything that can take input from a USB HID can be controlled with something like this. That’s because [Alex] is using the Teensy controller board as an interface. Just select the input types you want – sliders, potentiometers, buttons, switches – then wire them up to the microcontroller pins. If you start to run out of inputs he also discusses some add-on chips to use as port expanders.

Of course there’s a lot to be said for the physical appearance as well. Even though he used point-to-point connections for all of the controls, that wiring is hidden behind the aesthetically pleasing laser-cut dashboard. Follow his advice for layout and find a friend with access to a sweet laser cutter and you’re in business. Continue reading “Modular Controllers You Can’t Wait To Show Off To Your Friends”