Giant DIY Mouse Sets The Ball Free

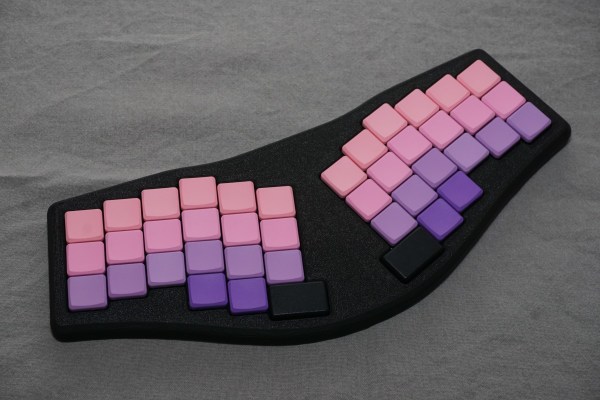
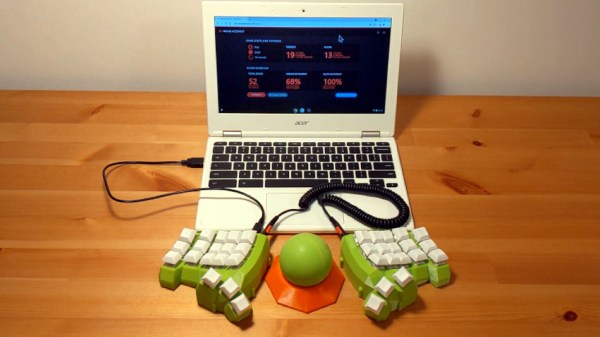
Make the move to a split keyboard and the first thing you’ll notice is that you have all this real estate between the two halves. (Well, as long as you’re doing it right). This is the perfect place to keep your cat, your coffee cup, or in [Jacek]’s case, your fantastic DIY trackball mouse.

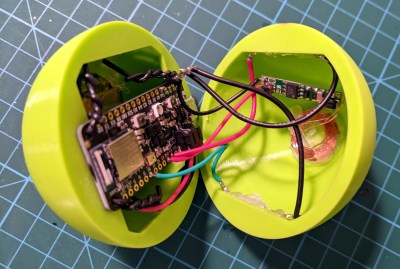
Don’t be fooled by the orange plastic base — all the electronics are rolled up inside that big sexy ball, which [Jacek] printed in two halves and glued together. Inside the ball there’s an Adafruit Feather nRF52840 Sense, which has an onboard accelerometer, gyroscope, and magnetometer. As you’ll see in the video after the break, the Feather takes readings from these and applies a sensor-fusing algorithm to determine the ball’s orientation in 3D space before sending its position to the computer. To send the click events, [Jacek] baked some mouse buttons into the keyboard’s firmware. Among the other Feather sensors is a PDM MEMS microphone, so detecting taps on the ball and translating them to clicks is not out of the question for a future version.

Here comes the really clever part: there are two reed switches inside the ball. One is used as a power switch, and the other is for setting the ‘up’ direction of the trackball. The ball charges wirelessly in a 3D printed base, which also has a small neodymium magnet for activating the reed switches. Check out the demo after the break, which shows [Jacek] putting the trackball through its paces on a mouse accuracy testing program.

If you prefer your DIY trackballs to be more standard looking, click on over to the Ploopy project.

Continue reading “Giant DIY Mouse Sets The Ball Free”

A Pull Chain To End Your Zoom Pain

Yay! Another videoconference call is in the books, so that must mean that it’s time to fumble around awkwardly for the hang-up button with a fading smile. [lanewinfield] knew there had to be a better way, and looked to the pull chain switch for salvation. Sure, this could just as easily be a button, but what’s the fun in that? Besides, few buttons would be as satisfying as pulling a chain to a Zoom call.

The pull chain switch is connected to an Adafruit Feather nRF52840 Express that’s emulating a Bluetooth keyboard. Firmware-wise it sends command + F6, which triggers an AppleScript that manually exits and and all Zoom calls and kills Chrome tabs pointed to meet.google.com. He’s using Apple’s hotkey wizard Alfred, but this could be handled just as easily with something like AutoHotKey.

Pull chain switches are neat little mechanisms. The chain is connected to a cam that engages a wheel with copper contacts on half the outside. When you pull the chain, the wheel moves 90° and the wheel contacts connect up with the fixed contacts inside the housing to make a connection. Pulling the chain again moves the wheel which slides to the half without the contacts. Check it out in the video below.

Continue reading “A Pull Chain To End Your Zoom Pain”

Here’s How Hard It Is To Produce A Conference Badge

Making an event badge is hard work. Making a single prototype badge is hard enough, but the whole process of sourcing components and coordinating manufacture for hundreds of badges on a shoestring budget with the looming deadline of the event and its expectant attendees is a Herculean task.

[Uri Shaked] is one who bears the scars of producing an event badge, and he’s written a fascinating account of his experience. The conference in question was Aramcon 2019, a private tech event in Israel, and the badge has an nRF52840 driving an e-ink display, multi-colour LED, and an audio codec, with a set of full-size keyboard keys as user input. Since the nRF chip supports mesh networking, the idea was to produce a badge capable of streaming audio across the entire event.

A clothes-pin as a programming jig, we like it!

We follow the team through nail-biting months of prototype boards, reversed connectors with last-minute cable bodges, compatible parts that didn’t turn out to be quite so compatible, and wrong footprints, and see them arriving at a badge which worked, but without the audio they’d hoped for. Along the way they came up with a clothes-pin-based programming jig which would surely have merited its own Hackaday write-up had they covered it on its own. Demonstrating the mesh networking by turning a whole auditorium’s worth of badges LEDs yellow was their reward, and we can see they’ve produced a very creditable badge. We particularly like the use of keyboard key switches, and we commend them for planning a life for the badge after the event.

Our Hackaday colleague [Brian Benchoff] is a veteran of badge production, read his write-ups of the genesis of our Superconference 2017 badge and the Tindie dog badge. Meanwhile the keen-eyed among you may recognise the nRF52840 as the guts of the latest generation of Particle boards.

Open Hardware E-Ink Display Just Needs An Idea

Its taken awhile, but thanks to devices like the Amazon Kindle, the cost of e-ink displays are finally at the point where mere mortals such as us can actually start using them in our projects. Now we’ve just got to figure out how to utilize them properly. Sure you can just hook up an e-ink display to a Raspberry Pi to get started, but to truly realize the potential of the technology, you need hardware designed with it in mind.

To that end, [Mahesh Venkitachalam] has created Papyr, an open hardware wireless display built with the energy efficiency of e-ink in mind. This means not only offering support for low-energy communication protocols like BLE and Zigbee, but keeping the firmware as concise as possible. According to the documentation, the end result is that Papyr only draws 22 uA in its idle state.

So what do you do with this energy-sipping Bluetooth e-ink gadget? Well, that part is up to you. The obvious application is signage, but unless you’re operating a particularly well organized hackerspace, you probably don’t need wireless dynamic labels on your part bins (though please let us know if you actually do). More likely, you’d use Papyr as a general purpose display, showing sensor data or the status of your 3D printer.

The 1.54 inch 200×200 resolution e-ink panel is capable of showing red in addition to the standard grayscale, and the whole thing is powered by a Nordic nRF52840 SoC. Everything’s provided for you to build your own, but if you’d rather jump right in and get experimenting, you can buy the assembled version for $39 USD on Tindie.