AI is quickly revolutionizing the security camera industry. Several manufacturers sell cameras which use deep learning to detect cars, people, and other events. These smart cameras are generally expensive though, compared to their “dumb” counterparts. [Martin] was able to bring these detection features to a standard camera with a Raspberry Pi, and a bit of ingenuity.
[Martin’s] goal was to capture events of interest, such as a person on screen, or a car in the driveway. The data for the events would then be published to an MQTT topic, along with some metadata such as confidence level. OpenCV is generally how these pipelines start, but [Martin’s] camera wouldn’t send RTSP images over TCP the way OpenCV requires, only RTSP over UDP. To solve this, Martin captures the video stream with FFmpeg. The deep learning AI magic is handled by the darkflow library, which is itself based upon Google’s Tensorflow.
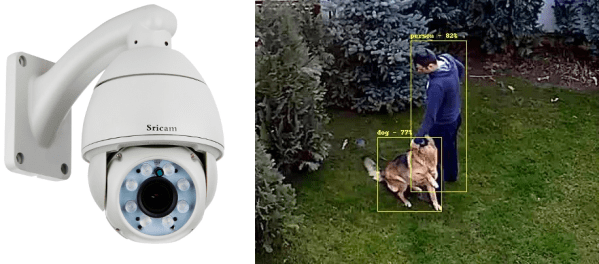
Martin tested out his recognition system with some cheap Chinese PTZ cameras, and the processing running on a remote Raspberry Pi. So far the results have been good. The system is able to recognize people, animals, and cars pulling in the driveway. His code is available on GitHub if you want to give it a spin yourself!