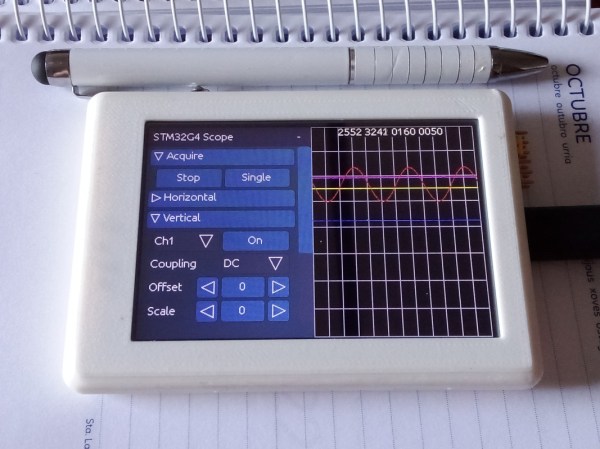
The completed oscilloscope in parts, with the screen in the front connected with prototyping wires, protoboarded buttons on the right, and the BlackPill board somewhere behind

DIY STM32 Scope Is Simple, Cheap, And Featureful

Would you like to have a small digital oscilloscope? Do you have a spare BlackPill (STM32F401) board and a TFT display laying around? [tvvlad1234] presents us with a simple and educational digital storage oscilloscope design that barely needs any components for you to build one, and it’s packed with features just like you would expect from a self-respecting open-source project. Not just that — it can even stream data to your computer, in a format compatible with the TekScope software!

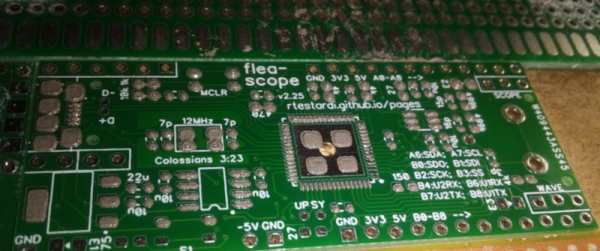
The same scope design, but now on a self-etched boardIt’s hard to overshadow just how easy this scope is to build, use, and hack on. You really don’t need much in the way of parts, a protoboard will do, though you can also etch or order your own PCBs. The front-end is super straightforward to find components for and assemble, a few opamps and resistors is all you need. So after jumper-wiring the LCD and three push buttons to your BlackPill, you’re golden.

Of course, the simple frontend results in the input range being from -3.3 V to 3.3 V, but as you could guess, this is exactly the kind of project where you could tweak the resistors and even upgrade it later on. Are you a bit lost in how oscilloscopes work? [tvvlad1234] has an explainer for you, too!

This build could easily take up a honorary “temporary turned permanent” place on your bench, thanks to its McGyver-esque qualities. It’s also, quite possibly, a better scope than the red “soldering kit” ones we’ve seen online. All in all, it’s a strong contender in the “simple and powerful DIY scope” arena, before this, we’ve seen one built with an Arduino Nano, and one with a Pi Pico.

Retro Gadgets: Make Your Scope Dual Channel

We live in a time when having an oscilloscope is only a minor luxury. But for many decades, a good scope was a major expense, and almost no hobbyist had a brand new one unless it was of very poor quality. Scopes were big and heavy and, at the price most people were willing to pay, only had a single channel. Granted, having one channel is better than having nothing. But if the relative benefit of having a single channel scope is 10 points, the benefit of having two channels is easily at least 100 points. So what was a poor hacker to do when a dual-trace or higher scope cost too much? Why, hack, of course. There were many designs that would convert a single trace scope into a poor-quality multichannel scope. Heathkit made several of these over the years like the ID-22, the ID-101, and the ID-4101. They called them “electronic switches.” The S-2 and S-3 were even earlier models, but the idea wasn’t unique to Heathkit and had been around for some time.

For $25, you could change your scope to dual trace!

There were two common approaches. With alternative or alt mode, you could trigger a sync pulse and draw one trace. Then trigger again and draw the second trace with a fixed voltage offset. If you do this fast enough, it looks like there are two traces on the screen at one time. The other way is to rapidly switch between voltages during the sweep and use the scope’s Z input to blank the trace when it is between signals. This requires a Z input, of course, and a fast switching clock. This is sometimes called “chopper mode” or, simply, chop. This wasn’t just the realm of adapters, though. Even “real” analog scopes that did dual channels used the same methods, although generally with the benefit of being integrated with the scope’s electronics.

Continue reading “Retro Gadgets: Make Your Scope Dual Channel”

Decoding 433 MHz Signals With Arduino & Raspberry Pi

433 MHz radio signals are all around us. They’re used for things like smart power plugs, garage door openers, and home weather stations. Decoding these signals can allow you to interface and work with these devices on your own terms. To help in those efforts, [Joonas Pihlajamaa] has written a three-part tutorial on decoding these signals.

A soundcard makes for a very cheap oscilloscope.

The focus of the tutorials is decoding the signals of a Nexa radio-controlled smart plug. [Joonas] first explores using an Arduino to do the job, paired with a RFM210LCF-433D radio receiver module. This setup dumps out data to a computer over serial for decoding. [Joonas] then tried an alternative strategy, using a soundcard as a “poor man’s oscilloscope” to do the same job, using the same radio module and using Audacity for signal analysis. Finally, [Joonas] brought out the big guns, hooking up a Picoscope digital oscilloscope to a Raspberry Pi 4 for a more deluxe attempt at decoding the signals.

The tutorial goes to show that higher-end tools can make such a job much easier. However, the cheaper techniques are a great way of showing what can be done with the bare minimum in tools. We’re hoping for an exciting fourth part to [Joonas’s] work, where he instructs us on how to decode 433 MHz signals by drinking huge amounts of caffeine and staring at a very fast blinking LED. If you’ve got your own nifty signal analysis (or SIGINT!) hacks, be a good sport and drop them into the tipsline!


Fixing An HP 54542C With An FPGA And VGA Display

Although the HP 54542C oscilloscope and its siblings are getting on in years, they’re still very useful today. Unfortunately, as some of the first oscilloscopes to switch from a CRT display to an LCD they are starting to suffer from degradation. This has led to otherwise perfectly functional examples being discarded or sold for cheap, when all they need is just an LCD swap. This is what happened to [Alexander Huemer] with an eBay-bought 54542C.

Although this was supposed to be a fully working unit, upon receiving it, the display just showed a bright white instead of the more oscilloscope-like picture. A short while later [Alexander] was left with a refund, an apology from the seller and an HP 54542C scope with a very dead LCD. This was when he stumbled over a similar repair by [Adil Malik], right here on Hackaday. The fix? Replace the LCD with an FPGA and VGA-input capable LCD.

While this may seem counter intuitive, the problem with LCD replacements is the lack of standardization. Finding an 8″, 640×480, 60 Hz color LCD with a compatible interface as the one found in this HP scope usually gets you salvaged LCDs from HP scopes, which as [Alexander] discovered can run up to $350 and beyond for second-hand ones. But it turns out that similar 8″ LCDs are found everywhere for use as portable displays, all they need is a VGA input.

Taking [Adil]’s project as the inspiration, [Alexander] used an UPduino v3.1 with ICE40UP5K FPGA as the core LCD-to-VGA translation component, creating a custom PCB for the voltage level translations and connectors. One cool aspect of the whole system is that it is fully reversible, with all of the original wiring on the scope and new LCD side left intact. One niggle was that the scope’s image was upside-down, but this was fixed by putting the new LCD upside-down as well.

After swapping the original cooling fan with a better one, this old HP 545452C is now [Alexander]’s daily scope.

Restarting The Grid When The Grid Is Off The Grid

If you watch YouTube long enough, it seems like going “off the grid” is all the rage these days. But what if the thing that goes off the grid isĀ the grid itself? In the video below the break, [Grady] with Practical Engineering explores the question: How do you restart an entire power grid after it’s gone offline? It’s a brilliantly simple deep dive into what it takes to restore power to large amounts of customers without causing major damage to not just the grid, but the power generators themselves.

What’s A Power Grid Operators Favorite Band?

The hackers among us who’ve dealt with automotive alternators know it must be excited in order to generate electricity. What does that even mean, and how does it affect the grid? Simply put, it takes power to make power. For example, old heavy equipment had what they called pony motors — a small easy to start engine that’s sole purpose was to start a much larger engine. Aircraft have auxiliary power units (APUs) for the same purpose. What do power grids have? You’ll have to watch the video to find out.

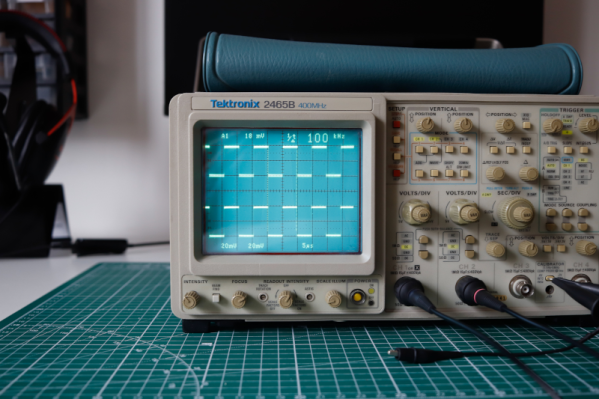
Once at least two power generators are online, grid operators can just flip the switch and start feeding power to customers, right? Not quite. [Grady] once again uses a clever test jig and an oscilloscope to show the damage that can occur if things aren’t done just right. It’s a fascinating video well worth watching.

Learn how grid operators use a Power Grid Emulator called LEGOS to help them with keeping the electrons flowing in the right direction.

Continue reading “Restarting The Grid When The Grid Is Off The Grid”

Cheap Scope Troubleshoots Commodore

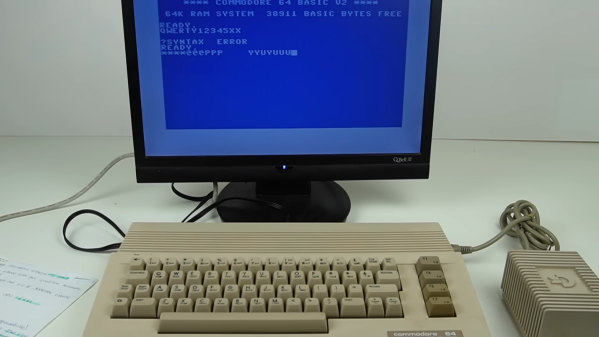
[Adrian] had a Commodore computer to fix and decided to see how his latest tiny portable scope would work. He paid $57 for the tiny little test instrument although the current price seems higher. It claims to have 120MHz bandwidth along with 500 megasamples per second. There are several versions with different claimed specs, but we did find a similar device for under $60. You can see the unboxing and how it worked in the video below.

Of course, these kinds of instruments often overstate their specs, and [Adrian] was also suspicious. One odd feature of the device is it can echo its output to an NTSC video output so you can send the screen to an external monitor.

Continue reading “Cheap Scope Troubleshoots Commodore”

A Pi Pico Oscilloscope

At the budget end of the oscilloscope range lie the so-called pocket ‘scopes. About the size of a deck of cards, they combine a microcontroller and an LCD screen to make an instrument with a bandwidth in the tens of kilohertz and a not-too-sparkling performance. They’re something of a toy, but then again, if all that’s needed is a simple ‘scope for audio frequencies, they make a passable choice in a small package. Now [jgpeiro] has made one which is light years ahead of the toy kits, using a Raspberry Pi Pico, a 100 MHz ADC, and an effort to design a better input circuit.

At its simplest this could be a straightforward op-amp and ADC circuit feeding the Pico, but instead it has multiple stages carefully designed to offer the full bandwidth, and with gain, offset, and trigger settings being set by a series of DAC chips under software control. This and the decent bandwidth make this a much more viable oscilloscope, and one we’d like to see further developed.

By comparison, we took a look at the best of the competition a few years ago.