For map-lovers like [Christopher Getschmann], poring over a quality map can be as satisfying as reading a good book. Good maps can be hard to come by, though, especially at a scale worth looking at, or worth using as adornment on a dull, lifeless wall. The solution is obvious: build a wall-mount CNC plotter to draw maps directly on the wall.
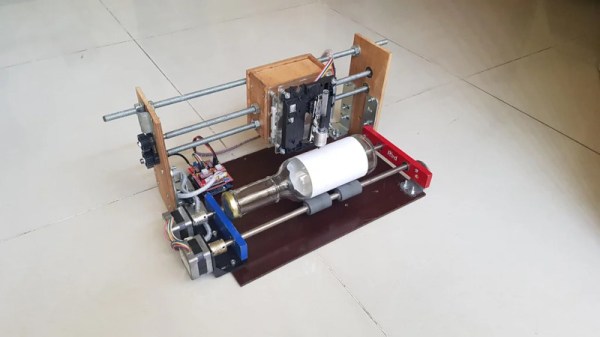
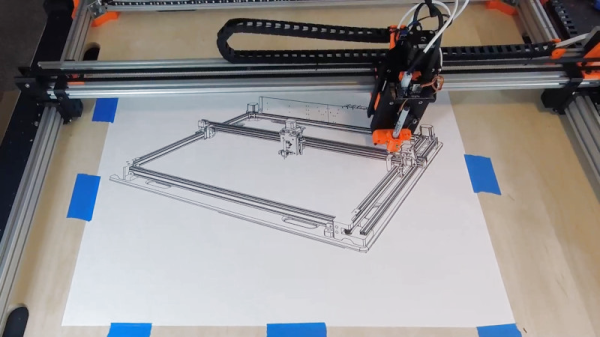
[Christopher] began his map quest by scraping world map data from a number of sources, including OpenStreetMap, Natural Earth, and GEBCO. This gave him data for coastlines, terrain, and bathymetry — enough for a map of the world large enough to fill a wall. Since the scale of the map would preclude the use of even a large-format inkjet printer, [Christopher] set about building a wall-covering pen-plotter to render the map. The CoreXY-style plotter is large, but still light enough to hang on the wall while it works, and to be repositioned to cover a larger area.
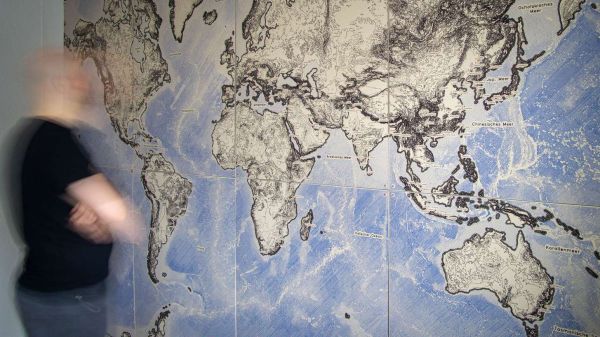
The plotter runs on steppers driven by ultra-quiet Trinamic TMC5160 drivers, so the plotter wouldn’t be a nuisance while it worked. The map was plotted on eight pieces of cardboard mounted directly to the wall, filling the 2- x 3-meter space almost entirely. Landmasses and elevation contours were plotted as continuous lines in black ink, while bathymetric data was rendered in blue ink as cross-hatching with variable spacing, to make deeper oceans darker blue.
We find [Christopher]’s map breathtaking, all the more so considering the work that went into making it. It would be interesting to find alternate uses for the plotter, which reminds us a little of a cross between a draw-bot and a Maslow vertical CNC router, now that it’s done with its cartographic duties.