Print-in-Place Connectors Aim To Make Wiring Easier

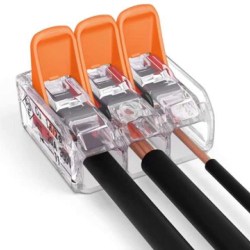
One thing some of us here in the United States have always been jealous of is the WAGO connectors that seem so common in electrical wiring everywhere else in the world. We often wonder why the electrical trades here haven’t adopted them more widely — after all, they’re faster to use than traditional wire nuts, and time is money on the job site.

Wago 221 compact lever connector via the Wago YouTube channel

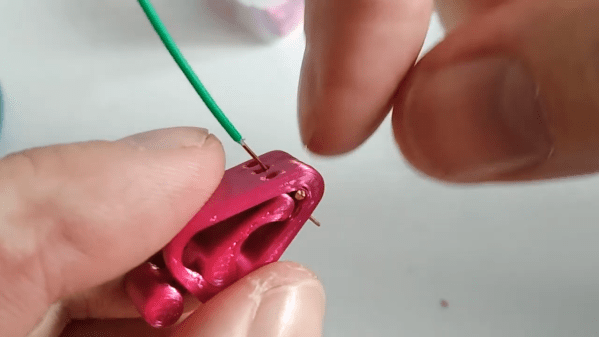
This print-in-place electrical connector is inspired by the WAGO connectors, specifically their Lever Nut series. We’ll be clear right up front that [Tomáš “Harvie” Mudruňka’s] connector is more of an homage to the commercially available units, and should not be used for critical applications. Plus, as a 3D-printed part, it would be hard to compete with something optimized to be manufactured in the millions. But the idea is pretty slick. The print-in-place part has a vaguely heart-shaped cage with a lever arm trapped inside it.

After printing and freeing the lever arm, a small piece of 1.3-mm (16 AWG) solid copper wire is inserted into a groove. The wire acts as a busbar against which the lever arm squeezes conductors. The lever cams into a groove on the opposite wall of the cage, making a strong physical and electrical connection. The video below shows the connectors being built and tested.

We love the combination of print-in-place, compliant mechanisms, and composite construction on display here. It reminds us a bit of these printable SMD tape tamers, or this print-in-place engine benchmark.

Continue reading “Print-in-Place Connectors Aim To Make Wiring Easier”

3D Printed Box Gets Bigger

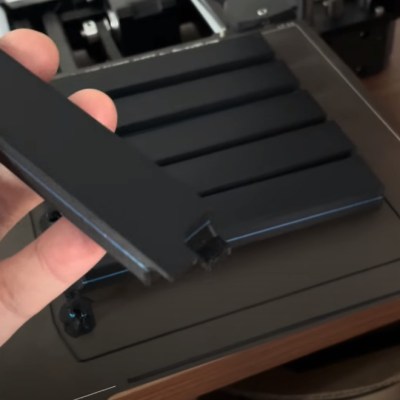
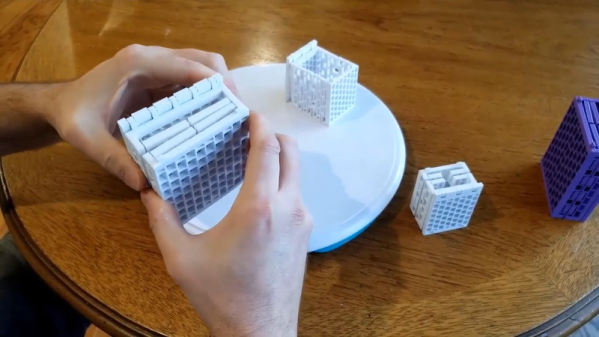
If you ever watched Dr. Who, you probably know that the TARDIS looked like a police call box on the outside, but was very large on the inside. When asked, the Doctor had some explanation of how something can look small when it is far away and large when it is close up, which never made much sense. However, [iQLess] has been 3D printing boxes in a small area, that fold out to be much larger boxes. (Video, embedded below.) The design comes from someone called [Cisco] who has a lot of interesting print in place designs.

You can find the design on the Prusa site or Thingiverse. The boxes do take a while to print, according to the video below. What was interesting to us, though, is that you should be able to print a design like this to create a box larger than your printer.

Continue reading “3D Printed Box Gets Bigger”

Print-in-Place Engine Aims To Be The Next Benchy

While there are many in the 3D-printing community who loudly and proudly proclaim never to have stooped to printing a 3DBenchy, there are far more who have turned a new printer loose on the venerable test model, just to see what it can do. But Benchy is getting a little long in the tooth, and with 3D-printers getting better and better, perhaps a better benchmarking model is in order.

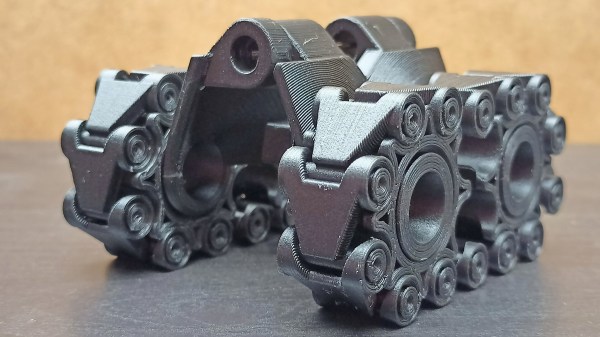
Knocking Benchy off its perch is the idea behind this print-in-place engine benchmark, at least according to [SunShine]. And we have to say that he’s come up with an impressive model. It’s a cutaway of a three-cylinder reciprocating engine, complete with crankshaft, connecting rods, pistons, and engine block. It’s designed to print all in one go, with only a little cleanup needed after printing before the model is ready to go. The print-in-place aspect seems to be the main test of a printer — if you can get this engine to actually spin, you’re probably set up pretty well. [SunShine] shares a few tips to get your printer dialed in, and shows a few examples of what can happen when things go wrong. In addition to the complexities of the print-in-place mechanism, the model has a few Easter eggs to really challenge your printer, like the tiny oil channel running the length of the crankshaft.

Whether this model supplants Benchy is up for debate, but even if it doesn’t, it’s still a cool design that would be fun to play with. Either way, as [SunShine] points out, you’ll need a really flat bed to print this one; luckily, he recently came up with a compliant mechanism dial indicator to help with that job.

Continue reading “Print-in-Place Engine Aims To Be The Next Benchy”

Folding Raspberry Pi Enclosure Prints In One Piece, No Screws In Sight

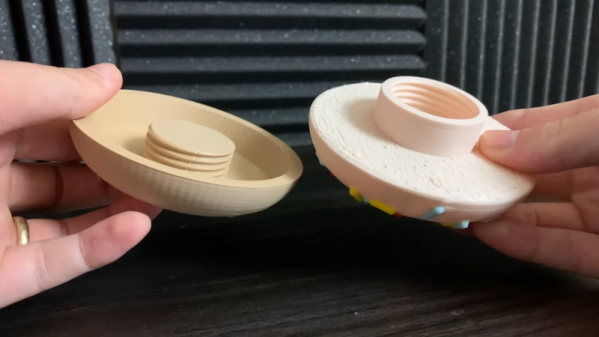
[jcprintnplay] has challenged himself to making Raspberry Pi cases in different ways, and his Fold-a-Pi enclosure tries for a “less is more” approach while also leveraging the strong points of 3D printing. The enclosure prints as a single piece in about 3 hours, and requires no additional hardware whatsoever.

The design requires no screws or other fasteners, and provides a mounting hole for a fan as well as some holes for mounting the enclosure itself to something. All the ports and headers are accessible, and the folding one-piece design is not just a gimmick; in a workshop situation where the Pi needs to be switched out or handled a lot, it takes no time at all to pop the Raspberry Pi in and out of the enclosure.

Microsoft’s 3D Builder has a pretty useful measurement tool for STLs.

[James] points out that the trick with a print-in-place hinge like this is leaving enough space between the parts so that the two pieces aren’t fused together, but not so much space that the print fails. He doesn’t go into detail about how much space worked or didn’t work, but an examination of the downloadable model shows that the clearance used looks like 0.30 mm, intended to be printed with a 0.4 mm nozzle.

[James] also demonstrates the value of being able to do quick iterations on a design when prototyping. In a video (embedded below) The first prototype had the hinge not quite right. In the second prototype there was a lack of clearance when closing. The third one solved both and shows the final design.

Continue reading “Folding Raspberry Pi Enclosure Prints In One Piece, No Screws In Sight”

No Assembly Required For This Compliant Mechanism Dial Indicator

If you’ve ever had the good fortune — or, after a shop mishap, the misfortune — to see the insides of a dial indicator, you’ll know the workings of these shop essentials resemble nothing so much as those of a fine Swiss watch. The pinions, gears, and springs within transmit the slightest movement of the instrument’s plunger to a series of dials, making even the tiniest of differences easy to spot.

Not every useful dial indicator needs to have those mechanical guts, nor even a dial for that matter. This compliant mechanism 3D-printed dial-free indicator is perfect for a lot of simple tasks, including the bed leveling chores that [SunShine] designed it for. Rather than print a bunch of gears and assemble them, [SunShine] chose to print the plunger, a fine set of flexible linkage arms, and a long lever arm to act as a needle. The needle is attached to a flexible fulcrum, which is part of the barrel that houses the plunger. Slight movements of the plunger within the barrel push or pull on the needle, amplifying them into an easily read deflection. When attached to the head of a 3D-printer and scanned over the bed, it’s easy to see even the slightest variation in height and make the corresponding adjustments. Check it out in the video below.

We’re big fans of compliant mechanisms, seeing them in everything from robot arms and legs to thrust vectoring for an RC plane. This might look like something from a cereal box, and it certainly doesn’t have the lasting power of a Starrett or Mitutoyo, but then again it costs essentially nothing, and we like that too.

Continue reading “No Assembly Required For This Compliant Mechanism Dial Indicator”

Printed It: Print-in-Place PCB Gripper

The goal of Printed It is to showcase creations that truly embrace the possibilities offered by desktop 3D printing. The most obvious examples are designs that can be printed quickly and cheaply enough that they’re a valid alternative to commercially available products. But as previous entries into the series have shown, there are also technical considerations. Is it simply a duplicate of something that could be produced via traditional means, or does the design really benefit from the unique nature of 3D printing?

A perfect example is the Print-in-Place PCB Holder/Gripper created by SunShine. This design is able to hold onto PCBs (or really, whatever you wish) without any additional components. Just pull it off the bed, and put it to work. While having to add a rubber band or generic spring would hardly be an inconvenience, there’s always something to be said for a design that’s truly 100% printable.

The secret is the dual flat spiral springs integrated into the device’s jaws. While most of the common thermoplastics used in desktop 3D printing are relatively stiff, the springs have been designed in such a way that they can be printed in standard PLA. The backside of the jaws have teeth that mesh together, so the energy of the springs is combined to provide a clamping force. Serrations have been added to the jaws to catch the edge of the PCB and help stabilize it.

Visually, it’s certainly striking. The design largely eschews right angles, giving it an almost biological appearance. Many have compared it to the head of a mantis, or perhaps some piece of alien technology.

There’s no question that the design leverages the strengths of 3D printing either; there’s no other way to produce its intricate interlocking components, especially without the use of any sort of fasteners. In short, this design is an ideal candidate for Printed It. But there’s still one question to answer: does it actually work?

Continue reading “Printed It: Print-in-Place PCB Gripper”

Print-in-Place Helping Hand Grabs A Hold Of Your PCB

We probably don’t have to promote the benefits of a third hand or PCB holders in general, such is their obvious utility. While you can arrange some boxes and pile up tools on your bench to get a similar result, a good grip and flexibility to move the PCB around during soldering or performing any other work on it makes life just so much easier. Thanks to 3D printing there have been plenty of inspiring designs that go beyond the usual clumsy-yet-cheap croc clip version of it, and [SunShine] adds one on to the list with his spring-loaded print-in-place PCB gripper, demonstrated in this video and available on Thingiverse.

The gripping part’s design is based on a spring-loaded box [SunShine] created a little while back — which you can read more about in his Instructable. The holder itself comes in two varieties: one that brings its own stand, and one that has a GoPro mount. The first one is really more to show off the design, and while the gripping part is fully functional, it might not perform too well with heavier boards and easily tip over. Sure, a bigger bottom or mounting it to something more sturdy will fix that, but so will the GoPro-mount version, which also adds the whole flexibility aspect.

If you do prefer something standing more sturdily on your desk though, have a look at the concrete-mounted solder squid from earlier this year. And if you’re interested in more of [SunShine]’s work, check out his 3D-printed brush collection.

Continue reading “Print-in-Place Helping Hand Grabs A Hold Of Your PCB”