Veronica 6502 Gets Keyboard Input Via USB

PS2

When building a homebrew computer, there are a few milestones that make all the work seem worth it. Of course, seeing the CPU step through address lines on the blinkenlights is near the top, but even more important is being able to type a character on a keyboard and have it show up on a display. [Quinn] didn’t want her Veronica computer to deal with serial terminals or PS/2 keyboards when she typed her first characters in; instead she wanted to read a USB keyboard using 80s-era hardware.

Back in the early days of USB, design specs and keyboard manufacturers included a legacy mode in nearly every USB keyboard ever manufactured. This allows a USB keyboard to work with the ancient PS/2 protocol. [Quinn] tapped into that functionality nearly every PS/2 keyboard has using a 6522 Versatile Interface Adapter. This VIA is in the same family of chips as the venerable 6502 CPU that provides GPIO pins and timers.

[Quinn] connected the keyboard connector tapped for PS/2 input to an ATtiny13. This microcontroller reads the scan codes from the keyboards and sends them to the VIA and the rest of Veronica. It’s quite a bit of work to get to this point, but [Quinn] finally has a computer she can type on, the first step to developing software for her homebrew computer.

Dual Displays On A Playstation 2

scope

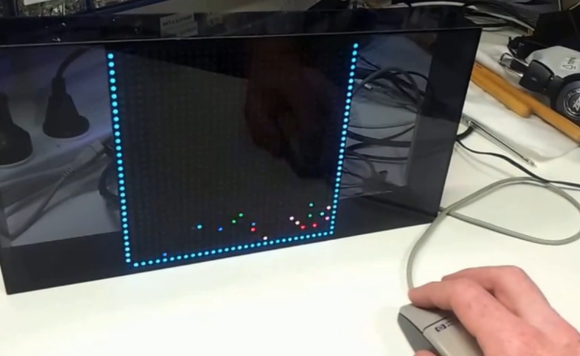
At the Revision 2013 demoparty held last weekend, visitors and guests wanting to check out the latest advances in programming old video game consoles got a real treat. [Abyss] took a Playstation 2, connected the composite video out port to a TV and an oscilloscope, and created the first dual display PS2.

From the official video of the demo, the two video signals are generated from a single video out on the PS2. Generating the composite video out is understandably fairly easy, but the second display – an oscilloscope – is driven during the Vblank period in the composite signal. There’s no audio trickery here; video signals are used for video, and audio signals are used for audio.

[Abyss] took first place in the wild demo competition at Revision 2013. Understandably, too, because this is one of the best demos we’ve ever seen. You can check out the official video from [Abyss] after the break, and the wild competition video after the break.

Continue reading “Dual Displays On A Playstation 2”

Building A Rather Rudimentary Arduino Tank Bot

building-an-arduino-tankbot

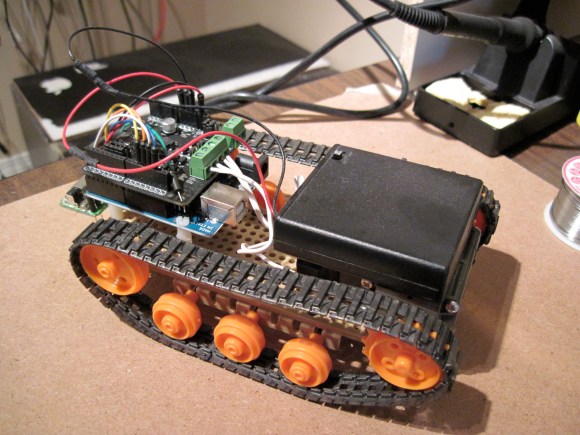
The tank robot builds that we see are often quite complex. This lets them do great things, but makes the platform scary for beginners. Here’s a tank build that would be a great first project, especially if you’re more interested in the programming side of robotics than you are in the hardware itself. [Paul Bleisch] combined several different commercially available products to fabricate this Arduino-powered tank robot base.

Locomotion is provided by a double geared-motor module. This unit, the plastic wheels and treads, as well as the wooden mounting platform are all made by Tamiya. They cost very little and are already designed to work with one another. To this base he adds the Arduino and a motor shield which makes the connections dead simple. The black case on one end of the chassis holds four AA batteries which provide power for everything.

These components are all that’s really needed to start, but they provide no interactivity. So [Paul] picked up a used wireless PlayStation 2 controller. There’s a library (written by regular reader [Bill Porter]) that allows him to connect the receiver to the Arduino in order to pick up commands from the controller. He also plans to add an ultrasonic range finder to the build sometime in the future.

If you’re don’t need to do things the easy way you should consider fabricating your own tank treads.

Controlling Your Webcam With An Old Guitar Hero Pedal

Hackaday reader [Tom Price] often uses Skype to communicate with family near and far, but he was getting tired of adjusting his webcam each time his kids moved out of frame. While the solution he came up with isn’t fully automated, it is hands-free, which is good enough for his purposes.

[Tom] was looking around for an electronic foot pedal of some sort when he came across a wireless 3rd party Guitar Hero peripheral that happened to fit the bill. Using an Arduino library created by [Bill Porter], he was quickly able to get the toy to communicate with an Arduino-flashed Atmega8, but things kind of fell flat when it came time to relay signals back to his computer. Using another Atmega8 along with the PS2X library, he was able to emulate the Guitar Hero controller that his foot pedal was looking for.

With the pedal portion of his project wrapped up, he focused on his webcam. [Tom] mounted the camera on a small servo, which he then wired up to the receiving end of his foot pedal rig. As you can see in the video below, he can now pan his camera across the room with a tap of his foot, rather than leaning in and manually adjusting it.

Continue reading “Controlling Your Webcam With An Old Guitar Hero Pedal”

Mbed And A Few Resistors Runs Console, VGA, And PS/2

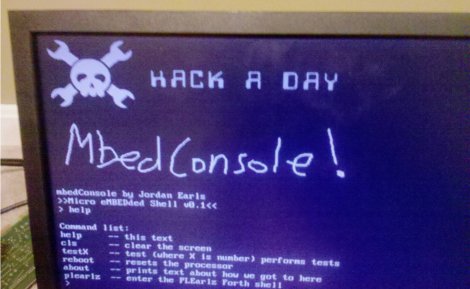
[Jordan] writes in to show us a project he has been working on called MbedConsole. Living up its name [Jordan] has managed to run a 640×480 VGA output, PS/2 port and console all from the mbed itself. We really mean from an mbed only; no extra hardware is required aside from a few resistors and connectors, a VGA monitor and PS/2 keyboard. The code is open source and links are included in the blog. There are even instructions for including your own graphics.

There are a few things to tackle still, like SD card support. Currently the PS/2 keyboard lights for caps-lock are not functional. [Jordan] would love to know what else we’d see going on something like this, with 400k of flash and 20k RAM left there certainly is a bit of room for some interesting stuff. One of his main goals is to get rid of the C interface and port an interactive shell over that could do something like BASIC or Forth (to give it that retro environment feel). We have seen the mbed in a handful of projects, what do you think?

Need A Quadcopter Transmitter? Use A PS2 Controller!

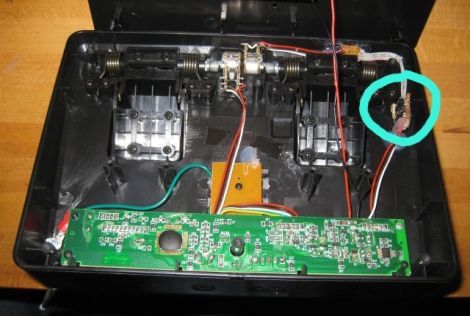
After [Pyrofer] built a quadcopter, he purchased a cheap 6-channel transmitter made in China. Unfortunately, that transmitter was terrible so he took an old PS2 controller and built his own.

For his build, [Pyrofer] broke out the analog sticks and wired them to an AVR housed in the handle of the controller. The AVR sent commands to a 2.4 GHz radio transmitter powered by a small LiPo battery. With the addition of a few tact switches behind the shoulder buttons of the controller, [Pyrofer] has four axes of control with a few buttons for changing modes on his quadcopter.

This build really doesn’t hold a candle to some of the awesome DIY RC transmitters we’ve seen, but we’ve got to give [Pyrofer] credit for coming up with a very simple and easy build. Just about everyone has a PS2 or XBox controller lying around, and with a few extra hardware bits it’s easy to bodge up a decent remote control.

[Pyrofer] used a project called Funkenschlag to generate PPM signals, so if you feel the need to replicate this project send it in when you’re done.

Laptop Touchpad As A Standalone Peripheral

[Viktor] is working on salvaging parts from a dead laptop. In his eyes the biggest gem to be had is the touchpad, so he set out to see if he could make the touchpad a standalone device. You might be envisioning the many hells of interfacing this with a microcontroller and writing firmware to measure and translate the input to HID compatible commands. The good news is it’s quite a bit simpler than that, with just one gotcha.

He looked around to see what he could find about the chip that drives the touchpad. He couldn’t locate an exact match, but a datasheet from a similar family of controllers make him think that there should be a PS/2 data and clock output from the chip. After probing the test points on the board he found them, as well as the voltage and ground rails. Above you can see he soldered an old mouse cable to the board and it works when plugged in.

But we did mention the gotcha. There doesn’t seem to be any support for the right and left buttons. Those were housed on a flexible PCB which attached to the white connector seen above. That PCB also connected to the computer so we don’t know if they will work with this hack or not.