Let Hauntimator Steer Your Next Animatronic Display

Animatronic displays aren’t just for Halloween, and hackers today have incredible access to effective, affordable parts with which to make spectacles of light, sound, and movement. But the hardware is only half the battle. Getting everything synchronized properly can be a daunting task, so get a head start on your next holiday display with the Hauntimator by [1031-Systems].

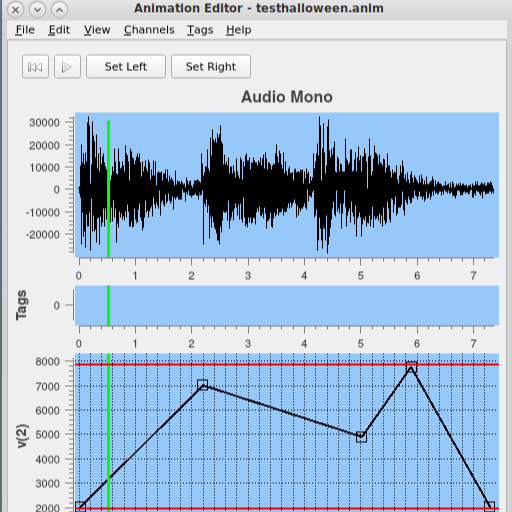
Synchronizing control channels to audio is at the heart of solid animations.

After all, synchronizing movements, sound, and light by trial and error can get tiresome even in small setups. Anyone who makes such a display — and contemplates doing it twice — tends to quickly look into making things modular.

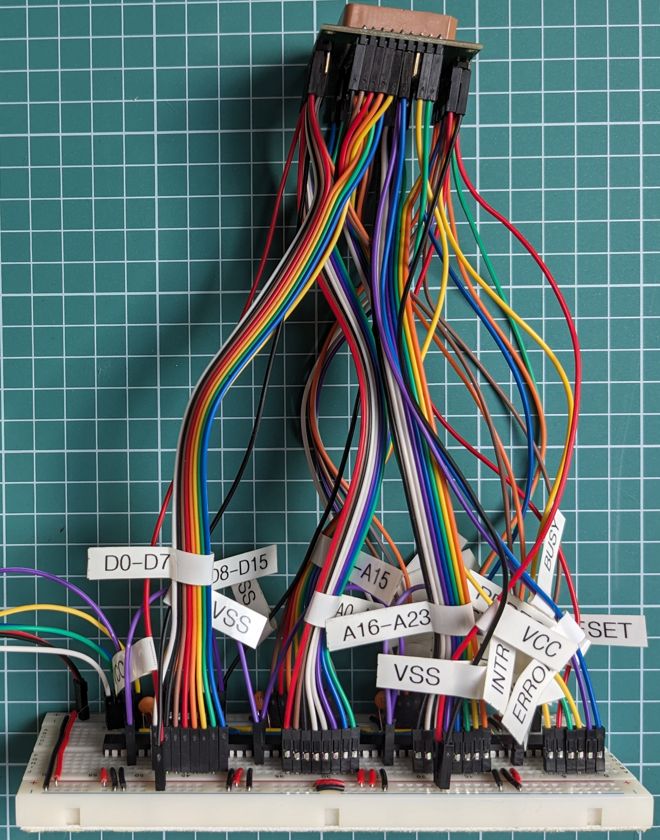
At its heart, Hauntimator works with a Raspberry Pi Pico-based controller board. The GUI makes it easy to create control channels for different hardware (for example, doing things like moving servos) and synchronize them to audio. Once an animation is validated, it gets uploaded to the control board where it runs itself. It’s open-source and designed to make plugins easy, so give it a look. There’s a video channel with some demonstrations of the tools that should fill in any blanks.

Intrigued by animatronics, but not sure where to begin? Get inspired by checking out this DIY set of servo-driven eyes, and see for yourself the benefits of smooth motor control for generating lifelike motion.

Making A Mountain Bike Data Acquisition System

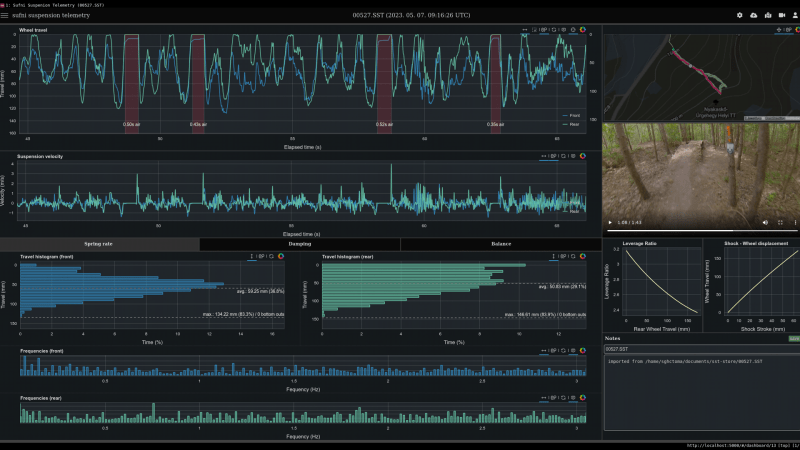
Professional mountain bike racing is a rather bizarre sport. At the highest level, times between podiums will be less than a second, and countless hours of training and engineering go into those fractions of seconds. An all too important tool for the world cup race team is data acquisition systems (DAQ). In the right hands, they can offer an unparalleled suspension tune for a world cup racer. Sadly DAQs can cost thousands of dollars, so [sghctoma] built one using little more then potentiometer and LEGO. 

The hardware is a fairly simple task to solve. A simple Raspberry Pi Pico setup is used to capture potentiometer data. By some simple LEGO linkage and mounts, this data is correlated to the bikes’ wheel travel. Finally, everything is logged onto an SD card in a CSV format. Some buttons and a small AMOLED provide a simple user interface wrapped in a 3D printed case.

Continue reading “Making A Mountain Bike Data Acquisition System”

Looking At A Real Fake Raspberry Pi RP2040 Board

Since the RP2040 microcontroller is available as a stand-alone component, it’s easy enough for third parties to churn out their own variations — or outright clones of — the Raspberry Pi Pico. Thus we end up with for example AliExpress sellers offering their own versions that can be significantly cheaper than the genuine article. The ones that [electronupdate] obtained for a test and decapping session cost just $2.25 a pop.

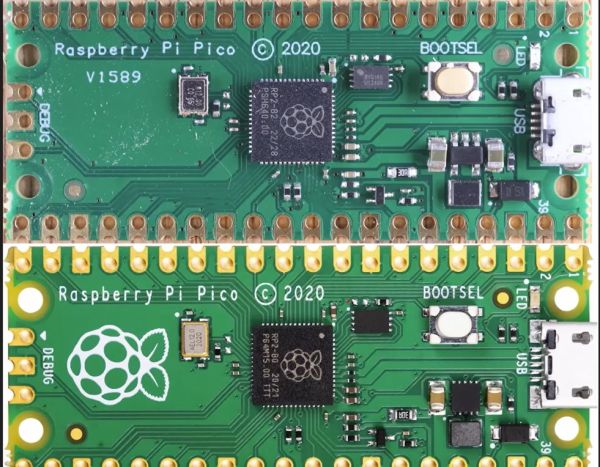
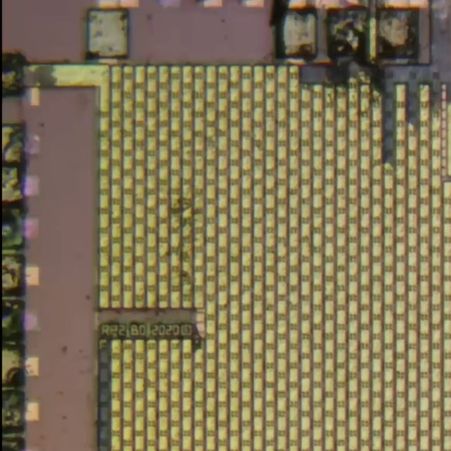
RP2 B0 stepping imprinted on the die shot.

As can be seen in the top image, the board from AliExpress misses the Raspberry Pi logo on the silkscreen for obvious reasons, but otherwise appears to feature an identical component layout. The QSPI Flash IC is marked on the die as BY250156FS, identifying it as a Boya part.

Niggles about flash ROM quality aside, what’s perhaps most interesting about this teardown is what eagle-eyed commentators spotted on the die shot of the RP2040. Although on the MCU the laser markings identify the RP2040 as a B2 stepping, the die clearly identifies it as an ‘RP2 B0’ part, meaning B0 stepping. This can be problematic when you try to use the USB functionality due to hardware USB bugs in the B0 and B1 steppings.

As they say, caveat emptor.

Continue reading “Looking At A Real Fake Raspberry Pi RP2040 Board”

USB DAC Comes With Graphic EQ

[shiura] had a problem — they wanted a nice high-quality audio output for their computer, but they didn’t fancy any of the DACs that were readily available on the market. They specifically wanted one that was affordable, capable, and included a graphic equalizer so they could simply hook it up to a regular amplifier and dial in the perfect sound. When they couldn’t find such a device, they decided to build their own.

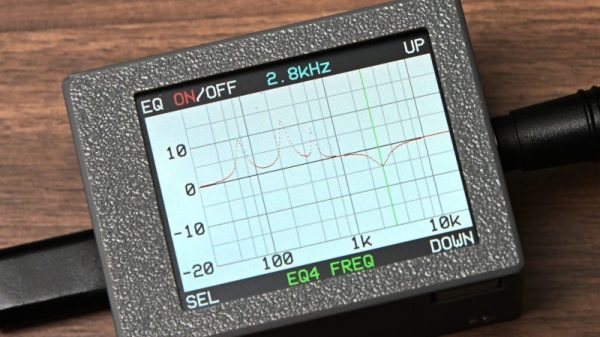
The build is based around a Raspberry Pi Pico, chosen for its feature set that makes it easy to configure as a USB audio device. It’s paired with a Waveshare Pico Audio module, which is based on the PCM5101A stereo DAC and slots neatly on top of the microcontroller board. An SPI-controlled LCD screen was also fitted in order to display the graphic equalizer interface that [shiura] whipped up. The project write-up explains the code required to implement the equalizer in detail. A four-channel equalizer was possible on the original Pi Pico (RP2040), while upgrading to a more powerful Pi Pico 2 (RP2350) allowed implementing eight channels in total.

If you’re looking to build a digital audio system with the ability to do some equalization to suit your listening room, this might be a project of interest to you. We’ve featured other projects in this realm before, too.

Continue reading “USB DAC Comes With Graphic EQ”

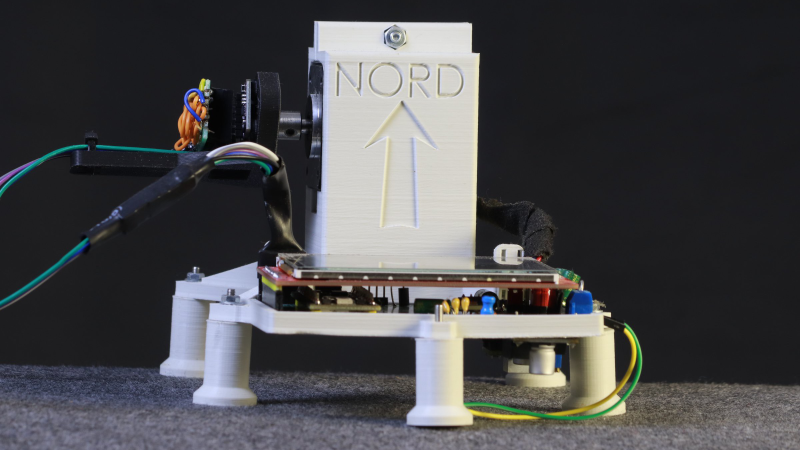
A 3D-printed assembly standing on short legs is visible. A portion extends upward with the word "Nord" sunk into it. Cables extend from one side of the upright portion, and a side view of a circuit board is visible at the front of the assembly.

Measuring Earth’s Rotation With Two Gyroscopes

We’ve probably all had a few conversations with people who hold eccentric scientific ideas, and most of the time they yield nothing more than frustration and perhaps a headache. In [Bertrand Selva]’s case, however, a conversation with a flat-earth believer yielded a device that uses a pair of gyroscopes to detect earth’s rotation, demonstrating that rotation exists without the bulkiness of a Foucalt pendulum.

[Bertrand] built his apparatus around a pair of BMI160 MEMS gyroscopes, which have a least significant bit for angular velocity corresponding to 0.0038 degrees per second, while the earth rotates at 0.00416 degrees per second. To extract such a small signal from all the noise in the measurements, the device makes measurements with the sensors in four different positions to detect and eliminate the bias of the sensors and the influence of the gravitational field. Before running a test, [Bertrand] oriented the sensors toward true north, then had a stepper motor cycle the sensors through the four positions, while a Raspberry Pi Pico records 128 measurements at each position. It might run the cycle as many as 200 times, with error tending to decrease as the number of cycles increases.

A Kalman filter processes the raw data and extracts the signal, which came within two percent of the true rotational velocity. [Bertrand] found that the accuracy was strongly dependent on how well the system was aligned to true north. Indeed, the alignment effect was so strong that he could use it as a compass.

In the end, the system didn’t convince [Bertrand]’s neighbor, but it’s an impressive demonstration nonetheless. This system is a bit simpler, but it’s also possible to measure the earth’s rotation using a PlayStation. For higher precision, check out how the standards organizations manage these measurements.

The Simplest Ultrasound Sensor Module, Minus The Module

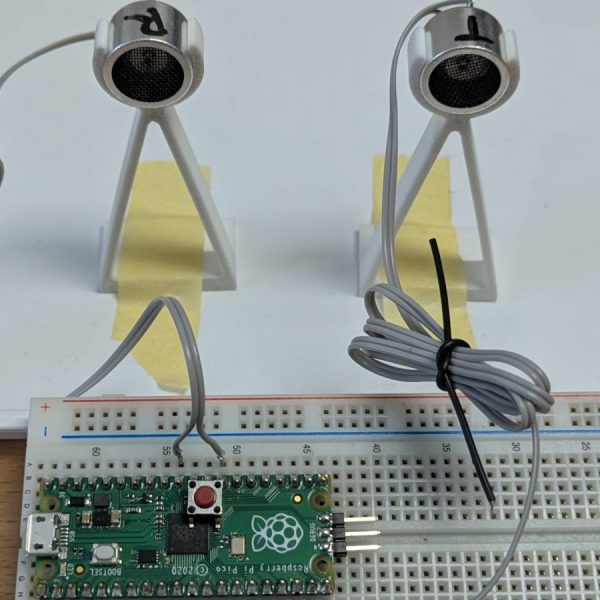
Just about every “getting started with microcontrollers” kit, Arduino or otherwise, includes an ultrasonic distance sensor module. Given the power of microcontrollers these days, it was only a matter of time before someone asked: “Could I do better without the module?” Well, [Martin Pittermann] asked, and his answer, at least with the Pi Pico, is a resounding “Yes”. A micro and a couple of transducers can offer a better view of the world.

The project isn’t really about removing the extra circuitry on the SR-HC0, since there really isn’t that much to start. [Martin] wanted to know just how far he could push ultrasound scanning technology using RADAR signal processing techniques. Instead of bat-like chirps, [Martin] is using something called Frequency-Modulated Continuous Wave, which comes from RADAR and is exactly what it sounds like. The transmitter emits a continuous carrier wave with a varying frequency modulation, and the received wave is compared to see when it must have been sent. That gives you the time of flight, and the usual math gives you a distance.

Continue reading “The Simplest Ultrasound Sensor Module, Minus The Module”

Bit-banged 100 MBit/s Ethernet Transmission On Raspberry Pi Pico

The Raspberry Pi Pico is a very capable board, but it’s still a surprise to see bit-banged 100 MBit/s Fast Ethernet implemented on one. [Steve]’s Pico-100BASE-TX library allows an RP2040 (or RP2350) microcontroller to stream data at roughly 11 Mbyte/s, enough to implement 100 MBit/s Fast Ethernet transmission.

We’ve seen 10BASE-T implemented on a Pico, but it takes a lot more than just shoveling bits faster to get 100BASE-T working. 10BASE-T uses two voltage levels and Manchester encoding, but 100BASE-T uses three voltage levels, which [Steve] cleverly implemented on the Pico with two GPIOs, and far more complex encoding. Check out the repository’s README for details as well as a couple example applications.

[Steve] tells us that to the best of his knowledge, this is the first bit-banged 100 MBit/s Ethernet implementation using a microcontroller. It’s transmit-only — reception being an entirely different beast — but it’s possible some enterprising soul might find a solution. If you do, be sure to let us know all about it!