Raspberry Pi Compute Module 3 In A GameBoy Original

[Kite] has been making custom PCBs for GameBoys for a long time. Long enough, in fact, that other people have used his work to build even more feature-rich GameBoy platforms. Unfortunately some of their work had stagnated, so [Kite] picked it up and completed a new project: a GameBoy that uses a Raspberry Pi running on his upgraded GameBoy PCB.

At its core the build uses a Raspberry Pi 3, but one that has been shrunk down to the shape of a memory module, known as the Compute Module 3. (We featured the original build by [inches] before, but [Kite] has taken it over since then.) The upgrade frees up precious space in the GameBoy case to fit the custom PCB that was originally built by [Kite], and also eliminates the need to cut up a Raspberry Pi and solder it to the old version of his PCB. The build is very clean, and runs RetroPie like a champ. It has some additional features as well, such as having an HDMI output.

For anyone looking for that retro GameBoy feel but who wants important upgrades like a backlit color screen, or the ability to play PSP games, this might be the build for you. The video below goes into details about how it all fits together. If you’re looking for more of a challenge in your GameBoy hacks, though, there’s an ongoing challenge to build the tiniest GameBoy possible as well.

Continue reading “Raspberry Pi Compute Module 3 In A GameBoy Original”

Homebrew SNES Mini Aims For Historical Accuracy

While “normies” are out fighting in the aisles of Walmart to snap up one of the official “Classic Mini” consoles that Nintendo lets slip out onto the market every once and awhile, hackers have been perfecting their own miniature versions of these classic gaming systems. The “Classic Mini” line is admittedly a very cool way to capitalize on nostalgic masses who have now found themselves at the age where they have disposable income, but the value proposition is kind of weak. Rather than being stuck with the handful of generation-limited games that Nintendo packed into the official products, these homebrew consoles can play thousands of ROMs from systems that stretch across multiple generations and manufacturers.

But for those old enough to remember playing on one of these systems when they first came out, these modern reincarnations always lack a certain something. It never feels quite right. That vaguely uncomfortable feeling is exactly what [ElBartoME] is aiming to eliminate with his very slick miniature SNES build. His 3D printed case doesn’t just nail the aesthetics of the original (PAL) console, but the system also uses real SNES controllers in addition to NFC “cartridges” to load different ROMs.

The project’s page on Thingiverse has all the wiring diagrams and kernel configuration info to get the internal Raspberry Pi 3 to read an original SNES controller via the GPIO pins. He also gives a full rundown on the hardware and software required to get the NFC-enabled cartridges working with EmulationStation to launch the appropriate game when inserted. Though he does admit this is quite a bit trickier than the controller setup.

[ElBartoME] has put a video up on YouTube that shows him inserting his mock cartridges and navigating the menus with an original SNES controller. If it wasn’t for the fact that the console is the size of a smartphone and the on-screen display is generations beyond what the SNES could pull off, you’d think he was playing on the real thing.

We’ve seen some incredibly impressive emulation boxes based on the Raspberry Pi, and builds which tried to embrace original hardware components, but this particular project may represent the best of both worlds.

Continue reading “Homebrew SNES Mini Aims For Historical Accuracy”

A Dreamcast VMU With A Secret

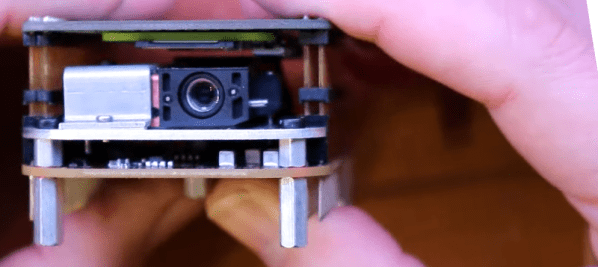
Since the Raspberry Pi range of boards first appeared back in 2012, we’ve seen them cleverly integrated into a host of inventive form factors. Today we bring you the latest offering in this space, [Kite]’s Raspberry Pi Zero W installed in the case of a Sega Dreamcast VMU. The result is a particularly nicely executed build in which the Pi with a few of its more bulky components removed or replaced with low-profile alternatives sits on the opposite side of a custom PCB from a small LCD display.

The PCB contains the relevant buttons, audio, and power supply circuitry, and when installed in a VMU shell makes for a truly professional quality tiny handheld console. In a particularly nice touch the Pi’s USB connectivity is brought out alongside the SD card on the end of the Zero, under the cap that would have originally protected the VMU’s connector. Some minimal paring away of Sega plastic was required but the case is surprisingly unmodified, and there is plenty of space for a decent-sized battery.

The VMU, or Visual Memory Unit, makes an interesting choice for an enclosure, because it is a relic of one of console gaming’s dead ends. It was the memory card for Sega’s last foray into the console market, the Dreamcast, and unlike those of its competitors it formed a tiny handheld console in its own right. Small games for the VMU platform were bundled with full titles, and there was a simple multiplayer  system in which VMUs could be linked together. Sadly the Dreamcast lost the console war of the late 1990s and early 2000s to Sony’s PlayStation 2, but it remains a console of note.

VMUs are not the most common of gaming survivors, but we’ve shown you one or two projects using them. There was an iPod conversion back in 2010, and much more recently some mind-blowing reverse engineering and emulation on the original VMU hardware.

Thanks [Giles Burgess] for the tip.

Raspberry Pi Learns Slow Morse Code

It wasn’t long ago that you needed to know Morse code to be a ham radio operator. That requirement has gone in most places, but code is still useful and many hams use it, especially hams that like to hack. Now, hams are using the Raspberry Pi to receive highly readable Morse code using very low power. The software is QrssPiG and it can process audio or use a cheap SDR dongle.

There are a few reasons code performs better than voice and many other modes. First, building transmitters for Morse is very simple. In addition, Morse code is highly readable, even under poor conditions. This is partly because it is extremely narrow bandwidth and partly because your brain is an amazing signal processor.

Like most communication methods, the slower you go the easier it is to get a signal through. In ham radio parlance, QRS means “send slower”, so QRSS has come to mean mean “send very slowly”. So hams are using very slow code, and listening for it using computerized methods. Because the data rate is so slow, the computer has time to do extreme methods to recover the signal — essentially, it can employ an extremely narrow filter. Having a QRSS signal detected around the world from a transmitter running much less than a watt is quite common. You can see a video introduction to the mode from [K6BFA] and [KI4WKZ], below.

Continue reading “Raspberry Pi Learns Slow Morse Code”

The VAIO WIth A Pi Inside

Raspberry Pi laptops are not an uncommon sight, as many hardware enthusiasts have shoehorned the tiny board behind LCD panels into home-made cases.

[Frank Adams] has created one of the best Pi laptops we’ve ever seen, (for which we suggest you skip straight to the PDF). He’s removed the guts from an aged Sony VAIO laptop and replaced it with the fruity computer, alongside a Teensy to handle VAIO keyboard, buttons, and LED I/O via the Pi USB port. An M.NT68676 video board interfaces the VAIO display to the Pi HDMI, and a USB to SATA cable is connected to a 240Gb solid state hard drive. The laptop’s Wi-Fi antenna is routed to the Pi via a soldered on co-axial connector, and there is also a real-time clock board. There are a few rough edges such as a USB cable that could be brought inboard, but it’s otherwise well-integrated into the case. His write-up is a very comprehensive PDF, that should serve as a good primer to anyone else considering such a laptop conversion.

The result is a laptop that looks for all the world like a commercially produced machine, yet that is also a Raspberry Pi. In a strange way, a Sony laptop is an apt homecoming for the board from Cambridge, because other than red soldermask or very early Chinese-made models, all Raspberry Pi boards are made in a Sony factory in Wales. Whatever the donor laptop though, this is definitely a step above the run-of-the-mill Pi laptops. To see its competition, take a look at this very ugly machine with a bare LCD panel, or this laser-cut sandwich laptop.

I See Rain In Your Future

Who wouldn’t like to have a crystal ball? Unfortunately, our computers aren’t very good at predicting the future. However they do occasionally get the weather correct, so [Jenny Hanell] built a crystal ball to show the weather forecast. She calls it “Sphaera” and you can see a video of it in operation below.

The user interface is entertaining, and relies on 5 photoresistors. The Raspberry Pi inside detects when you cover one of them up, and interprets that as a command. A piece of plastic allows for projection inside the sphere from an LCD display. [Jenny] calls that a hologram although technically it isn’t a true hologram, of course.

Continue reading “I See Rain In Your Future”

Cat Feeder Has Steampunk Flair And A GMail Account

While it is often said that “necessity is the mother of invention”, we can’t say that’s always been our experience here at Hackaday. You won’t need to search too long before you find a project or hack on this site that definitely falls out of the realm of strict necessity. But that’s part of the fun, there’s a reason this site isn’t called AppropriateUseOfTime.com

But when [Sam Storino] couldn’t seem to stop his cats from howling for their supper at 3:00 AM, he had the perfect opportunity to fulfill that age-old wisdom. Not only did he manage to turn a trip to the plumbing isle of his local home improvement store into a very Steampunk-looking automatic cat feeder, but he also found the time to write up an exceptionally detailed series of blog posts on what he learned during the process.

The heart of the machine is everyone’s favorite Linux board, the Raspberry Pi. You might be thinking the Pi is overkill for a simple timer, and you’d be right. Rather than just dump the food out on a set schedule, [Sam] decided to get a little fancy and come up with some Python scripts that will monitor a GMail inbox and activate the feeder hardware when it receives an email with the title “feed cats”. He then uses IFTTT to send the appropriately named email to the GMail account of his cat feeder on a specific schedule. Hey, nobody said necessity was the mother of straightforward invention.

In the final post of the series, [Sam] goes over the hardware side of the device. Copper pipe makes up the frame, which holds a commercial off-the-shelf dry food dispenser. The feeder was designed for manual operation, but by attaching a continuous rotation servo [Sam] can spin it up and dump a pre-measured amount of food via the Pi’s GPIO pins. The addition of some PVC pipe and fittings takes the food and (at least in theory) divides it equally between the two cat bowls below.

If you think [Sam] may have put a bit more thought than was necessary into something as simple as feeding his pets, keep in mind that he’s in exceptionally good company. Paging through the archives, it seems the intersection of felines and hackers is littered with gloriously complex contraptions.