An amateur radio repeater used to be a complex assemblage of equipment that would easily fill a 19″ rack. There would be a receiver and a separate transmitter, usually repurposed from commercial units, a home-made logic unit with a microprocessor to keep an eye on everything, and a hefty set of filters to stop the transmitter output swamping the receiver. Then there would have been an array of power supply units to provide continued working during power outages, probably with an associated bank of lead-acid cells.
More recent repeaters have been commercial repeater units. The big radio manufacturers have spotted a market in amateur radio, and particularly as they have each pursued their own digital standards there has been something of an effort to provide repeater equipment to drive sales of digital transceivers.
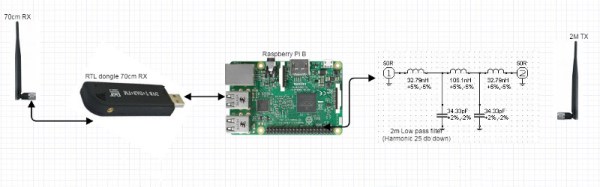
But what if you fancy setting up a simple repeater and you have neither a shed full of old radios or a hotline to the sales department of a large Japanese manufacturer? If you are [Anton Janovsky, ZR6AIC], you make your own low-powered repeater using an RTL-SDR, a low-pass filter, and a Raspberry Pi.
[Anton]’s repeater is a clever assemblage through pipes of rtl_sdr doing the receiving, csdr demodulating, and [F5OEO]’s rpitx doing the transmitting. As far as we can see it doesn’t have a toneburst detector or CTCSS to control its transmission so it is on air full-time, however we suspect that may be a feature that will be implemented in due course.
With only a 10 mW output this repeater is more of a toy than a useful device, and we’d suggest any licensed amateur wanting to have a go should read the small print in their licence schedule before doing so. But it’s a neat usage of a Pi and an RTL stick, and with luck it’ll inspire others in the same vein.
We’ve touched on the Pi as a transmitter before, from a straightforward broadcast FM unit to crossing continents with WSPR, and even transmitting digital TV in another [F5OEO] hack.

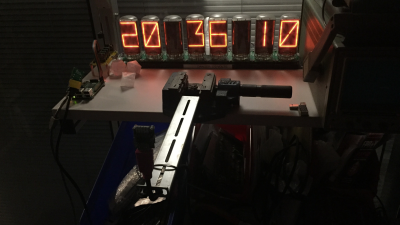 For the display, he’s using eight big vintage Burroughs B7971 Nixie Tubes. These aren’t easy to source, and current prices hover around $100 each if you can find them. The 170V DC needed to run each tube comes from a set of six