RFID Audio Book Reader For The Visually Impaired

When [Willem] visited home last year, he stopped in at his grandparents’ house and found that his very active 93-year-old grandfather had recently gone almost completely blind and was passing the days just sitting in a chair. [Willem] suggested that he listen to audio books, but his grandfather wasn’t receptive to the idea until [Willem] convinced him that the well-narrated ones can be very gripping and entertaining. Once his grandfather was on board, [Willem] knew that he needed a much more accessible solution than a tiny device with tiny controls, so he built an RFID audio reader using a Raspberry Pi.

[Willem] has posted the build details at his personal site. Essentially, the box you see above contains a Raspi and an RFID reader. He created different ‘books’ by placing RFID cards inside of DVD boxes, which makes them more tangible and accessible. When a book is placed on the box, the RFID reader tells the Pi which mp3 files to load. The large colored buttons let the user pause, rewind 20 seconds, and control the volume.

We love to see this kind of build. It’s simple, effective, and greatly enhances the user’s quality of life. [Willem]’s grandfather loves it and uses it every day.

A Raspberry Pi Helmet Cam With GPS Logging

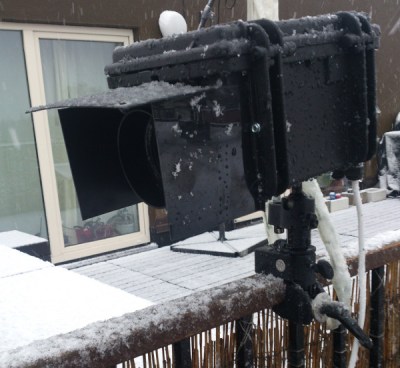
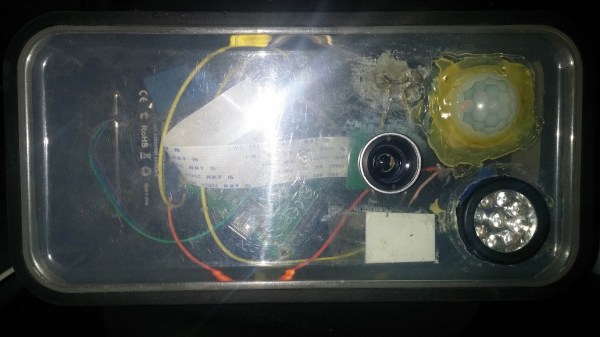
20140126_222809-1 Over the last 20 years, [Martin] has been recording snowboarding runs with a standard helmet cam. It was good but he felt like he could improve upon the design by building his own version and logging additional data values like speed, temperature, altitude, and GPS. In the video shown after the break, a first person perspective is displayed with a GPS overlay documenting the paths that were taken through the snow. [Martin] accomplished this by using a python module called picamera to start the video capture and writing the location to a data file. He then modified the program to read the current frame number and sync GPS points to an exact position in the video. MEncoder is used to join the images together into one media file.

The original design was based on the Raspberry Pi GPS Car Dash Cam [Martin] developed a few months earlier. The code in this helmet cam utilizes many of the same functions surrounding the gathering of GPS data points, recording video, and generating the overlay. What made this project different though were the challenges involved. For example, a camera inside a car rarely has to deal with extreme drops in temperature or the wet weather conditions of a snowy mountain. The outside of the vehicle may get battered from the snow, but the camera remains relatively safe from exposure. In order to test the Raspberry Pi before venturing into the cold, [Martin] stuck the computer in the freezer to see what would happen. Luckily it worked perfectly.

Click past the break for the rest of the story.

Continue reading “A Raspberry Pi Helmet Cam With GPS Logging”

PirateCade Is An Impressive Feat Of Woodworking And Design

Retro Arcade Machine Keeps the Classics

A six month journey of blood sweat and tears is finally over for [David Carver] and what he is left with is nothing short of beautiful. He calls it the PirateCade. We call it the perfect arcade cabinet.

This project is actually [David’s] very first Raspberry Pi project – at least it was, until his Pi crapped out on him. After running into too many problems with it and SD card corruptions, [David] decided against the RetroPie project platform and decided to upgrade to a full-blown PC, using an AtomicFE front-end and the Ultimark Ipac.

The entire cabinet is hand made out of solid wood; he didn’t have access to any fancy CNC routers or laser cutters. We gotta hand it to him, he’s quite the cabinet maker for an electronics guy. Continue reading “PirateCade Is An Impressive Feat Of Woodworking And Design”

Raspberry Pi Backup Scripts

Raspberry Pi

[Matthew’s] recent blog post does a good job explaining the basics of the Raspberry Pi’s file system. The Linux operating system installed on a Pi is generally installed on two different partitions on an SD card. The first partition is a small FAT partition. All of the files on this partition are used for the initial booting of the Pi. This partition also includes the kernel images. The second partition is the root file system and is generally formatted as ext4. This partition contains the rest of the operating system, user files, installed programs, etc.

With that in mind you can deduce that in order to backup your Pi, all you really need to do is backup all of these files. [Matt] has written some scripts to make this a piece of cake (or pie). The first script will simply copy all of the files into a gzipped archive. You can save this to an external SD card, USB drive, or network share.

The second script is perhaps more interesting. This script requires that you have one free USB port and a USB SD card reader. The script will automatically format the extra SD card to contain the two critical partitions. It will then copy the “boot” files to the new boot partition and the root file system files to the new SD card’s root partition. When all is said and done, you will end up with an SD card that is an exact copy of your current running file system.

This can be very handy if you have multiple Pi’s that you want to run the same software, such as in a Pi cluster. Another good example is if you have spent a lot of time tweaking your Pi installation and you want to make a copy for a friend. Of course there are many ways to skin this cat, but it’s always fun to see something custom-built by a creative hacker.

Testing VR Limits With A Raspberry Pi

vrpi

Virtual Reality by function pushes the boundaries of what we perceive as existence, tricking the mind into believing that the computer generated environment that the user is thrust into actually contains a real place. So in the spirit of seeing what is possible in VR, a developer named [Jacques] hooked up a Raspberry Pi to an Oculus Rift. He used a computer graphics rendering API called OpenGL ES, which is much like any mobile platform found these days, to render a floating, rotating cube.

All his tests were done on a Release build which utilized the official vertex and fragment shaders. There was no attempt to optimize anything; not like there would be much to do anyways. The scene was rendered twice at 16 milliseconds per frame. From there, he attempted 27 ms per frame with texture, followed by 36 ms/frame, and then 45.

The code used can be found on [Jacques]’s Github account. A simple improvement would use a Banana Pi for better processing speed. However, don’t expect any spectacular results with this type of setup. Really, the project only proves that it’s possible to minimize a VR experience into something that could become portable. And in the same vein, the Pi + Oculus integration can produce an uncomfortable lagging effect if things are not lined up properly. But once the energy/computing power issues are addressed, VR devices could transform into a more fashionable product like Google Glass, where a simple flip of a switch would toggle the view between VR and AR into a something more mixed. And then a motion sensing input camera like this Kinect-mapping space experiment could allow people all over the world to jump into the perspectives of other reality-pushing explorers. That’s all far down the line though, but this project lays the foundation for what the future might hold.

To see [Jacques]’s full set up, view the video after the break.

Continue reading “Testing VR Limits With A Raspberry Pi”

Controlling Music With The Wave Of A Hand

2301141406514425783

[Thomas] created a magical music player that gives the listener the ability to change songs and alter the volume levels without having to touch anything but air. Called the LighTouch, this device puts the control in the hands of the user by interpreting input from an ultrasonic sensor and plays back tracks based on waving gestures.

It is the 2nd iteration of a prototype that he completed about a year ago and functions as a streaming radio/alarm clock. The sensor is hooked up to a Raspberry Pi with a fading LED. Everything is highly customizable including the distances used for playback features. The criteria [Thomas] put in place has the pause method trigger when an object is detected between 0-10cm from the sensor. The volume control on the next level up brightens and dims the LED light just for some added flair.

Continue reading “Controlling Music With The Wave Of A Hand”

Raspberry Pi Spies On Your Front Door

doorbell pictures

One of [Sander]’s first projects with a Raspberry Pi was to get it to send messages to his iPhone. From there he decided to take it a step further and wire the tiny computer up to his doorbell, creating a system that can send push messages to his phone whenever someone is at the front door.

[Sander]’s doorbell is wireless, and he decided to keep all of its original functionality. All it took to signal the Pi was a simple circuit tied to the doorbell’s status LED which turns off whenever the doorbell is pushed.

The Raspberry Pi runs a python program that handles the GPIO pin which is wired to the doorbell. When the doorbell is pushed, the program processes and sends the push notification while taking pictures of the visitor with an attached webcam. The pictures are included in the message so [Sander] can see who is at the front door. The code for the project is included on his project page.

This project rang a bell for us since we’ve seen projects using a Raspberry Pi and push notifications. None of them so far have included a webcam or utilized an existing wireless doorbell though, and this is a great step forward!