[Colin], AKA [Domipheus], was working on a project to monitor a thermostat with a wall mounted Raspberry Pi and a touchscreen. Simple enough, but the Pi has a problem: The plugs are all around the perimeter of the board, and with a TFT touch screen shield, it’s a bit too thick to be wall mounted. What followed is a hack in the purest sense: [Domipheus] removed and relocated components on the Pi until the entire Pi/display stack was just a hair over 10mm tall.
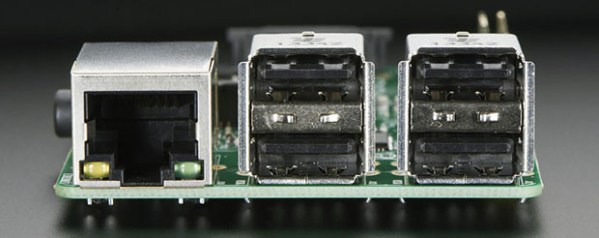
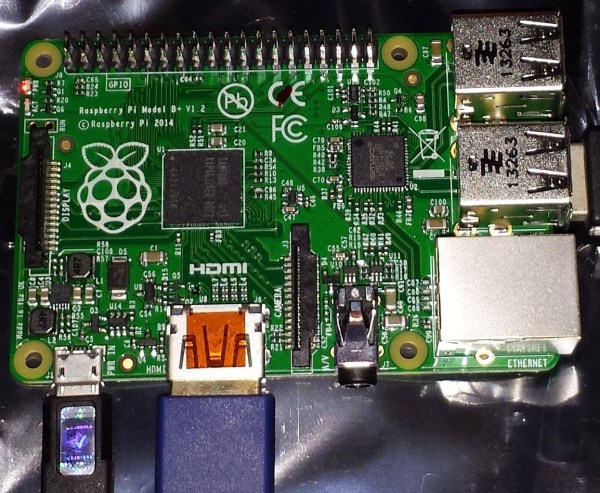
A Raspberry Pi Model A was used for this build, meaning the Ethernet jack was gone, and there was only a single USB port to deal with. Still, the highest components – the RCA and audio jacks – were too tall and needed to be removed; they weren’t going to be used anyway.
After these components were gone, [Domipheus] turned his attention to the next tallest parts on the board: fuses, caps, and the HDMI port. For fear of damaging the surrounding components when removing the HDMI connector the right way, this part was simply hacked off. The large tantalum cap near the USB power connector was removed (it’s just a filter cap) and the large protection diode was moved elsewhere.
Slimming down a Pi is no good without a display, and for that [Domipheus] used this touchscreen thing from Adafruit. Things got a little complicated when the project required the ability to remove the LCD, but you can do amazing things with a DIP socket and a file.
The end result is a Raspberry Pi with touchscreen display that’s just a smidgen thicker than a CD case. It’ll fit right up against a wall in its repurposed enclosure, and the end result looks very professional.
[Thanks Luke via reddit]
 I ran into a guy at Maker Faire Kansas City who I used to scoop ice cream with twenty years ago. We were slinging frozen dairy at a Baskin Robbins in a dying suburban strip mall that had a one-hour photo booth in the parking lot. It was just far enough away from our doorstep that dotting its backside with the hard-frozen ice cream balls that had been scooped and then not always accidentally dropped into the depths of the freezer was challenging. This guy, [Blake], kept a hockey stick hidden in the back room especially for this purpose. I never could get them to fly that far, but he was pretty good at it.