A Raspberry Pi Phone For The Modern Era

While it might seem like mobile phones are special devices, both in their ease of use and in their ubiquity in the modern culture, they are essentially nothing more than small form-factor computers with an extra radio and a few specific pieces of software to run. In theory, as long as you can find that software (and you pay for a service plan of some sort) you can get any computer to work as a phone. So naturally, the Raspberry Pi was turned into one.

[asherdundas], the phone’s creator, actually found a prior build based around the Raspberry Pi before starting this one. The problem was that it was built nearly a decade ago, and hadn’t been updated since. This build brings some modernization to the antiquated Pi phone, and starts with a 3D printed case. It also houses a touchscreen and a GSM antenna to connect to the cell network. With some other odds and ends, like a speaker and microphone, plus a battery and the software to tie it all together, a modern functional Raspberry Pi phone was created, with some extra details available on the project page.

The phone has the expected features — including calling, texting, and even a camera. A small WiFi USB dongle allows it to connect to the Internet too, allowing it to do all of the internet browsing a modern smartphone might want to do. The only thing that it might be pretty difficult to do is install Android apps, and although there are ways to get Android apps working in Linux, it’s not always strictly necessary to have this functionality.

Mac 128K Emulator Gets DIY Ceramic Enclosure

Creative technologist [Joselyn McDonald] wanted to hone her ceramic skills by building an iconic Macintosh 128K sculpture, complete with a fully functional operating system.

At first, she was determined to use Processing to create an interface for her sculpture by recreating the UI visually and adding some touch controls. However, she soon abandoned this tedious task after discovering MacintoshPi, which steps you through installing Mac OS 7, 8, and 9 emulators on a Raspberry Pi. [Joselyn] has also installed several retro games, including DOOM II, Carmen Sandiego, and Sim City, thanks to sites like Macintosh Garden and Macintosh Repository. 

Next, [Joselyn] hopes to set it up to display her and her partner’s schedules, and to let friends play around with nostalgic games. This piece was made using hand building, but other cool ceramic techniques like this slip cast dog bowl and this stone 3D printer have us thinking about what other types of enclosures could be built!

Giving Environmental Readouts Some Personality

Air Quality Index for one’s region can be a handy thing to know, but it’s such a dry and humorless number, isn’t it? Well, all that changes with [Andrew Kleindolph]’s AQI Funnies: a visual representation of live AQI data presented by a friendly ghost character in a comic panel presentation. The background, mood, and messaging are all generated to match the current conditions, providing some variety (and random adjectives) to spruce things up.

We love the attention paid to the super clean presentation, and the e-paper screen looks fantastic. Inside the unit is a Raspberry Pi using Python to talk to the AirNow.gov API to get local conditions and update every four hours (AirNow also has a number of useful-looking widgets, for those interested.)

The enclosure is 3D printed, and [Andrew] uses a Witty Pi for power management and battery conservation. The display is a color e-paper display that not only looks great, but has the advantage of not needing power unless the display is updating. The Pi can be woken up to update the screen with new info when needed, but otherwise can spend its time asleep.

[Andrew] has a knack for friendly presentations of information with an underlying seriousness, as we saw with his friendly reminders about nasty product recalls.

Snooping On Starlink With An RTL-SDR

With an ever-growing constellation of Starlink satellites whizzing around over our heads, you might be getting the urge to start experimenting with the high-speed internet service. But at $100 or more a month plus hardware, the barrier to entry is just a little daunting for a lot of us. No worries, though — if all you’re interested in is tracking [Elon]’s birds, it’s actually a pretty simple job.

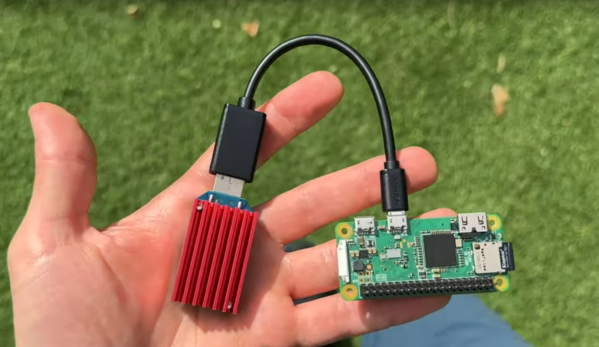
Now, we’re not claiming that you’ll be able to connect to Starlink and get internet service with this setup, of course, and neither is the delightfully named [saveitforparts]. Instead, his setup just receives the beacon signals from Starlink satellites, which is pretty interesting all by itself. The hardware consists of his “Picorder” mobile device, which sports a Raspberry Pi, a small LCD screen, and a host of sensors, including an RTL-SDR dongle. To pick up the satellite beacons, he used a dirt-cheap universal Ku-band LNB, or low-noise block downconverter. They’re normally found at the focal point of a satellite TV dish, but in this case no dish is needed — just power it up with a power injector and point it to the sky. The signals show up on the Picorder’s display in waterfall mode; curiously, the waterfall traces look quite similar to the patterns the satellites make in the night sky, much to the consternation of astronomers.

Of course, you don’t have to have a Picorder to snoop in on Starlink — any laptop and SDR should work, despite [saveitforparts]’ trouble in doing so. You shouldn’t have much trouble replicating the results by following the video below, which also has a few tips on powering an LNB for portable operations.

Continue reading “Snooping On Starlink With An RTL-SDR”

Simple Internet Radio Transplant

While we have a definite sweet spot in our hearts for analog radio, there are times that just call for a digital upgrade. One of the downsides that can come with this upgrade is complexity. For example, the more software-minded among us might base their build on the Music Player Daemon, and use a web interface for control. But that’s not everyone’s idea of a good time, and particularly an older user of your gizmos might really appreciate a simple, tactile user interface. That’s the situation [Blake Hannaford] was in, while building an Internet powered radio for someone else.

The solution was to take a familiar analog radio, the Tivoli Audio Model One, and give it a digital makeover. Now before you get worked up about wrecking the purity of a classic radio, note that the Model One is a faux-classic, made in 2000. No antiques were harmed in the making of this hack, and the exterior is essentially left stock — the only visible modification being the taped-on tuner label.

Inside it’s a Raspberry Pi Zero, the Adafruit Audio Bonnet, and a 3D printed bracket to tie a variable potentiometer to the tuning knob. The original volume knob and speaker are re-used. As [Blake] says, sometimes all you need is tuning and volume. Plus, re-using the speaker means that the whole unit still sounds great. Sometimes simple really is best.

While you’re here, check out our previous coverage of these style hacks and conversions!

Raspberry Pi Grants Remote Access Via PCIe (Sort Of)

[Jeff] found a Raspberry Pi — well, the compute module version, anyway — in an odd place: on a PCI Express card. Why would you plug a Raspberry Pi into a PC? Well, you aren’t exactly. The card uses the PCI Express connector as a way to mount in the computer and connect to the PC’s ground. The Pi exposes its own network cable and is powered by PoE or a USB C cable. So what does it do? It offers remote keyboard, video, and mouse (KVM) services. The trick is you can then get to the PC remotely even if you need to access, say, the BIOS setup screen or troubleshoot an OS that won’t boot.

This isn’t a new idea. In fact, we’ve seen the underlying Pi-KVM software before, so if you don’t mind figuring out your mounting options for a Raspberry Pi, you probably don’t need this board. Good thing too. Judging by the comments, they are hard to actually buy — perhaps, due to the chip shortage.

Continue reading “Raspberry Pi Grants Remote Access Via PCIe (Sort Of)”

A RPI HAT For Synchronized Measurements

A team from the Institute for Automation of Complex Power System (ACS) at RWTH Aachen University have been working for a while on the analysis of widely distributed power systems. In a drive to move away from highly specialised (and expensive) electronics platforms, they have produced some instrumentation designed to operate with the Raspberry Pi platform, and an open source software stack. They call the platform the SMU (Synchronised Measurement Unit.) The SMU consists of a HAT sitting on an RPi3, inside a 3D printed box that is intended to attach to a DIN rail. After all, this is supposed to be an industrial platform.

Hardware wise, the star of the show is the Texas Instruments ADS8588S which is a 16-bit 8-channel simultaneous sampling ADC. This is quite a nice device, with 200 kSPS throughput and a per-channel programmable front end, packaged in a hacker-friendly 64-pin QFP. What makes this project interesting however, is how they solved the problem of controlling the sampled data acquisition and synchronisation.

1-PPS and BUSY edges converted to levels, then OR’d to trigger the DMA

By programming the ADC into byte-parallel mode, then using the BCM2837 Secondary Memory Interface (SMI) block together with the DMA, samples are transferred into memory with minimal CPU overhead. An onboard U-Blox Max-M8 GNSS module provides a 1PPS (top of second pulse) signal, which is combined with the ADC busy signal in a very simple manner, enabling both sample rate control as well as synchronisation between multiple units spread out in an installation. They reckon they can get synchronisation to within 180 ns of top-of-second, which for measuring relatively slow-changing power systems, should be enough. The HAT PCB was created in KiCAD and can be found in the SMU GitHub hardware section, making it easy to modify to your needs, or at least adjust the design to match the parts you can actually get your hands on.

Continue reading “A RPI HAT For Synchronized Measurements”