Back To The Future Prop Can Tell When It Hits 88 MPH

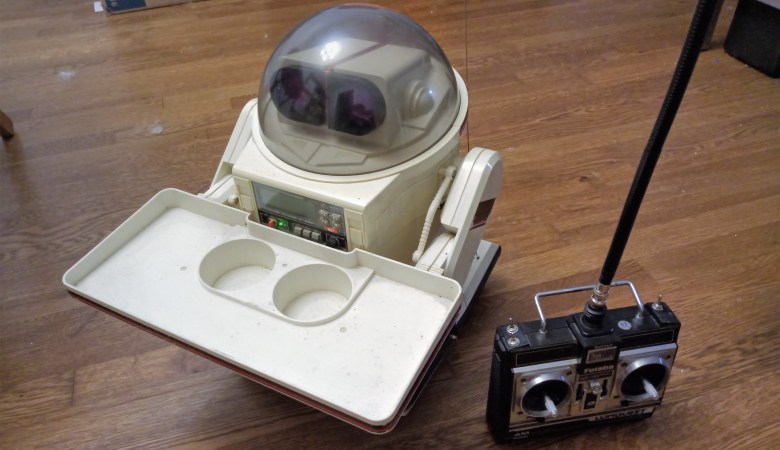
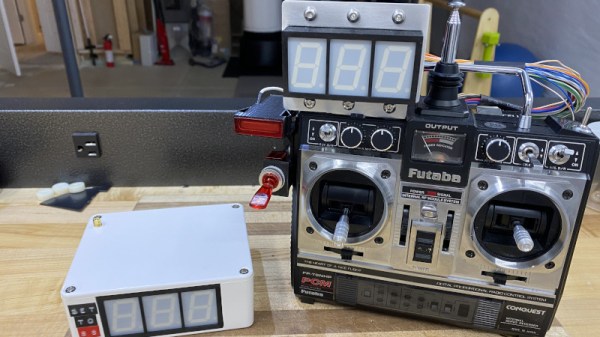
Obviously, the most iconic piece of fictional hardware from the Back to the Future films is Doc Brown’s DeLorean DMC-12 time machine. But we’d have to agree with [Jason Altice] of CodeMakesItGo that the second-most memorable gadget is the modified Futaba remote control used to control the DeLorean from a distance. Now, thanks to his detailed build guide, you can build your own version of the time machine’s controller — complete with working speed readout.

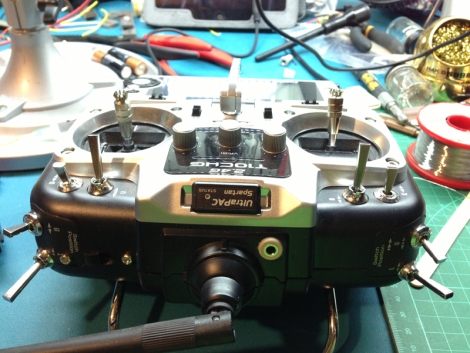
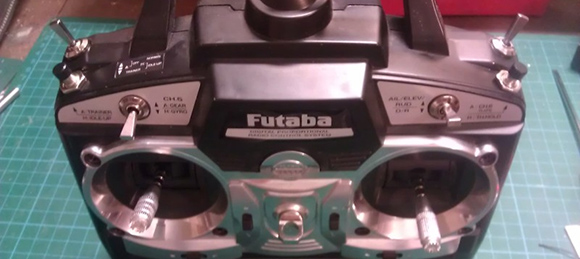
Now to be clear, [Jason] isn’t claiming that his build is particularly screen accurate. It turns out that the actual transmitter used for the prop in the film, the Futaba PCM FP-T8SGA-P, has become difficult to find and expensive. But he argues that to the casual observer, most vintage Futaba transmitters are a close enough match visually. The more important part is recreating the extra gear Doc Brown bolted onto his version. Continue reading “Back To The Future Prop Can Tell When It Hits 88 MPH”

80's vintage Tomy Omnibot and Futaba RC Transmitter

80’s Omnibot Goes RC And Gets A Modern Refresh

Thrift stores, antique shops, knick-knack stores- Whatever you might call them in your locale, they’re usually full of “another man’s treasure”. More often than not, we leave empty-handed, hoping another shop has something we just can’t live without. But on rare occasions, when the bits all flip in our favor, we find real gems that although we have no idea what we’re going to do with them, just have to come home with us.

[Charles] ran into this exact situation recently when he walked into yet another shop among many dotting the highways and byways of Georgia and spotted it: A Tomy Omnibot beckoning to him from the 1980s. [Charles] didn’t know what he’d do with the Omnibot, but he had to have it. Not being one to have things just sit around, he set out to make it useful by combining it with an era-appropriate Futaba 4 channel AM radio, and updating all of the electronics with modern hardware.  The Mission? Drive it around at car shows and meetups where he already takes his 1980’s era vans.

We’re not going to spoil the goodies, but be sure to read [Charles]’ blog post to see how he hacked a modern 2.4 GHz 7 channel radio into the vintage Futaba 4 channel AM radio case. We appreciated his analytical approach to meshing the older gimbals and potentiometers with the new radio guts. Not to mention what it took to get the Omnibot back into service using parts from his battle bots bin. You’ll love the attention to detail on the new battery, too!

We’ve featured [Charles] work in the past, and his Power Wheels racer fed by a recovered Ford Fusion battery is simply unforgettable. You might also appreciate another Omnibot revival we featured recently. And as always, if you have a hack to share, submit it via the Tip Line!

Spline Thieving Makes Hobby Servos Even More Useful

For years the proprietary spline pattern of rc servos has been a dealbreaker for hobbyists who want to add custom shafts and gears to their servos. First, different servo sizes have different spline sizes, and each vendor equips their servos with different patterns. True, some special vendors sell custom gears that mate to these patterns, but, overall, the hard-to-replicate pattern has severely limited the output options for servos.

This pattern didn’t deter [JB], however. With some clever CAD skills, and two working implementations, he’s demonstrated that these spline patterns can be (1) harvested and (2) added into custom components, opening a new suite of design opportunities involving servos.

To capture the spline, [JB] imports an image into Solidworks, and traces the pattern on a properly scaled image. From there, he can embed this pattern directly into a physical model for fabrication.

To make parts that preserve this pattern, [JB] has two options. With his FormLabs printer, he can print components that already have the pattern feature, allowing him to press-fit custom links directly onto servos. Alternatively, for a sturdier component, he presents the milling method. With this technique, he drills a circle of bolt holes onto the desired output shaft and then mills out the center. From here, the shaft can also be directly pressed onto the servo spline where each spline groove fits snugly into the edge of the previously-drilled holes.

So, how well do they work? According to [JB] he’s actually managed to do some damage to himself before damaging to the 3D-printed part while trying to strip the pattern. The end-goal is to insert these shafts into transmissions for a miniature combat robot, another one of [JB’s] projects which is well-underway. Until then, we’re looking forward to seeing more servos tightly-integrated into upcoming projects.

Futaba 10C Radio Modified For Spektrum Module Compatibility

futaba-radio-modified-to-fly-spektrum

The Futaba 10C radio (non-module version) is [Tom]’s transmitter of choice. Unfortunately,  it isn’t compatible with the Spektrum DSM2 technology modules he wanted to use. So, being the crafty guy he is, he decided to hack it so it was.

Upon opening the Futaba transmitter, he realized that the non-module version of the 10C didn’t really seem that different than a module version. His transmitter just has a pcb hardwired in place where the modules would otherwise go. He soldered a 4 conductor audio jack to the unused pins on the pcb in the transmitter, then mounted it in the case with some J.B. Weld. He then wired and mounted the receiving jack in the module case. A small 6 inch audio cable bridges the two devices, and velcro holds them neatly together.

He discovered that certain modules have problems with the channels being out of order. Unless someone comes up with a firmware hack, there’s no way to remap the controls. So, some modules are just not compatible. [Tom] gives a very nice video walkthrough after the break. Check it out.

Continue reading “Futaba 10C Radio Modified For Spektrum Module Compatibility”

Adding Shoulder Buttons To An RC Transmitter

radio

[Gerard] does puppeteering and animatronics work, and to remotely control his creations and characters he uses an off-the-shelf remote control radio. It’s you basic 6-channel setup, but [Gerard] wanted a way to control eye blinks and other simple actions with the press of a button. Sure, he could use the toggle switches on his transmitter, but he wanted something that wouldn’t require turning a servo on and off again. To fix this problem, [Gerard] added shoulder buttons to his transmitter with only a little bit of soldering.

[Gerard]’s transmitter uses toggle switches to send a signal on channels five and six. To add his push buttons, he simply drilled a hole in the plastic enclosure, installed a pair of push buttons, and wired them in parallel to the toggle switches.

Now [Gerard] has momentary switches on channels five and six, perfect for making his creations blink. Since the buttons are wired in parallel with the switches, flicking the switches to the ‘on’ position in effect takes the button out of the circuit, just in case the transmitter gets jostled around.

Parts: 4×20 VFD Character Display (NA204SD02)

futuba-serial

Futaba makes vacuum florescent character displays that can be used as a drop-in replacement for common character LCDs. VFDs have a wider viewing angle, and generally look cooler.

Futaba’s character displays can be interfaced using the standard 8-bit or 4-bit parallel LCD interface, or a simple two-wire protocol. The protocol type is set by resistors on the back of the display, so it’s not particularly easy to change without a hot-air rework station. Today we’ll demonstrate a serially-interfaced VFD using the Bus Pirate.

Continue reading “Parts: 4×20 VFD Character Display (NA204SD02)”