Set Up A Headless Raspberry Pi, All From Another Computer’s Command Line

There are differences between setting up a Raspberry Pi and installing an OS on any other computer, but one thing in common is that if you do enough of them, you seek to automate the process any way you can. That is the situation [Peter Lorenzen] found himself in, and his solution is a shell script to install and configure the Raspberry Pi for headless operation, with no need to connect either a keyboard or monitor in the process.

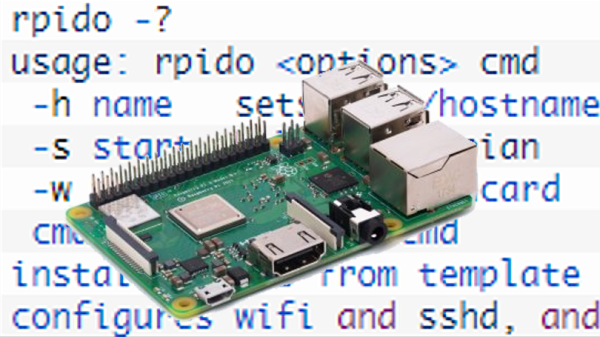
[Peter]’s tool is a script called rpido, and with it the process for setting up a new Raspberry Pi for headless operation is super streamlined. To set up a new Pi, all [Peter] needs to do is:

  1. Plug an SD card into his laptop (which happens to be running Ubuntu.)
  2. Run: rpido -w -h myhostname -s which downloads and installs the newest version of Raspbian lite, does some basic setup (such as setting the hostname), configures for headless operation, and launches a root shell.
  3. Use the root shell to do any further tweaks or checks (like launching raspi-config for additional changes.)
  4. Exit the shell, remove the SD card from his laptop, and install the card into the Raspberry Pi.

There are clear benefits to [Peter]’s script compared to stepping through a checklist of OS install and setup tasks, not to mention the advantage of not needing to plug in a keyboard and monitor. Part of the magic is that [Peter] is mounting the SD card’s filesystem in a chroot environment. Given the right tools, the ARM binaries intended for the Pi run on his (Intel) Ubuntu laptop. It’s far more convenient to make changes to the contents of the SD card in this way, before it goes to its new home in a Pi.

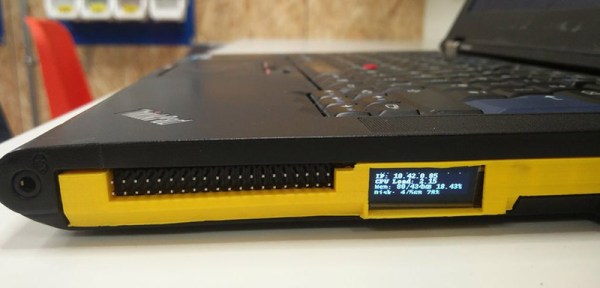
Not everything has to revolve around an SD card, however. [Jonathan Bennet] showed that it’s possible to run a Raspberry Pi without an SD card by using the PXE boot feature, allowing it to boot and load its file system from a server on the same network, instead of a memory card.

I’m Sorry, Alexander, I’m Afraid I Can’t Do That

Getting people to space is extremely difficult, and while getting robots to space is still pretty challenging, it’s much easier. For that reason, robots and probes have been helping us explore the solar system for decades. Now, though, a robot assistant is on board the ISS to work with the astronauts, and rather than something impersonal like a robot arm, this one has a face, can navigate throughout the ship, and can respond to voice inputs.

The robot is known as CIMON, the Crew Interactive Mobile Companion. Built by Airbus, this interactive helper will fly with German astronaut Alexander Gerst to test the concept of robotic helpers such as this one. It is able to freely move about the cabin and can learn about the space it is in without being specifically programmed for it. It processes voice inputs similarly to a smart phone, but still processes requests on Earth via the IBM Watson AI. This means that it’s not exactly untethered, and future implementations of this technology might need to be more self-contained for missions outside of low Earth orbit.

While the designers have listened to the warnings of 2001 and not given it complete control of the space station, they also learned that it’s helpful to create an interactive robot that isn’t something as off-putting as a single creepy red-eye. This robot can display an interactive face on the screen, as well as use the same screen to show schematics, procedure steps, or anything else the astronauts need. If creepy design is more your style though, you can still have HAL watching you in your house.

Thanks to [Marian] for the tip!

Continue reading “I’m Sorry, Alexander, I’m Afraid I Can’t Do That”

Mining Airport WiFi Data: This Sunday Is The Worst Day To Fly

This is Thanksgiving weekend in the United States; the country’s most congested travel weekend of the year. It’s common knowledge, and it’s easy to infer that this holiday weekend is one of the busiest for air travel. But can you prove it empirically? Apparently so. [Bertrand Fan] filed a Freedom of Information Act request for the WiFi traffic at San Francisco International Airport and used the access point data from the past year and a half to show which days were most congested in the airport.

FOIA actually has its own website which boils down the act as follows:

The basic function of the Freedom of Information Act is to ensure informed citizens, vital to the functioning of a democratic society.

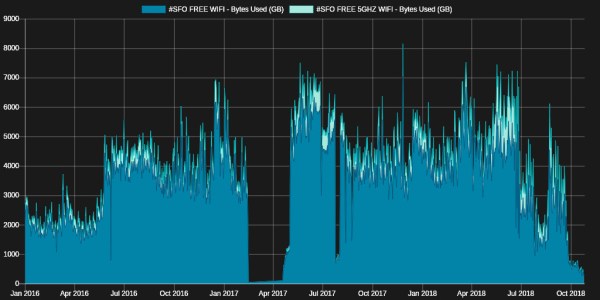
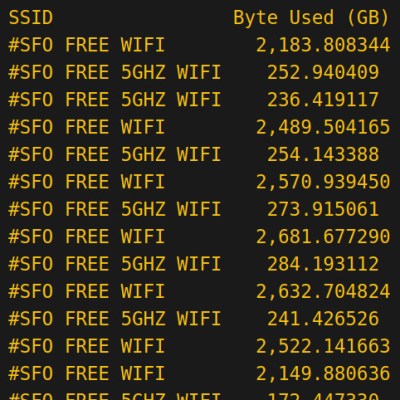
We’re not sure if this particular data mining hack falls under that description, but it’s good to know if you want information about what government is doing, you can get it and fast! From the first request to receiving the info was just 10 days.

Ghostscript was used to turn the PDF into a CSV which was then plotted on a graph. It shows that the heaviest WiFi usage was on 11/26/17, the Sunday after Thanksgiving. As you can see, the only thing returned was data used per day for each SSID (plus dates which aren’t shown in this screenshot). But in theory the more people stuck at the airport the more data they’ll consume, so the method is reasonable.

This was all just to color a conversation he was having with his parents about the weekend’s travel. It’s a long way to go to prove a point, but we had fun joining along in the ride!

[via Lobsters]

Agilent LCR Meter Teardown

Since 1999, one of the more popular manufacturers of test equipment has been Agilent, the spun-off former instrument division of Hewlett-Packard. From simple multimeters to fully-equipped oscilloscopes, they have been covering every corner of this particular market. And, with the help of [Kerry Wong] and his teardown of an Agilent LCR meter, we can also see that they’ve been making consistent upgrades to their equipment as well.

The particular meter that [Kerry] took apart was an Agilent U1731B, a capable LCR (inductance, capacitance, resistance) meter. He had needed one for himself and noted that while they’re expensive when new, they can be found at a bargain used, but that means dealing with older versions of hardware. For example, his meter uses an 8-bit ADC while the more recent U1733 series uses a 24-bit ADC. The other quality of this meter that [Kerry] made special note of was how densely populated the circuit board is, presumably to save on the design of a VLSI circuit.

While we don’t claim to stump for Agilent in any way, it’s good to know that newer releases of their equipment actually have improved hardware and aren’t just rebadged or firmware-upgraded versions of old hardware with a bigger price tag attached. Also, there wasn’t really any goal that [Kerry] had in mind besides sheer curiosity and a willingness to dive deep into electronics details, as those familiar with his other projects know already.

Adding Vector Art To Your Eagle Boards

Badgelife and the rise of artistic PCBs are pushing the envelope of what can be done with printed circuit boards. And if you’re doing PCB art, you really want to do it with vectors. This is a surprisingly hard problem, because very few software tools can actually do DXFs and SVGs properly. Never fear, because [TallDarknWeirdo] has the solution for you. It’s in Eagle, and it uses Illustrator and Inkscape, but then again this is a hard problem.

The demonstration article for this example is just a Christmas tree. It’s somewhat topical green soldermask is standard, FR4 looks like wood, and silver and gold and all that. [TallDarknWeirdo] first split up this vector art into its component pieces — soldermask, bare FR4, and copper — then imported it into Inkscape to make the SVGs. This was then thrown into an online tool that creates something Eagle can understand. The results are better than importing bitmaps, resulting in much cleaner lines in the finished board.

Quick word of warning before we get into this, though: if you’re reading this in 2019 or later, this info might be out of date. Autodesk should be releasing a vector import utility for Eagle shortly, and we’re going to be taking a deep dive into this tool and complaining until it works. Until then, this is the best way to get vector art into Eagle.

Oh, and [TallDarknWeirdo] is none other than [Bradley Gawthrop], who’s put more time in crimping wires than anyone else we know.

The Best Laptop Gets Even Better

The ThinkPad is the greatest laptop ever created. It doesn’t come in rose gold, it comes in black. It doesn’t have a weird screen instead of an escape key. For less than half the price of a MacBook, you can have a capable laptop that will somehow fit three drives inside. It’s madness, but it’s still not the perfect tool for hacking. To get there, you’re going to need to load that thing up with an independent Linux system, and maybe a solderless breadboard. That’s what [ollie242] is doing with his ThinkPad, and the results are the perfect addition to the perfect laptop.

This build is really just a 3D printed drive caddy for the Thinkpad UltraBay, the modular standard that allows you to add a CD drive, SATA drive, or even a serial and parallel port to your laptop. [ollie242] is modeling this off the CD drive taken from a ThinkPad T420, so we’re looking at a ‘Serial Ultrabay Enhanced’ version of this standard, which is compatible with a T430, which is still the best laptop you can possibly buy.

Inside this 3D printed drive caddy is a Raspberry Pi Zero W, powered by the ThinkPad through the internal SATA connector. The Pi Zero has right-angle headers attached, giving access to the GPIO pins from the outside. Just to add a little flair, [ollie242] added an OLED display to show the IP address, the CPU load, and the memory availability of the Pi.

This is a great project, if only because no one has any use for a CD drive anymore. Since these UltraBay drives are huge, it would be a simple matter to add a much more powerful computer to the drive like the recently announced Raspberry Pi 3 Model A+. There are — or at least there should be — some interesting internal connections on that UltraBay port, and it’s not inconceivable this Raspberry Pi UltraBay could be used as a coprocessor of sorts for its host laptop.

Electrolysis Tank Removes Rust

If you have something rusty, you can get a wire brush and a lot of elbow grease. Or you can let electricity do the work for you in an electrolysis tank. [Miller’s Planet] shows you how to build such a tank, but even better, he explains why it works in a very detailed way.

The tank uses a sodium carbonate electrolyte — just water and washing powder. In the reaction, free electrons from the electrolyte displace the oxygen from the rusted metal piece. A glass container, a steel rod, and a power supply make up the rest.

Continue reading “Electrolysis Tank Removes Rust”