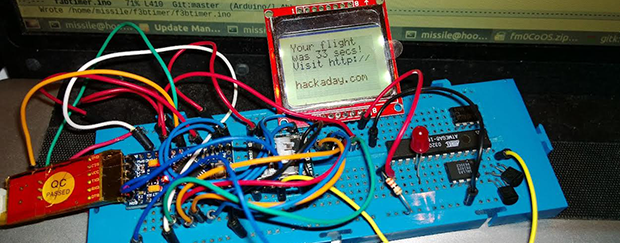
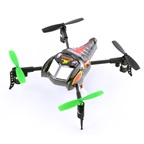
Tricked-out Arduino-controlled Time-Lapse Is More Than Just A Timer

arduinoPhotoRig

[Hlesliebole] wanted a finer degree of remote control over his time-lapse shots, so he decided to build an Arduino-driven infrared shutter. He ended up creating this killer Arduino-controlled photography rig that does a whole lot more.

This hack was built for [Hlesliebole]’s Nikon D3100, but he says it should work with any DSLR and remote shutter. This initial build uses an LED as a stand-in for the remote shutter that he ordered.  He intends to update the post once it arrives and he integrates it.

[Hlesliebole] wired a 7-segment display to show the current time delay between photos. This can be set on the fly with a potentiometer, so there’s no need to stop and reprogram the Arduino. And while you’re grabbing a beer and watching the sun slowly sink, the rig can better capture that sunset because of a photoresistor. It detects the ambient light level and minimizes the number of throwaway dark shots.

If that weren’t enough, he’s built servo functionality into the code to support remote control over the camera’s physical position, allowing for panning or rotation over a scene. [Hlesliebole] doesn’t go into detail, but he assures us that there are many tutorials out there.  If you think you’re man enough, you could always work in this outstanding versatile motion dolly hack.

Continue reading “Tricked-out Arduino-controlled Time-Lapse Is More Than Just A Timer”

A 555-Based, Two-Channel Remote Control Circuit

NE555N

[fahadshihab], a young tinkerer, shared his circuit design for a simple remote control using 555 timers.  Using a 555 calculator, he designed a clock circuit that would run at 11.99 Hz. Two transistors are connected to inputs (presumably button switches). One sends the plain clock signal, and one sends the inverted clock signal. A matching circuit at the other end will separate the channels. All it requires is connecting the two circuits in order to synchronize them. It would be easy enough to interface this with an oscillator, an IR LED, or a laser for long-range control.

The great thing about this circuit is its simplicity. It’s often so easy to throw a microcontroller into the mix, that we forget how effective a setup like this can be. It could also be a great starter circuit for a kid’s workshop, demonstrating basic circuits, timers, and even a NOT gate. Of course, it would be a good refresher for those without a lot of circuit knowledge too. Once you’ve mastered this, perhaps an AM transmitter is next?

Primer Tutorials For Arduino IR Remote Cloning And Keyboard Simulation

We’ve featured loads of IR Arduino projects and they are all exciting and unique. The projects spring from a specific need or problem where a custom infrared remote control is the solution. [Rick’s] double feature we’re sharing in this article is no exception, but what is interesting and different about [Rick’s] projects is his careful and deliberate tutorial delivery on how to copy infrared remote codes, store the codes with a flavor of Arduino and then either transmit or receive the codes to control devices.

In the case of his space heater an Arduino was used to record and later retransmit the “power on” IR code to the heater before he awakes on a cold morning. This way his room is toasty warm before he has to climb out from under the covers, which has the added benefit of saving the cost of running the heater all night. Brilliant idea if you don’t have a programmable heating system. Maybe he will add a temperature sensor someday so it doesn’t have to run on strictly time.

A more complicated problem was controlling DVD playback software on his computer remotely. [Rick] says he sits at a distance when watching DVDs on his computer but his computer doesn’t have a remote control like a normal TV. Arduino to the rescue again! But this time he pulls out a Teensyduino because of its added feature of being able to emulate a keyboard and of course the computer DVD playback software accepts keyboard commands. Once again he used the “IRremote.h” library to record certain button codes from an old remote control before adding the retrieved codes to a Teensyduino setup and programmed to receive and decode the remote’s IR signals. The Teensyduino then maps the IR codes to known keyboard shortcuts and transmits the simulated keyboard shortcut commands to the computer via its USB cable where the DVD playback software recognizes the key commands.

As always [Rick] shares all his libraries and sketches on his blog so follow the above links to download the files. You will not miss a single step if you follow his excellent videos below. Plus, here are some other ways and other tools for using an IR remote with your Arduino and cloning an infrared remote.

Continue reading “Primer Tutorials For Arduino IR Remote Cloning And Keyboard Simulation”

Remote Control FPV Cockpit

cockpit

FPV flying, for how awesome it actually is, still consists of fiddling around with a remote control transmitter and either wearing video goggles or squinting into a screen. Awesome, yes, but not as cool as [Brett Hays]’s enclosed cockpit ground station. It’s a trailerable flight sim that allows you to have the same experience of flying an aircraft over your local terrain without actually leaving the ground.

The centerpiece for this build is a 42 inch flat screen TV that was picked up for $160. This was placed at the front of a large plywood and 2×2 box along with a computer joystick, throttle, and rudder controls.

The pots inside the controls needed to be switched out to match the resistance of the ones inside an old Futaba transmitter. From there, completing the the cockpit was just a matter of fabricating a few panels for a video switcher, gear retract lever, flaps. and RC radio settings.

It’s a truly amazing build and when placed on a trailer towed by [Brett]’s jeep, has the potential to be the closest thing to flying a manned aircraft you can get without a pilot’s license.

Videos of the cockpit in action below.

Continue reading “Remote Control FPV Cockpit”

Hacking A Streetlight With Lasers

$20, some spare parts and a bit of mischief was a small price for [Chris] to pay for a reprieve from light pollution with this remote control laser hack. The streetlight in front of his house has a sensor that faces westward, and flips the lamp on once the sun has disappeared over the horizon. As it turns out, [Chris’s] third floor window is due west of this particular lamp, meaning he takes the brunt of its illumination but also conveniently places him in a prime location for tricking the sensor.

According to [Chris], the lamp’s sensor requires two minutes of input before it will switch off and stay off for around 30 seconds before cycling on again. The lamp does not zap straight to full brightness, though; it takes at least a minute to ramp up. [Chris] recalled a hack from a few years ago that essentially used LED throwies tacked onto the sensors with putty to shut off lamps for a guerrilla drive-in movie, but the sensors on those lamps were at the base and easily accessed. [Chris] needed to reach a sensor across the block and nearly three stories tall, so he dug around his hackerspace, found a 5V 20mA laser diode, and got to work building a solution.

[Chris] 3D printed a holder for the laser and affixed it via a mounting bracket to the wall near his third floor window, pointing it directly at the street lamp’s sensor. He plugged the laser’s power supply into an inexpensive remote control outlet, which allowed him to darken the street lamp at a touch of a button. This is certainly a clever and impressive hack, but—as always—use at your own risk. Check out a quick demo video after the break.

Continue reading “Hacking A Streetlight With Lasers”

A DIY Solution For Controlling Robots And Quadcopters

RC

RC transmitters used for controlling robots, quadcopters, airplanes, and cars really aren’t that complex. There are a few switches, pots, a screen and a radio transmitter. The maker toolbox already has all these components, so it only makes sense someone would try to build their own RC transmitter.

[Oscar]’s project started by gathering a bunch of toggle switches, 2-axis joysticks, pots, tact switches, an Arduino, LCD, and a Ciseco XRF wireless module. These were attached to a front panel made of polystyrene and work on the communications protocol began.

It should be noted that microcontroller-powered RC transmitters with XBees is nothing new. There was a Kickstarter for one last year, but the final product turned out to be bit janky and full of fail wiring, We’re really glad to see [Oscar]’s attempt at a DIY RC transmitter, and hopefully we’ll see this project taken up and improved by others.

Continue reading “A DIY Solution For Controlling Robots And Quadcopters”

Game Controller Repurposed For Flea Market Find

powerPannerControlReplacement

A jarring pan with your tripod can ruin a shot in your film, and tilting up or down usually requires some loosening and tightening kung fu to keep gravity from taking over. The “Power Panner” is a remote-controlled device that fits between the tripod and the camera, handling pans and tilts with ease. When [NeXT] found one at the Capitol Flea Market for $5, he didn’t care about the missing remote. He bought the Panner, dragged it home, and hacked together his own remote with a Sega Master Pad.

After researching similar devices online, [NeXT] had determined the original remote’s pinout: essentially a D-pad with adjustable speed control. He decided to ignore the speed pins and to instead search for a suitable replacement controller. A Sega Master Pad offered the most straightforward solution, so [NeXT] went to work separating out the wires and soldering them to a DIN connector. He couldn’t find the right plug to fit the Panner’s DIN-7 jack, so he substituted a DIN-8 with the extra pin snapped off.

Rather than use the remaining two buttons for speed control, [NeXT] chose to feed them directly into his camera to drive the focus and shutter, but the Master Pad’s wiring posed a problem: the camera would have to share the Power Panner’s ground, and the Panner plugs into the wall via a 6V adapter. Fingers crossed, he decided to push ahead and was relieved that everything worked. We suspect the shared ground won’t be a problem as long as one device uses a floating power supply, which the Panner can provide either through the proper wall wart or by using its 4 AA battery option.

If you’re in the mood for more camera hacks, check out the sound-dampening and waterproofing build from last week.