In an interesting post on Inverse, [Sarah Wells] does a deep dive into something you probably don’t think about very often: the blinking cursor. You’d assume there wasn’t much to the story. Maybe a terminal manufacturer put a toggle flip flop on the cursor output and it caught on. But the true story is much deeper than that.
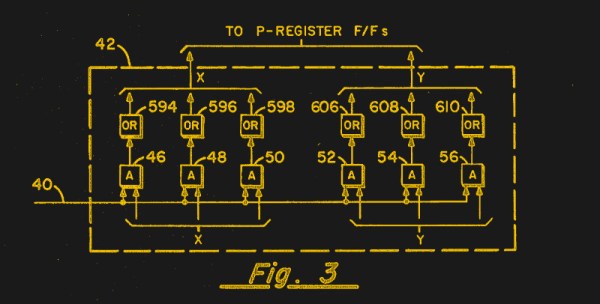
We were surprised that the father of the blinking cursor was one guy, [Charles Kiesling]. In a 1967 patent, he described the blinking cursor. An ex-Navy man, [Kiesling’s] patent names his employer at the time, Sperry Rand, where he’d worked since 1955.
That sound you may have heard in the wee hours of Christmas morning had nothing to do with Santa; rather, it was the sound of a million astronomers collectively letting out their breath around the world as the James Webb Space Telescope survived its fiery ride to space. And not only did it survive, but the ESA launch team did such a good job putting the Ariane rocket on course that NASA predicts the observatory now has enough fuel to more than double its planned ten-year mission. Everything about the deployment process seems to be going well, too, with all the operations — including the critical unfurling of the massive and delicate sunshield — coming off without a hitch. Next up: tensioning of the multiple layers of the sunshield. If you want to play along at home, NASA has a nice site set up to track where JWST is and what its current status is, including temperatures at various points on the telescope.
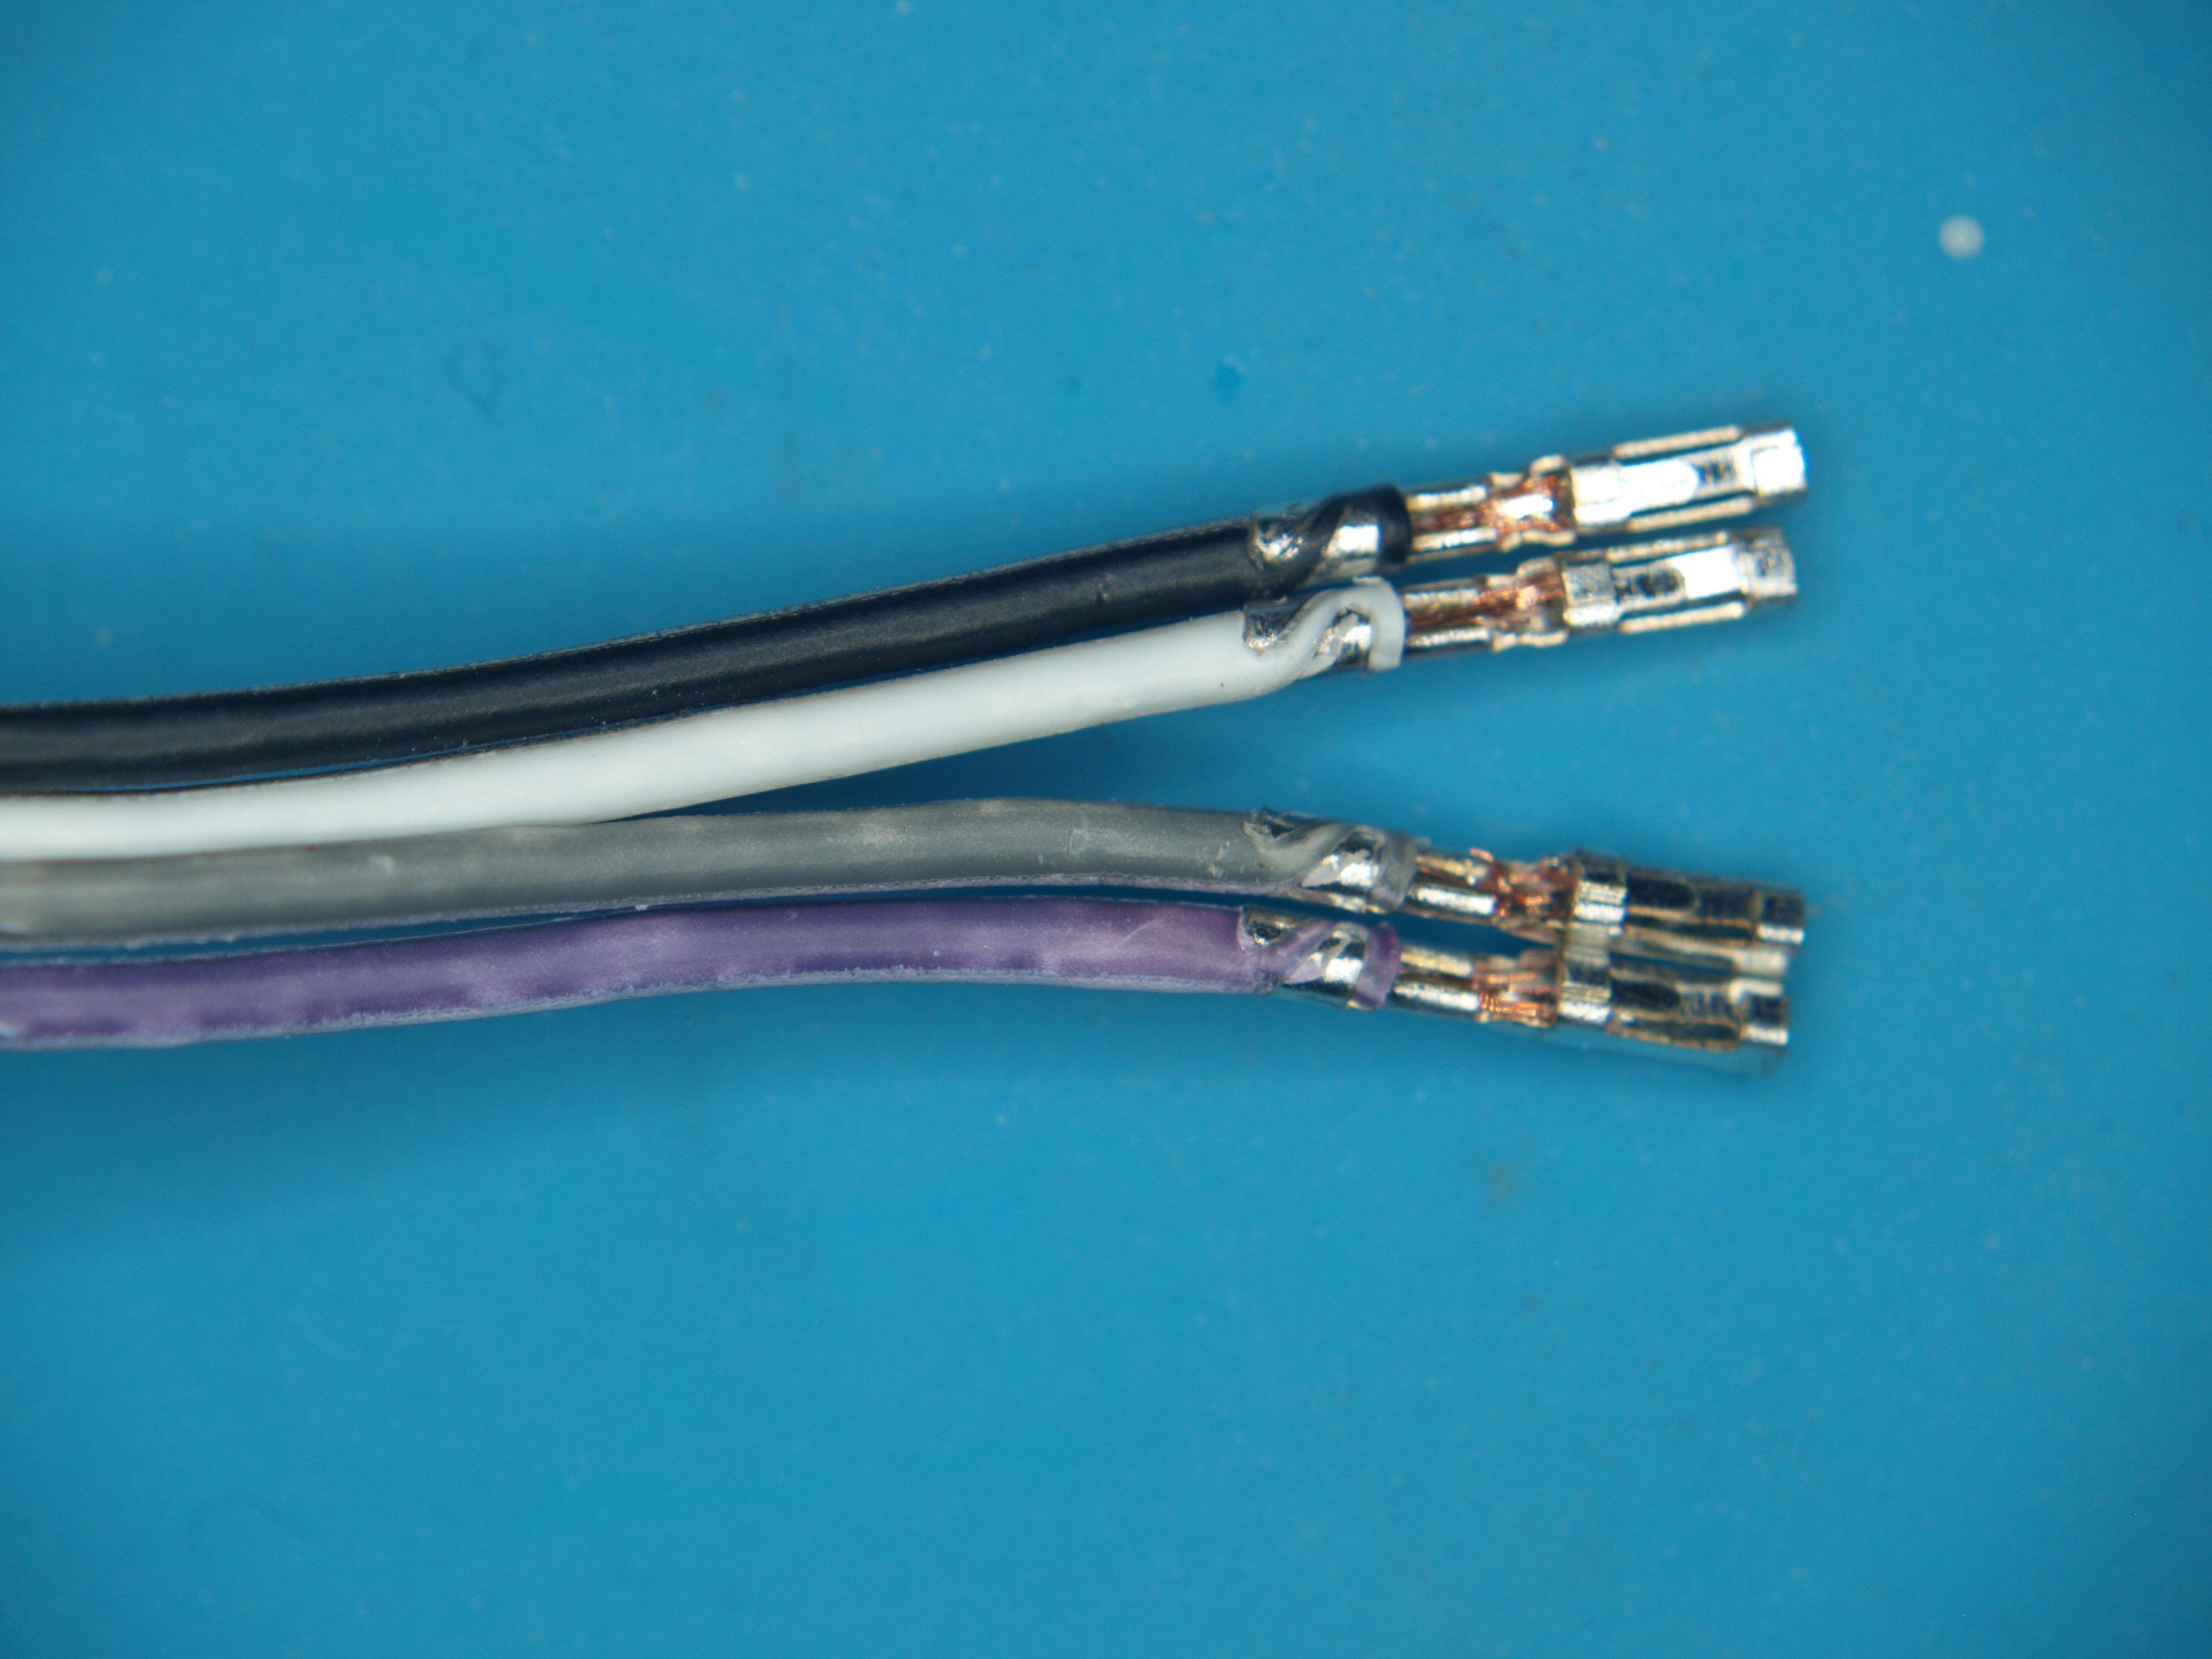
We got a tip from Mark about some dodgy jumper wires that we thought we should share. Low-quality jumpers aren’t really a new problem, but they can really put a damper on the fun of prototyping. The ones that Mark found could be downright dangerous. He got them with a recent dev board purchase; outwardly, they appear fine, at least at first. Upon closer inspection, though, the conductors have turned to powder inside the insulation. Even the insulation is awful, since it discolors when even slightly flexed. He suspects conductors are actually copper-plated aluminum; check out his pictures below and maybe look through your collection for similarly afflicted jumpers.
Speaking of dodgy hardware, if you love the smell of melting MOSFETs in the morning, then have we got a deal for you. It seems that a non-zero number of Asus Z690 Hero PC motherboards have suffered a fiery demise lately, stirring complaints and discontent. This led some curious types to look for the root cause, which led to the theory that an electrolytic cap had been installed with the wrong polarity on the dead boards. Asus confirmed the diagnosis, and is doing the right thing as they are “working with the relevant government agencies on a replacement program.” So if you’ve got one of these motherboards, you might want to watch the video below and see how the caps were installed.
If you’re in the mood for some engineering eye-candy, check out the latest video from Asianometry. They’ve got a finger on the pulse of the semiconductor industry, with particular attention paid to the engineering involved in making the chips we all have come to depend on. The video below goes into detail on the extreme ultraviolet (EUV) light source that fabrication machine maker ASML is developing for the next generation of chip making. The goal is to produce light with a mind-bending wavelength of only 13.5 nanometers. We won’t spoil the details, but suffice it to say that hitting microscopic droplets of tin with not one but two lasers is a bit of a challenge.
And finally, bad luck for 38 people in Tokyo who were part of a data breach by the city’s Metropolitan Police Department. Or rather, good luck since the data breach was caused by the loss of two floppy disks containing their information. The police say that there haven’t been any reports of misuse of the data yet, which is really not surprising since PCs with floppy drives are a little thin on the ground these days. You’d think that this would mean the floppies were left over from the 90s or early 2000s, but no — the police say they received the disks in December of 2019 and February of 2021. We’d love to know why they’re still using floppies for something like this, although it probably boils down to yet another case of “if it ain’t broke, don’t fix it.”
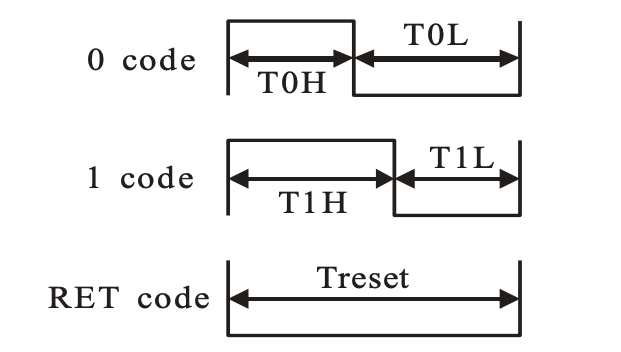
We can still remember when the WS2812 LED first came into our consciousness, way back in the mists of time. The timing diagrams in the datasheet-of-questionable-veracity made it sound quite tricky, with tight timing tolerances and essentially a high-speed two-bit PWM data protocol at 500 kHz. It was a challenge to bit-bang with an ATtiny85 back then, but there’s no way something as old and crusty as an Apple II would be up to snuff, right?
Specifically, [Anders] abuses the 74LS165 parallel-in, serial-out shift register for his dirty work. Instead of bit-banging the WS2812’s “long high is a 1, short high is a 0” signal directly, the first few bits of the shift register are hard-wired to VCC and the last few to GND.
The bits in the middle determine if the pulse shifted out is long or short, and they’re set by the 6502, through a 6522 VIA chip, just like the Apple II would have. Clocking the data out of the shift register handles the timing-critical stuff. Very clever!
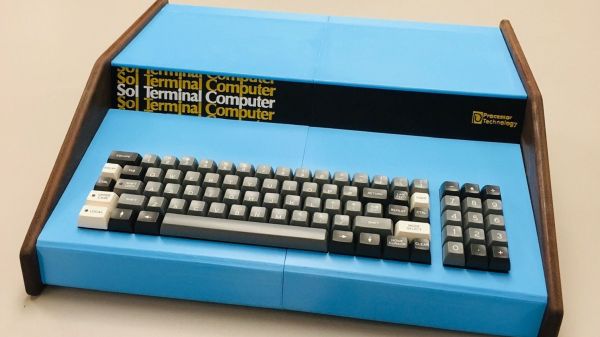
In the early years of the computer revolution, a machine like the Sol-20 really stood out. Where most hobbyist machines had front panels that bristled with toggle switches and LEDs, the Sol-20 was a sleek, all-in-one that looked like an electric typewriter in a walnut-trimmed box. Unfortunately, it was also quite expensive, so not that many were sold. This makes them hard enough to find 40 years later that building his own reproduction Sol-20 is about the only way for [Michael Gardi] to have one of his own.
In a lot of ways, the Sol-20 anticipated many of the design elements that would come into play later. Like the Apple and Commodore machines that were coming down the pike, the Sol-20 was intended to be plug and play. [Mike] celebrates that design with a full-size reproduction of the original, concentrating on its unique aesthetic aspects. The reproduction mimics the striking blue case, with its acrylic front panel and walnut sides. The keyboard is also an exact match for the original, in looks if not in function — the capacitive mechanism proved too difficult to replicate, so he opted for a kit using Cherry switches and custom keycaps. [Mike] also used his proven technique for 3D-printing the memorable Sol-20 logo for the front panel, in the correct font and color.
Under the hood, a Raspberry Pi runs an 8080 emulator, which supports a range of virtual devices, including a cassette tape drive and the video output. For fun, [Mike] also imagined what a CRT display for the Sol-20 would have looked like, and added that to his build. It’s a great-looking machine that never was, and we appreciate the attention to detail. We’ve seen that before — his 2/3-scale VT-100 terminal comes to mind, as does his reproduction of a 1960s computer trainer.
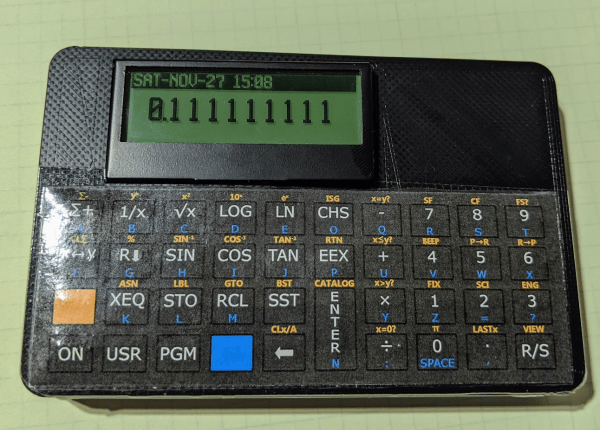
I have a confession to make. I write about a lot of projects for Hackaday, but there are very few I read about and then go actually build a copy of it. I don’t have a lot of time and I’m usually too busy building my own stuff. But once in a while, something strikes my fancy and I’ll either raid the junk box or buy the kit. The most recent case of that was the PX-41C, a replica of the classic HP-41C.
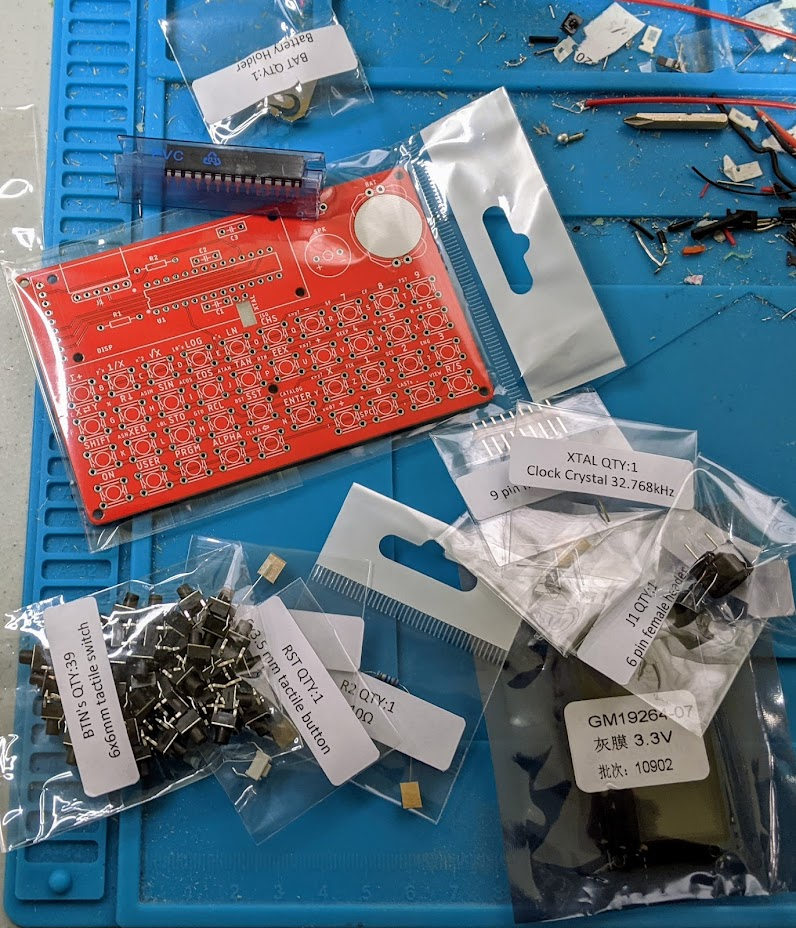
Nicely bagged parts.
The HP-41C is a somewhat legendary reverse-polish notation calculator. I still have my original HP-41C from 1979 (a very low serial number). It is still a workhorse but at 43 years old or so, I don’t like to leave it hanging around or near anything that might damage it. It has enough wear from the daily use it received 40 years ago. Sure, I have great emulation on my phone and I use that too, but the PX-41C kit looked fun, and with all through-hole parts it would be a quick build. The black Friday sale on Tindie sealed the deal for me.
Start-Up
The kit arrived on the Saturday after Thanksgiving, I decided to tackle it while waiting for some 3D prints. The components were all nicely bagged and marked. Tearing into the bags was a bit frustrating, but not hard and it did keep everything separate. There was a bill of materials, but — I thought — no instructions. Turns out the last part of the bill of materials is a link to some instructions. They aren’t much and I didn’t realize they were until after completing the board, but it isn’t hard to figure out. All the parts are marked on the silkscreen and you can probably figure it out — with a few caveats.
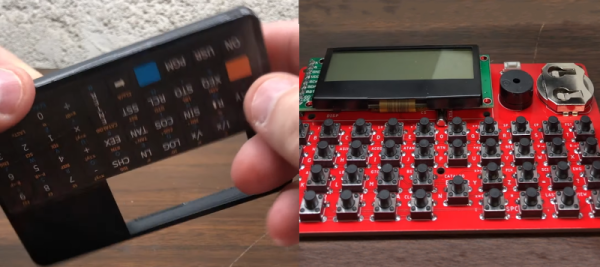
There was a time when engineers carried slide rules. Then there was a time when we all carried calculators. Sure, calculators are still around, but you are more likely to use your phone. If you really need serious number crunching, you’ll turn to a full computer. But there was that awkward time when calculators were very important and computers were very expensive that calculators tried to be what we needed from full-blown computers. The HP41C was probably the pinnacle of that trend. If you’ve ever had one, you know that is a marvel of the day’s technology with alphanumeric capabilities and four plug in ports for more memory or ROMs. It really was a little hand-held computer. Didn’t have one? Don’t worry, you can now build your own. In fact, the HP emulator will also act like an HP15C or 16C, if you prefer.
You can see the device in action in the video below. As you might expect, this version uses a through-hole ATMEGA328 and even at 8 MHz, the emulation is faster than the original calculator. The machine also has over double the memory the original calculator had along with a real-time clock built-in. The display is also backlit, something we all wanted in the original.
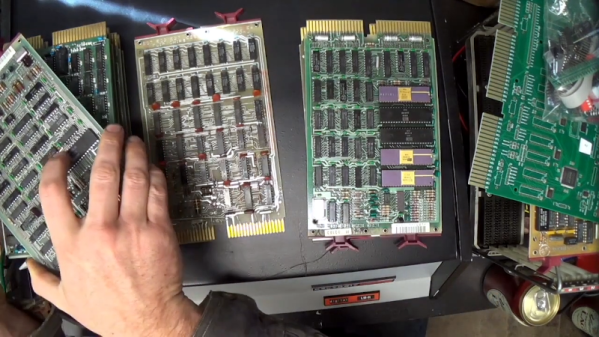
[Lee Adamson] is no stranger to classic computers. He recently picked up a Heathkit H11A which, as you might remember, is actually a PDP-11 from DEC. Well, technically, it is an LSI-11 but still. Like a proper LSI-11, the computer uses the DEC QBus. Unlike a lot of computers of its day, the H11 didn’t have a lot of switches and lights, but it did have an amazing software library for its day.
[Lee] takes us through a tour of all the different cards inside the thing. It is amazing when you think of today’s laptop motherboards that pack way more into a much smaller space. He also had to fix the power supply.