A New Mechanical Keyboard For An Old Computer

As computers age, a dedicated few work towards keeping some of the more interesting ones running. This is often a losing battle of sorts, as the relentless march of time comes for us all, human and machine alike. So as fewer and fewer of these machines remain new methods are needed to keep them running as best they can. [CallousCoder] demonstrates a way of building up a new keyboard for a Commodore 64 which both preserves the original look and feel of the retro computer but also adds some modern touches.

One of the main design differences between many computers of the 80s and modern computers is that the keyboard was often built in to the case of the computer itself. For this project, that means a custom 3D printed plate that can attach to the points where the original keyboard would have been mounted inside the case of the Commodore. [CallousCoder] is using a print from [Wolfgang] to get this done, and with the plate printed and a PCB for the keys it was time to start soldering. The keyboard uses modern switches and assembles like most modern keyboards do, with the exception of the unique layout for some of the C64 keys including a latching shift key, is fairly recognizable for anyone who has put together a mechanical keyboard before.

[CallousCoder] is using the original keycaps from a Commodore 64, so there is an additional step of adding a small adapter between the new switches and the old keycaps. But with that done and some amount of configuring, he has a modern keyboard that looks like the original. If you’re more a fan of the original hardware, though, you can always take an original C64 keyboard and convert it to USB to use it on your modern machines instead.

Continue reading “A New Mechanical Keyboard For An Old Computer”

Pico Pal Puts RP2350 Into Game Boy Color Shell

While modern gaming systems deliver ever more realistic experiences, there’s still something to be said for the consoles and handhelds of the 80s and 90s. For many, the appeal is nostalgic. Others are attracted to the “lo-fi” graphical and sound design of these games, necessitated by the limited hardware of the time.

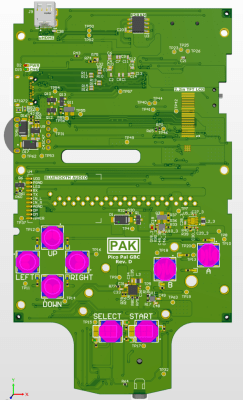
That said nobody would claim those old systems were perfect. Which is why a hybrid approach like [Peter Khouly] has been working on with the Pico Pal might be the ultimate solution. This replacement motherboard for the Game Boy Color (GBC) is powered by the RP2350, meaning the external hardware will have the same look and feel as it did back in 1998, but you’ll still be able to reap the benefits of modern emulation.

While the origins of the project go a bit farther, [Peter] has been working on this particular variation of the Pico Pal GBC since August, and has kept a fascinating log of his progress. Just getting the RP2350 to emulate Pokémon isn’t really that big of a deal, but getting all the ancillary hardware implemented and fitted inside the case of the GBC is a different story. Especially since [Peter] intends to pack plenty of features into the final product, such as rechargable batteries, Bluetooth audio, real-time clock support, and digital video out.

The most recent status update is from just last week, where [Peter] goes over some of the new features he’s been working on. A major one is the soft power solution, where the physical power switch doesn’t just pull the plug like it did back in the 1990s. Instead, the switch triggers the board to save the game and enter into a low-power mode so that it can come right back on to where you left off. This does impact battery life, but so far, it looks like the Pico Pal GBC will be able to run for at least five hours on a charge, and more than twice that if you don’t mind turning off the audio.

It sounds like there’s still several gremlins to track down in the design, but even in its current state, the Pico Pal GBC looks very interesting. We’re immediately reminded of the phenomenal work [Bucket Mouse] has put in on a similar refit for the original DMG-1 Game Boy.

Holiday Jukebox Gets ESP32, Home Assistant Support

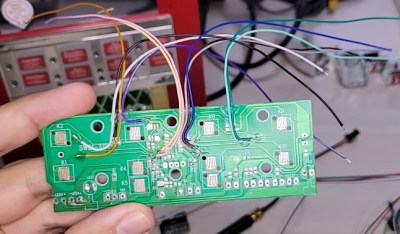
If we’ve learned anything over the years, it’s that the only thing hardware hackers love more than a device festooned with buttons is one that’s covered in LEDs — so it’s no surprise that this “Mr Christmas” jukebox caught the eye of [Roberts Retro]. But while the holiday gadget might have been mildly entertaining in its stock configuration, he quickly realized that what it really needed was an ESP32 retrofit. After all, what good are all those buttons and LEDs if you can’t bend them to your will?

For the first half of the video, [Robert] treats us to a detailed teardown of the device, which as you might imagine, is largely hollow inside. This gave him plenty of room to graft in new hardware, which is really the best gift any of us could hope to find under the tree. In addition to the ESP32 development board, the jukebox also received a number of WS2812B addressable RGB LEDs, and a DFPlayer module to handle music playback.

With all the buttons wired up to inputs on the ESP32, [Robert] can reconfigure the jukebox to do pretty much whatever he wants with just changes to the software. In the video, he demonstrates how the buttons can be used to trigger the playback of individual songs stored on the DFPlayer’s SD card, which essentially replicates it’s stock functionality. A few lines of changed code later, those same buttons can be used to control devices via Home Assistant.

To get into the holiday spirit, [Roberts Retro] shows off the completed jukebox controlling his ESP-enabled LEGO train set — another of his festive upgrades that we covered back in 2022.

Continue reading “Holiday Jukebox Gets ESP32, Home Assistant Support”

Upgrading At Least One Component Of A TI Calculator

Even though Texas Instruments were the first company to produce an integrated circuit and a microprocessor, their success as a company in the 60s and 70s was not guaranteed. At the time there wasn’t much demand for previously non-existent products like these, so to drive some business they built the first hand-held calculator, a venture that they are still famous for today. Since then, though, they’ve become a bit of a punchline for producing calculators with decades-old technology but with modern price tags, so while this business model was quite successful if you want a calculator with a few modern features you’ll have to take a DIY approach like this calculator retrofitted with a LiPo battery.

The modern battery pack, with a lithium polymer battery at its core, includes all of the circuitry needed to integrate it seamlessly into the TI-59 calculator, which is all available on the project’s GitHub page. This calculator originally used a 9V battery, so the new battery pack includes a boost converter to match the 3.7V from the new battery to the needs of the old calculator. It doesn’t stop there, though. The pack is rechargeable from an included USB-C port, has a built-in charge controller, and is housed in its own custom-built case that fits neatly into the calculator where the old battery would sit.

While this wouldn’t be a drop-in replacement for more modern calculators like the TI-83/84 and TI-89, a new case and a different boost converter would solve the problem of the AAA batteries dying during exams. It might make the calculators non-compliant with various standardized testing requirements, though (which TI was also instrumental in developing) so you may want to verify with your testing standard of choice before modifying a calculator you need for an exam. But if all the rules are off, why not add Wi-Fi to it too?

Prison TV Gets Simple Speaker Mod

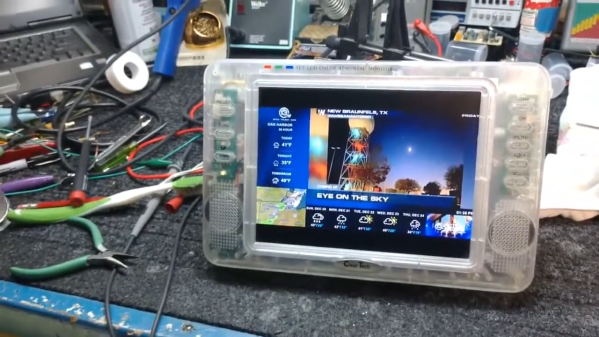
American prisons are strict about television use. Typically they’re only to be used with headphones, and their enclosures need to be transparent so they can’t be used to smuggle goods. ClearTech makes TVs that meet these specifications, and when [Steve Pietras] got his hands on just such a unit, he set about modding it for use in the free world.

Getting into the TV isn’t easy; ClearTech built the units using special security fasteners unlike any we’ve seen before. [Steve] found a way to deal with these, though declines to share his technique in his video. Once inside though, his task is relatively straightforward. He steps through where to install speakers in the TV’s housing, and how to hook them up to the right spots on the main circuit board. With the case closed back up, [Steve] is able to use the TV without headphones, and without the threat of getting shanked by a fellow inmate who really doesn’t want to hear Jeopardy while they’re trying to read.

It’s not every day we get to look at a piece of obscure hardware like this. We’d never seen a prison TV before, and now we feel like experts on the topic. Of course, we’re no strangers to esoterica at Hackaday.

Continue reading “Prison TV Gets Simple Speaker Mod”

A Solari Mechanical Digital Clock Hack With A Little Extra

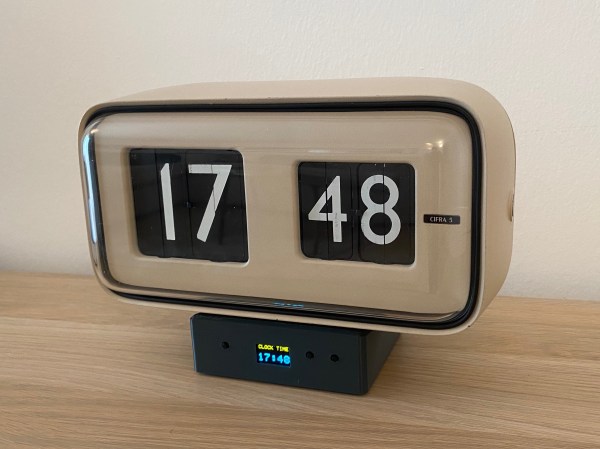
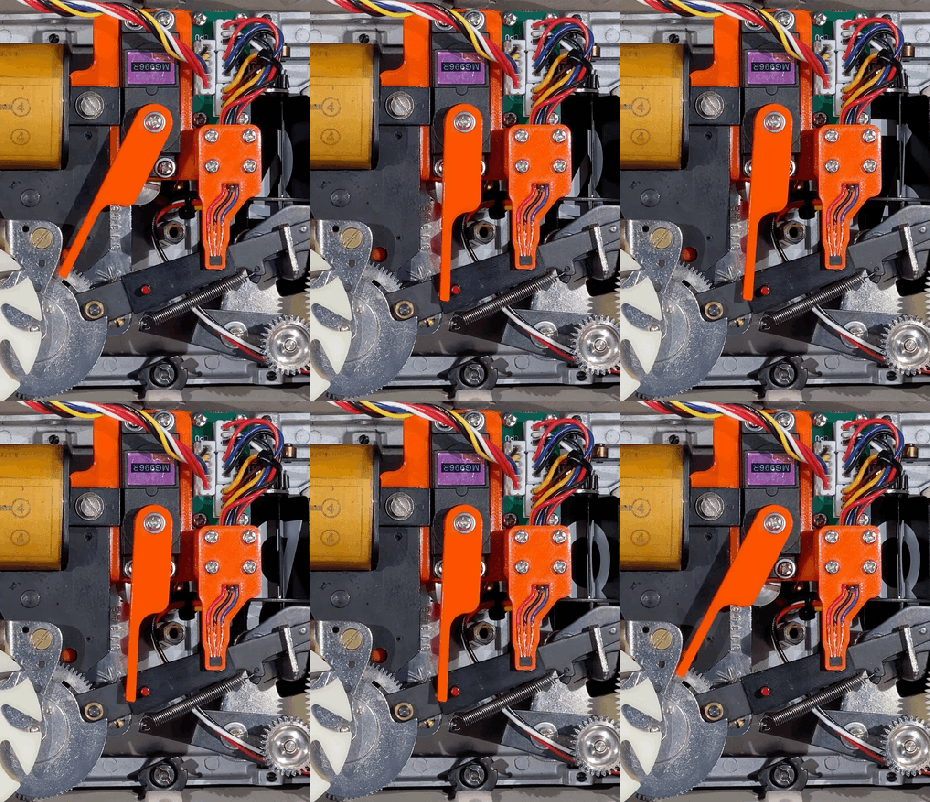
[Alfredo Cortellini] was perusing an antique shop in Bologna, and came across a nice example of a late 1950s timepiece, in the shape of a Solari Cifra 5 slave clock, but as the shop owner warned, it could never tell the time by itself. That sounded like a challenge, and the resulting hack is a nice, respectful tweak of the internals to bring it into the modern era. Since the clock requires a single pulse-per-minute in order to track time, the simplest track often followed is to open the back, set the correct time manually by poking the appropriate levers, and then let an external circuit take over clocking it. [Alfredo] wanted autonomy, and came up with a solution to make the thing fully adjust itself automatically.

Electronics-wise, initial prototyping was performed with a Nucleo 32 dev board and a pile of modules, before moving to a custom PCB designed in Altium Designer. An STM32G031 runs the show, with a few push buttons and a SSD1306 OLED display forming the UI.

Using some strategically-placed magnets and hall effect sensors, the status of the internal mechanism could be determined. Minute advancements were effected by driving the clock’s 24V electromagnet with a DRV8871 motor driver IC, the power supply for which was generated from the USB supply via a TPS61041 boost converter. In order to synchronise the mechanism with the electronics, the unit could have been driven to advance a minute at a time, but since every hour would need sixty pulses, this could take a while given the limited speed at which that could be done reliably. The solution was to sneak in a crafty MG996R high-torque servo motor, which pushes on the hour-advancement lever, allowing the unit to be zeroed much faster. Sensing of the zero-hour position was done by monitoring the date-advance mechanism, that is not used in this model of clock. Once zeroed, the clock could then be advanced to the correct time and kept current. Firmware source, utililising FreeRTOS can be found on the project GItHub, with schematics and Fusion360 files on the Hackaday.IO project linked above.

If you were thinking you’ve seen these Solari soft-flap displays here before, you’d be quite correct, but if you’re not so much interested in marking the passage of time, but bending such devices to your other indication whims, we’ve got you covered also.

Continue reading “A Solari Mechanical Digital Clock Hack With A Little Extra”

Adding Wireless Charging To The Switch Lite

The Nintendo Switch is a monstrously popular machine, and it’s had no difficulty raking in the bucks for the Japanese gaming giant, but there’s no denying that it’s technologically a bit behind the curve. Until the long-rumored “Pro” version of the Switch materializes, industrious gamers like [Robotanv] will simply have to make up for Nintendo’s Luddite ways by hacking in their own upgraded hardware.

In this case, [Robotanv] wanted to add Qi wireless charging to his Switch Lite. He figured that if all of his other mobile devices supported the convenient charging standard, why not his portable gaming system? Luckily, the system already supports the increasingly ubiquitous USB-C, so finding an aftermarket Qi receiver that would connect to it was no problem. He just needed to install it into the handheld’s case.

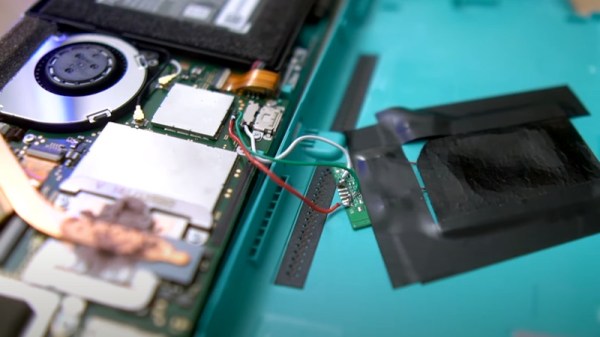
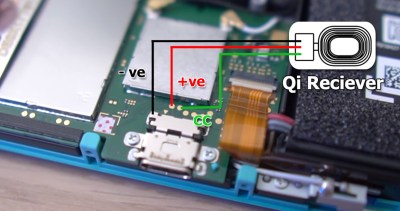
After liberating the Qi receiver from its protective pouch enclosure to get it a bit thinner, [Robotanv] taped it to the inside of the system’s case and ran thin wires to the rear of the USB-C port. As luck would have it, Nintendo was kind enough to put some test pads for the power pins right behind the port, which made for an ideal spot to connect the charger.

At first he only connected the positive and negative lines from the charger, but quickly realized he also had to connect the CC pin to get the juice flowing. After that, it was just a matter of buttoning the system back up. All told, it looks like a pretty simple modification for anyone who’s not bashful about taking a soldering iron to their $199 console.

We’ve seen these Qi receivers retrofitted into devices before, and it remains an excellent way to add the feature not only to commercial products, but to your own projects.

Continue reading “Adding Wireless Charging To The Switch Lite”