[Daniel Lange] and [Felix Domke] gave a great talk about the Volkswagen emissions scandal at this year’s Chaos Communication Congress (32C3). [Lange] previously worked as Chief architect of process chain electronics for BMW, so he certainly knows the car industry, and [Domke] did a superb job reverse-engineering his own VW car. Combining these two in one talk definitely helps clear some of the smog around the VW affair.
[Lange]’s portion of the talk basically concerns the competitive and regulatory environments that could have influenced the decisions behind the folks at VW who made the wrong choices. [Lange] demonstrates how “cheating” Europe’s lax testing regime is fairly widespread, mostly because the tests don’t mimic real driving conditions. But we’re not sure who’s to blame here. If the tests better reflected reality, gaming the tests would be the same as improving emissions in the real world.
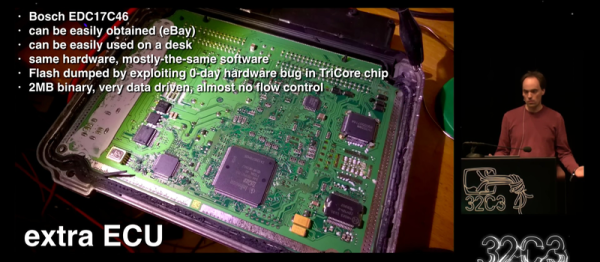
As interesting as the politics is, we’re here for the technical details, and the reverse-engineering portion of the talk begins around 40 minutes in but you’ll definitely want to hear [Lange]’s summary of the engine control unit (ECU) starting around the 38 minute mark.
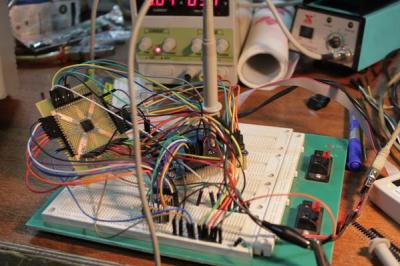
[Domke] starts off with a recurring theme in our lives, and the 32C3 talks: when you want to reverse-engineer some hardware, you don’t just pull the ECU out of your own car — you go buy another one for cheap online! [Domke] then plugged the ECU up to a 12V power supply on his bench, hooked it up, presumably to JTAG, and found a bug in the firmware that enabled him to dump the entire 2MB of flash ROM into a disassembler. Respect! His discussion of how the ECU works is a must. (Did you know that the ECU reports a constant 780 RPM on the tacho when the engine’s idling, regardless of the actual engine speed? [Domke] has proof in the reverse-engineered code!)
The ECU basically takes in data from all of the car’s sensors, and based on a number of fixed data parameters that physically model the engine, decides on outputs for all of the car’s controls. Different car manufacturers don’t have to re-write the ECU code, but simply change the engine model. So [Domke] took off digging through the engine model’s data.
Long story short, the driving parameters that trigger an emissions reduction exactly match those that result from the EU’s standardized driving schedule that they use during testing — they’re gaming the emissions tests something fierce. You’ve really got to watch the presentation, though. It’s great, and we just scratched the surface.
And if you’re interested in our other coverage of the Congress, we have quite a collection going already.