Arduino-Powered Alarm System Has All The Bells And Whistles

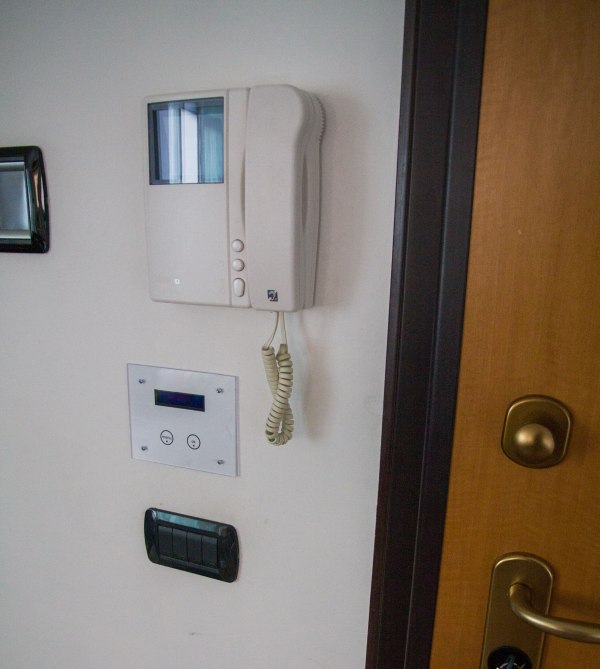
Put aside all of the projects that use an Arduino to blink a few LEDs or drive one servo motor. [IngGaro]’s latest project uses the full range of features available in this versatile microcontroller and has turned an Arduino Mega into a fully-functional home alarm system.

The alarm can read RFID cards for activation and control of the device. It communicates with the front panel via an I2C bus, and it can control the opening and closing of windows or blinds. There is also an integrated GSM antenna for communicating any emergencies over the cell network. The device also keeps track of temperature and humidity.

The entire system can be controlled via a web interface. The Arduino serves a web page that allows the user full control over the alarm. With all of that, it’s hard to think of any more functionality to get out of this tiny microcontroller, unless you wanted to add a frickin’ laser to REALLY trip up the burglars!

RFID Audio Book Reader For The Visually Impaired

When [Willem] visited home last year, he stopped in at his grandparents’ house and found that his very active 93-year-old grandfather had recently gone almost completely blind and was passing the days just sitting in a chair. [Willem] suggested that he listen to audio books, but his grandfather wasn’t receptive to the idea until [Willem] convinced him that the well-narrated ones can be very gripping and entertaining. Once his grandfather was on board, [Willem] knew that he needed a much more accessible solution than a tiny device with tiny controls, so he built an RFID audio reader using a Raspberry Pi.

[Willem] has posted the build details at his personal site. Essentially, the box you see above contains a Raspi and an RFID reader. He created different ‘books’ by placing RFID cards inside of DVD boxes, which makes them more tangible and accessible. When a book is placed on the box, the RFID reader tells the Pi which mp3 files to load. The large colored buttons let the user pause, rewind 20 seconds, and control the volume.

We love to see this kind of build. It’s simple, effective, and greatly enhances the user’s quality of life. [Willem]’s grandfather loves it and uses it every day.

Disabling Tap To Pay Debit Cards

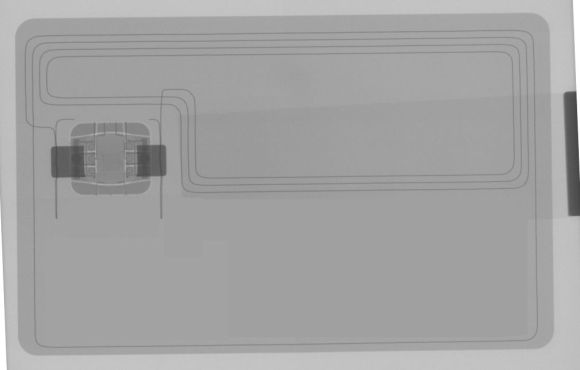
XRAY of Debit Card

Some people aren’t too crazy about the rush of RFID enabled credit & debit cards, and the problem is, you don’t really have a choice what card you get if the bank sends you a new one! Well if you really don’t like this on your card for whatever reason, it’s pretty easy to disable.

[James Williamson] recently got a new debit card with RFID technology — the problem is it was messing with his access card at work, the readers would beep twice, and sometimes not work. He decided to disable it because of this and that he didn’t really use the tap to pay feature, nor was he completely convinced it was as secure as the bank said.

Since these RFID chips use antennas made of copper wire, he could have just started slicing his card with a knife to break the antenna — but, since he has access to a CT scanner, he thought he’d scan it to figure out where everything was.

Simply make a small notch in the edge of your card, or snip off one of the corners. This breaks the antenna and prevents power to the chip when held near a reader — though if you don’t have access to a CT scanner you might want to double-check next time you buy something!

Now there is another side to this — maybe you actually like the whole tap to pay thing, well, if you wanted to you could get a supplemental card, dissolve it in acetone, and then install the RFID chip into a finger ring for Jedi-like purchasing powers!

Quick And Dirty RFID Door Locks Clean Up Nice

homemade RFID Door Locks

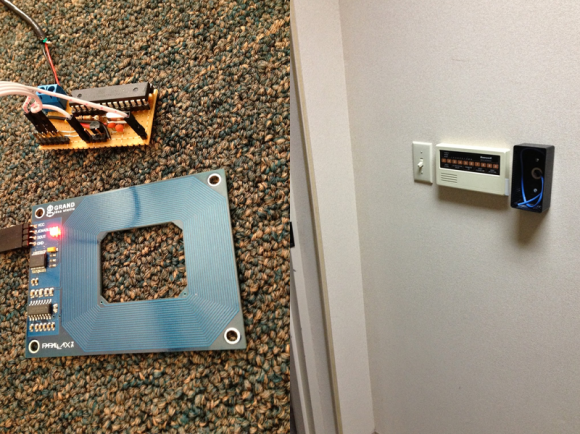
[Shawn] recently overhauled his access control by fitting the doors with some RFID readers. Though the building already had electronic switches in place, unlocking the doors required mashing an aging keypad or pestering someone in an adjacent office to press a button to unlock them for you. [Shawn] tapped into that system by running some wires up into the attic and connecting them to one of two control boxes, each with an ATMega328 inside. Everything functions as you would expect: presenting the right RFID card to the wall-mounted reader sends a signal to the microcontroller, which clicks an accompanying relay that drives the locks.

You may recall [Shawn’s] RFID phone tag hack from last month; the addition of the readers is the second act of the project. If you’re looking to recreate this build, you shouldn’t have any trouble sourcing the same Parallax readers or building out your own Arduino on a stick, either. Check out a quick walkthrough video after the jump.

Continue reading “Quick And Dirty RFID Door Locks Clean Up Nice”

PiGates Validates Your Concert Tickets

gatespi

[Seph] works for a company that handles ticketing for concerts and special events. One of his primary tasks is to check for counterfeit tickets at the gates of an event. Depending on the venue, this can be mag-stripes, bar codes, or one of several breeds of RFID. Until recently, netbooks coupled with USB readers performed the task. The netbooks weren’t a great solution though – they were expensive, relatively fragile, and took up more space than necessary.

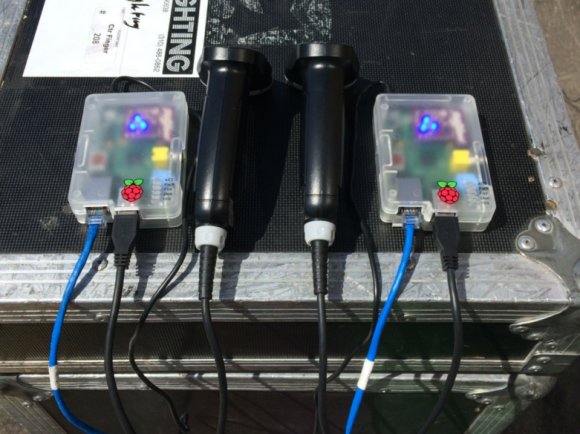
[Seph] had a better idea. He created a ticket validation system using a Raspberry Pi. The Pi sits in a translucent case with a PiGlow RGB LED board. A USB reader (in this case a bar code reader) plugs into one of the Pi’s USB ports. These readers can operate in several modes, including keyboard emulation, which [Seph] chose because it wouldn’t require any driver work.

Using PiGates is so simple even a drummer could handle it. Normally the Pi glows blue. When a ticket is scanned, [Seph’s] python script reads the code and verifies it against an online database.If the ticket is valid, the Pi will glow green. A counterfeit ticket is indicated by flashing red LEDs.

Click past the break for more on PiGates.

Continue reading “PiGates Validates Your Concert Tickets”

RFID Tag Cell Phone

Simple Hack Puts An RFID Tag Inside Your Mobile Phone

RFID security systems have become quite common these days. Many corporations now use RFID cards, or badges, in place of physical keys. It’s not hard to understand why. They easily fit inside of a standard wallet, they require no power source, and the keys can be revoked with a few keystrokes. No need to change the locks, no need to collect keys from everyone.

[Shawn] recently set up one of these systems for his own office, but he found that the RFID cards were just a bit too bulky for his liking. He thought it would be really neat if he could just use his cell phone to open the doors, since he always carries it anyways. He tried searching for a cell phone case that contained an RFID tag but wasn’t able to come up with anything at the time. His solution was to do it himself.

[Shawn] first needed to get the RFID tag out of the plastic card without damaging the chip or antenna coil. He knew that acetone can be used to melt away certain types of plastic and rubber, and figured he might as well try it out with the RFID card. He placed the card in a beaker and covered it with acetone. He then sealed the beaker in a plastic bag to help prevent the acetone from evaporating.

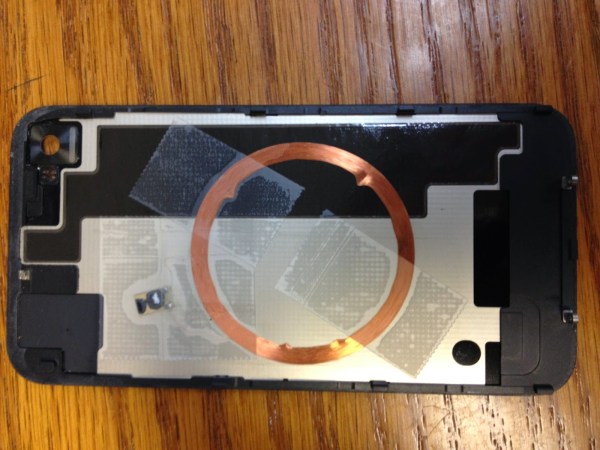
After around 45 minutes of soaking, [Shawn] was able to peel the plastic layers off of the electronics. He was left with a tiny RFID chip and a large, flat copper coil. He removed the cover from the back of his iPhone 4S and taped the chip and coil to the inside of the phone. There was enough room for him to seal the whole thing back up underneath the original cover.

Even though the phone has multiple radios, they don’t seem to cause any noticeable interference. [Shawn] can now just hold his phone up to the RFID readers and open the door, instead of having to carry an extra card around. Looking at his phone, you would never even know he modified it.

[Thanks Thief Dark]

Upgrade Your Garage Door With Arduino And RFID

RFID Garage Door Opener

[Jason] really wanted to build an RFID controlled garage door opener and decided to turn to Arduino to get the job done. For someone who’s never worked with an Arduino before, he really seemed to know what he was doing.

The Arduino acts as the brains of the operation while an off-the-shelf NFC/RFID reader module is used to read the RFID tags. To add new keys to the system, [Jason] simply swipes his “master” RFID key. An indicator LED lights up and a piezo speaker beeps, letting you know that the system is ready to read a new key. Once the new key is read, the address is stored on an EEPROM. From that point forward the new key is permitted to activate the system.

Whenever a valid key is swiped, the Arduino triggers a relay which can then be used to control just about anything. In this case, [Jason] plans to use it to control his garage door. The system also has a few manual controls. First is the reset button. If this button is held down for two seconds, all of the keys from the EEPROM are erased. This button would obviously only be available to people who are already inside the garage. There is also a DIP switch that allows the user to select how long the relay circuit should remain open. This is configurable in increments of 100ms.

For now the circuit is wired up on a couple of breadboards, but it might be a good idea to use something more permanent. [Jason] could always take it a step further and learn to etch his own PCB’s. Or he could even design a board in Eagle CAD and order a real printed board. Don’t miss the video description of the RFID system below. Continue reading “Upgrade Your Garage Door With Arduino And RFID”