1D Fireworks Are Nice And Quiet

Maybe you do it out of respect for the dogs and parents of young children in the neighborhood. Or maybe you do it because they’re harmful to the environment, or just because it’s too darn cold outside. Whatever your reasoning for not setting off fireworks, don’t fret — you can probably put together your own silent one-dimensional “fireworks” display from what you’ve got in the parts bin.

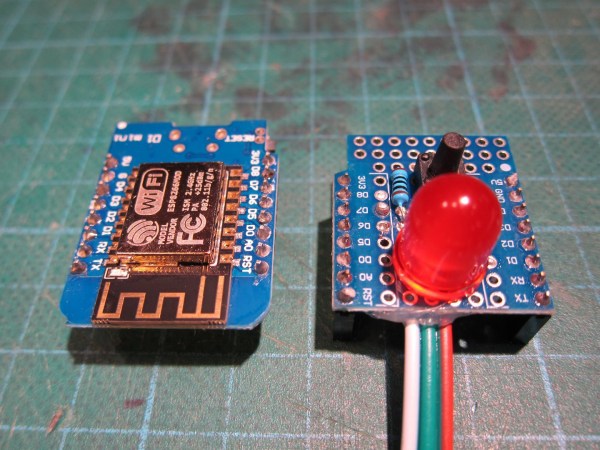
[Daniel Westhof]’s design is simple, requiring little more than a Wemos D1 Mini and a strip of WS2812 LEDs. Once activated, a red rocket shoots up from the ground and detonates, sending lights in both directions on the strip to imitate the bombs bursting in air. It’s controlled with a small push button switch, and there’s a deliciously large red LED indicator that shows the thing is ready for detonation.

You might be surprised to find that there’s a wide array of 1D gaming and animation projects out there, many of which made possible by the ubiquitous addressable RGB LED strip. We’ve seen a dungeon crawler, at least two different versions of the classic PONG, and even the makings of a simplified Wolfenstein.

Backyard UFO Is Out Of This World

Halloween may be over for another year, but UFOs in your yard are cool year-round. This one might take the cake. [frydom.john]’s excellent UFO is fully programmable and contains about 2000 addressable RGB LEDs, smoke, a laser-lit ramp, and of course, an alien crew.

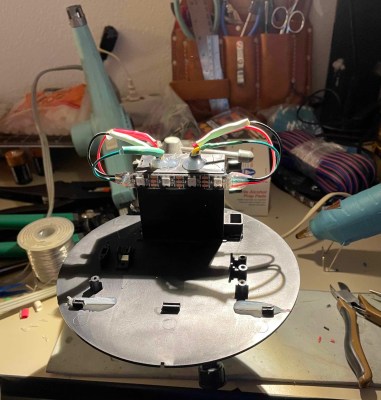
Under the hood of the wooden frame, you’ll find a Teensy 4.1 running the blinkenlights. There’s also a hacked smoke machine, because what’s a UFO without smoke or fog emanating from underneath? There are six PC fans to blow it around and recycle it, and the ramp runs on a linear actuator.

[frydom.john]’s project notes (PDF), which they refer to as ‘scrappy/hacky’ are also available. We beg to differ a bit on the scrappy/hacky part; it’s 60 pages long and full of photos and diagrams and charts. Even so, it may not be enough for you to replicate this extraterrestrial vehicle, so [frydom.john] is open to questions. Be sure to check this thing out after the break.

Want to have your UFO lift off of the ground? It’s possible with the Coandă effect.

Continue reading “Backyard UFO Is Out Of This World”

2023 Halloween Hackfest: Musical Jack-o-Lanterns Harmonize For Halloween

Halloween is many things to many people. For some, it’s a chance to dress up and let loose. For others, it’s a chance to give everyone in the neighborhood a jump scare. For [Aaron], it’s the perfect time to put on a show in the yard with some musical, light-up jack-o-lanterns.

[Aaron] came across some deeply-discounted light-up jack-o-lanterns a few years ago. They all had one of those Try Me buttons that’s powered by a couple of coin cells and uses a temporary two-wire connection to the PCB, and [Aaron] figured he could remotely control them using this port of sorts.

Now the guts are made of addressable RGB LEDs that are connected through the battery compartment via weatherproofed pigtails.

On the control side, he has a Raspberry Pi 3, an amplifier, and a couple of power supplies all housed in a weatherproof box. Since it’s not possible to multiplex both the lights and the audio on a Pi 3, he added a USB sound card into the mix.

Be sure to check out the awesome demo video after the break, followed by a pumpkin conversion video.

If you’re more into scaring people, carve up an animated evil-eye pumpkin.

Continue reading “2023 Halloween Hackfest: Musical Jack-o-Lanterns Harmonize For Halloween”

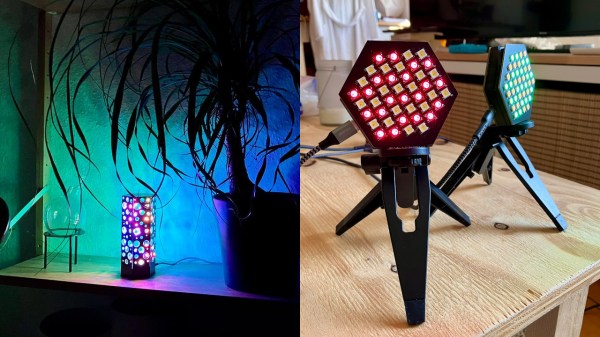
Two lamp versions side by side - one desk lamp and one spotlight lamp, both turned on and shining

A Tale Of Two LÄMPs

Building with LEDs is a hacker pastime like no other – what’s more, if you keep playing with LED tech out there, you’re bound to build something elegant and noteworthy. For today’s fix of beautiful LED devices, take a look at the two LÄMP creations of [Jana Marie], both LED projects building upon one another. It’s not just your regular RGB LEDs – she adds a healthy mix of white and yellow LEDs, making for colors way more natural-looking and pleasant to the eye!

The first one is the LAEMP-Panel, a two-PCB sandwich, combining into a spot light you can use for any purpose where some extra LED would really shine – be it photography, accent, or mood lighting. All of these LEDs are individually controlled and from the SK6812 family, half of them YYW and half RGB variation. As for the base board, the controller is an ESP32, paired to an E75 ZigBee module – this spot light is built to be part of your home’s ZigBee network. If you look at the base board’s KiCad files, you will also notice six-pin headers on five edges – and they’re there for a reason.

The sister project to this one, the LAEMP-Prism, is a remarkable hexagonal lamp built upon the LAEMP-Panel’s PCB base, but in a desk-friendly form-factor. Six extra side panels with a generous amount of circular cutouts give you a total of 291 LEDs, mix of yellow, white and RGB as before – we got to say, from the pictures we found, it looks like a gorgeous thing to have in your house!

Such is a story of building a spotlight and a desk lamp, both using the same hardware base to accomplish quite different purposes. As is [Jana-Marie]’s tradition, these two lamps are fully open-source, complete with instructions on assembling them – everything is ready for you if you’d like to build one of your own, whichever version it may be! When it comes to lamp-building projects that excel at looks, one can’t forget the two other lamps we’ve seen a few years ago – one built with fiber optics, and another in the shape of the Moon.

Giant Spinning POV Christmas Tree

Spinning Holographic POV Christmas Tree Of Death

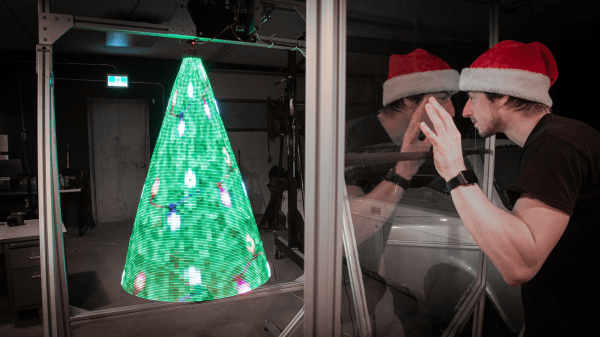
[Sean Hodgins] really harnessed the holiday spirit to create his very own Giant Spinning Holographic Christmas Tree (of Death). It’s a three-dimensional persistence-of-vision (POV) masterpiece, but as a collection of rapidly spinning metal elements, it’s potentially quite dangerous as well. As [Sean] demonstrates, the system can display other images and animations well beyond the realm of mere holiday trees.

Initial experiments focused on refining the mechanical structure, bearings, and motor. A 1/2 horsepower A.C. motor was selected and then the dimensions of the tree were “trimmed” to optimize a triangular frame that could be rotated at the necessary POV speed by the beefy motor.  A six-wire electrical slip ring allows power and control signaling to be coupled to the tree through its spinning central shaft.

The RGB elements are SK9888 LEDs also know as DotStar LEDs. DotStar LEDs are series-chainable, individually-addressable RGB LEDs similar to NeoPixels. However, with around 50 times the pulse width modulation (PWM) rate, DotStars are more suitable for POV applications than NeoPixels.  The LED chain is driven by a Raspberry Pi 4 single board computer using a clever system for storing image frames.

If deadly rotational velocity is not your cup of tea, consider this slower spinning RGB Christmas tree featuring a DIY slip ring. Or for more POV, may we suggest this minimalist persistence-of-vision display requiring only a few LEDs and an ATtiny CPU.

Continue reading “Spinning Holographic POV Christmas Tree Of Death”

Exploded version of the Cistercian display

Serial Cistercian Digit Module

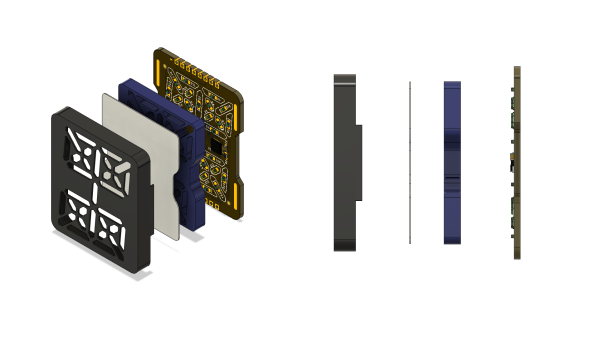
There’s no doubt that the 7-segment display is a gold standard for displaying lighted digits. But what about a throwback to an older system of displaying numbers — Cistercian? With thirty-one 0805 LEDs, [Josue Alejandro] made a simple module displaying a single Cistercian digit (any from 0-9999).

The first iteration used castellated edges and required a significant number of GPIO, so on the next rev, he switched to a serial-to-parallel converted from Lumissil (IS31FL3726A). A diffuser and spacer were printed from PLA and made for an incredibly snazzy-looking package.

Of course, it couldn’t stop there, and a third revision was made that uses SK6812 Neopixels, allowing full RGB capability. All the design documents, layout files, and incredibly detailed drawings are available on GitHub. What makes this incredibly handy is having a module you can easily add to a project. Perhaps even as a component in an escape room in a box that would allow you to flash multiple numbers. Or perhaps as a stylish clock. We’d even go so far as to challenge someone to create a calculator by combining several of these modules with this keypad.

The Rollercoaster Of Developing The Ultimate Hackable Keyboard

When designing anything with “hackable” in the punchline, scope creep is an integral part of the process. You end up trying to create something to potentially be an infinite number of things for an infinite number of users. [Zack Freedman] is going really deep down the rabbit hole with his MiRage keyboard and has been documenting the progress in his usual entertaining style, with some cautionary notes included.

The most fascinating tale from this come about as a result of adding RGB LEDs beneath the keys, while still allowing everything to function when the keyboard is split in two. Thanks to an IO expander chip in one side of the board, a standard TRRS audio cable is enough to link both sides together. But the addition of addressable LEDs meant more lines were required.
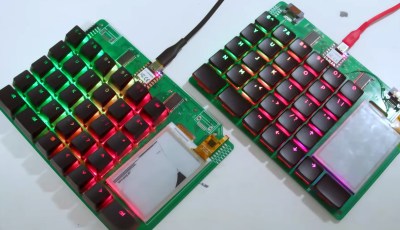
[Zack] thought he had found a solution in the form of SATA cables, but it turns out all SATA cables internally connect pins 1,3, and 7, making them useless for this application. He realized he had no choice but to add a second microcontroller to the “dumb” side of the keyboard and return to I2C over a TRRS cable. However, the RP2040-based Seeed XIAO’s I2C absolutely refused to play along. After a fortnight of frustrating debugging, it turns out there was a bug in the pin definitions. Fortunately, this also revealed that the XIAO had an undocumented secondary I2C interface, which he plans to configure as a peripheral to make the keyboard almost infinitely expandable with additional keys.

An earlier version of the MiRage featured tactile OLED displays, but it turns out the thin panes of glass don’t handle repeated flexing well, so they had to be scrapped. In their place came a touchscreen E-paper display, but now this seems to be evolving into a pluggable module for any input device that your heart desires, including possibly a haptic SmartKnob. Another major update are PCB footprints that support both CHOC and MX switches.

It all started with the MiRage V1 keyboard intended to for use in an updated version of [Zack]’s cyberdeck. After realizing how many people were interested in the keyboard but not the cyberdeck, he shifted focus to refining the MiRage.

This project still has some way to go, so we’ll certainly be keeping our eye on it. In the meantime, we’ve recently covered another exceptionally customizable keyboard that might catch your fancy.

Continue reading “The Rollercoaster Of Developing The Ultimate Hackable Keyboard”