Complete Guide To Compiling OpenWRT

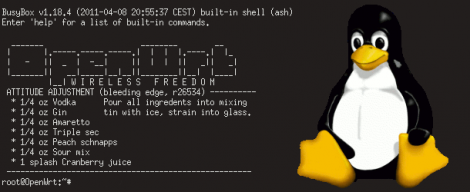
Regular reader [MS3FGX] recently wrote a guide to compiling OpenWRT from source. You may be wondering why directions for compiling an open source program warrant this kind of attention. The size and scope of the package make it difficult to traverse the options available to you at each point in the process, but [MS3FGX] adds clarity by discussion as much as possible along the way.

OpenWRT is an open source alternative firmware package that runs on may routers. It started as a way to unlock the potential of the Linksys WRT54G. But the versatility of the user interface, and the accessibility of the Linux kernel made it a must-have for any router. This is part of what has complicated the build process. There are many different architectures supported and you’ve got to configure the package to build for your specific hardware (or risk a bad firmware flash!).

You’ll need some hefty hardware to ease the processing time. The source package is about 300 MB but after compilation the disk usage will reach into the Gigabyte range. [MS3FGX] used a 6-core processor for compilation and it still took over 20 minutes for a bare-bones distribution. No wonder pre-built binaries are the only thing we’ve ever tried. But this is a good way to introduce yourself to the inner workings of the package and might make for a frustrating fun weekend project.

Extreme Finger Painting With A Router

Most of the time, CNC machines are used for very precise and exacting. There is another way that allows for a more “hands on” approach to routers and mills that allows for a lot more creativity and freedom. The touchCNC these guys whipped up allows anyone to finger paint with a friggin router.

From the forum post the guys sent in, they wrote a simple Android app for a tablet that allows for router control via a touch interface. There are three parts to the software. An Android app sends finger positions to a java server running on the CNC computer. This server dumps gcode into a text file. A vbscript inside the router software keeps reading from the specified file. With all this, finger movements are translated directly into machine movements.

The controls are fairly simple, like a real-life representation of Microsoft Paint. Of course there’s a ‘tap GOTO’ command that moves the router to a specified position. The router bit is lowered onto the work piece with a ‘long tap’ and stays lowered until the finger is released.

You can check out the code for touchCNC, but the guys are working on a few additional features like converting the tablets gyro output to gcode. Until then, enjoy the videos the guys posted after the break.

Continue reading “Extreme Finger Painting With A Router”

RAM Upgrade For WRT300N Router

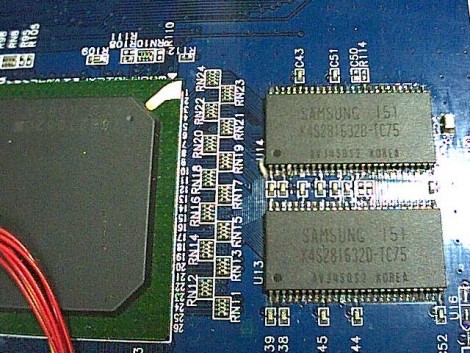
[Heli] had a WRT300N wireless router sitting around collecting dust. He decided to squeeze at bit more entertainment value out of it by seeing if he could pull off a RAM upgrade. He managed to double the router’s RAM and posted a walk through (translated) to help you do the same.

Swapping out surface mount RAM chips isn’t the easiest thing in the world and you must wondering what prompted this. It seems he wanted to run the LuCI package on the router but it was slow (or even incapable) of booting with the stock hardware’s 16 Mb. He first sourced some pin-compatible replacement chips from an old Pentium III computer. While his soldering iron was hot, he also wired up a JTAG header, which connects via the red wires just visible to the left. When he first fired up the unit he was happy that it was able to boot, but it still only detected 16 Mb.

It turns out you’re going to need to roll your own kernel to get it to take advantage of the upgrade. Source code for OpenWRT is easy to find and there’s plenty of guides for compiling it. If you try this, make sure to read [Heli’s] post carefully as he’s got some important configuration information that will help you to avoid bricking your router.

Unbricking And Upgrading An ASUS Wl520 Router

unbricking_upgrading_asus_wl520

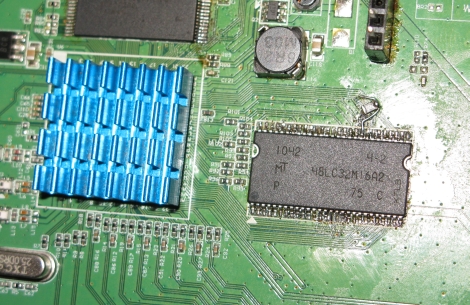
[Andrew] has an ASUS wl520-gU router that he is pretty fond of, despite its numerous problems. CPU clock bug aside, the router only has 16MB or memory like many others on the market. While tooling around with the bootloader he bricked the device, so he decided it was time for an overhaul.

After some searching online, he found that the router could be unbricked by shorting out one of the pins on its flash chip. With an emergency unbrick button installed on the board, he can now reset it in seconds by power cycling the device.

Now that he had a working router again, he proceeded to remedy his initial gripe – the lackluster amount of memory. He soldered in a 512Mbit (64MB) module in the original chip’s place, crossed his fingers and booted the router. It started up just fine, so he ran a few commands to instruct the router to recognize the new memory capacity. After rebooting, he found that it only recognized 32MB of RAM, which was remedied by soldering a 22 Ohm resistor to one of the module’s pins.

It did take a bit of careful soldering to get things upgraded and working, but we think it was well worth the effort.

Freakin’ Huge CNC Router

[Tom] sent in a gigantic 3-axis router that he pieced together during a 2 week-long work experience placement. Looking at this picture showing a 12-inch ruler on the work area, we realized that this may be the largest CNC router we’ve seen on Hack A Day.

[Tom]’s employer gave him some obsolete axes, so piecing the mechanical components together was very easy. The only real problem was interfacing the CNC controller to a computer. This meant [Tom] had to convert G Code to the code used by the antiquated NSK axes. Where G Code defines arcs with a start point, end point, and radius, the NSK code defines arcs with a start point, end point, and another point along the arc. It’s a tricky bit of math, but [Tom] built some software that did this in Visual Basic.

Right now, [Tom] only has a pen tool attached to the router; you can check that in action after the break. We’re trying to imagine what we would do with a 4 m² work area; this could easily be used to make a giant reprap or other 3D printer.

Continue reading “Freakin’ Huge CNC Router”

Cellphone Controlled Retro-radio Stores And Plays Your Digital Library

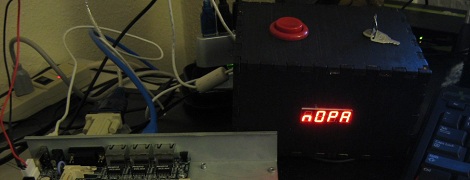
[Autuin] was worried about having desirable electronics stolen while on the road with his band. He didn’t want to take a laptop along on tour, but he didn’t want to be without his music either. To solve this problem, he built a music player inside of a cheap-looking radio. His write-up covers two different portable MP3 solutions, but it’s the second rendition that catches our attention.

After hollowing out the old radio he filled the void with an Asus WL-HDD 2.5. That hardware is meant to be an easy way to add network storage; it houses a laptop hard drive and has WiFi and Ethernet connectivity. But it also has one USB port, and can be hacked to add a second. [Autuin] did just that, using the two USB connections to add a Bluetooth dongle and a USB sound card. Music is synced with the hard drive via some cat-5 cable that’s hidden in the battery compartment of the vintage box. The NAS runs Linux, and the audio playback software is controlled though a Mobile Java application running on a somewhat broken cellphone. That’s an idea that might find its way into our next project.

Using A Router As A Linux-based PID Controller

espresso_machine_pid

[Nathan] had an small router kicking around and thought that he might as well put it to good use. He had always been interested in getting a better handle on his espresso machine, and figured that the router would be a perfect Linux-based PID controller.

He installed OpenWRT on the router, then disassembled it in order to get access to the router’s GPIO pins. He built a small PCB that allows him to get temperature info from the machine to the router using i2c. [Nathan] put together a PID package for OpenWRT, allowing him to control the machine over SSH, though he may build in a user-friendly web interface sometime in the future.

He says that most espresso machine PID controllers he has seen come in the form of big ugly boxes slapped on the side of the machine’s case, though we have to disagree with him on that point. Opinions aside, he is going for a minimalist design, and while he says that he is only about half way through the project, we think things are looking promising so far.

When everything is said and done, we hope to get a much closer look at all of his code, schematics, and more information on the router he used as well.