Laptop Backlight Converted From CCFL To LED

ccfl-to-led-backlight-conversion

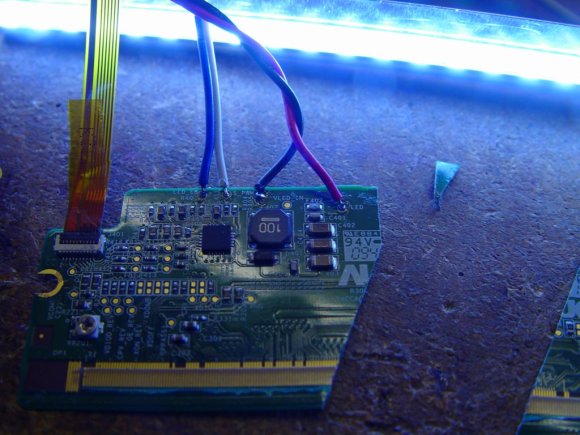
[Lee Davison] acquired an Acer laptop that didn’t have a display anymore. He had enough parts on hand to add in an LCD panel and give it a CCFL backlight. But when he started looking for an inverter to drive the backlight he couldn’t find one. What he did have on hand were some smashed screens that had LED backlights and so the CCFL to LED backlight conversion project was born.

He tore into the LED display and found the driver board. Unfortunately he didn’t locate the datasheet for the exact LED driver, but he found one that was similar and was able to trace out the support circuitry on the PCB. This let him cut away the unneeded parts of the board without damaging the driver. He didn’t want to pull out the CCFL tubes until he was sure the LED conversion would work so he tried it out on another smashed panel (where does he come up with all these parts) and it worked great. Once he got everything in place he was very happy with the results. The only drawback to the system is that he doesn’t have the ability to dim the backlight.

Smashed Tablet In NES Case Lives Out Its Days As An Emulator

smashed-tablet-nes-emulator

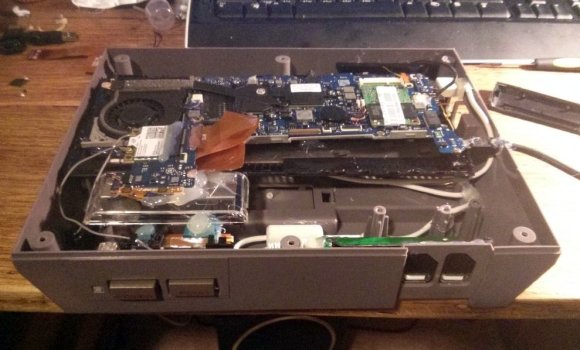
The creator of this project started off with a 7″ tablet he received from a coworker. The screen was horribly smashed from one corner spreading out through the entire surface. But the hardware inside still worked, including the HDMI out port. He ended up transplanting the tablet hardware for use as an emulator.

After a bit of sizing up it was determined that the tablet hardware would fit inside the case of a broken NES. The battery would have been a tough fit, but this thing is always going to need to be connected to a television so there’s no need to work without mains power. The back plate was cut down to size and used as a try for mounting the motherboard in the case. Before that step he wired up a USB hub and mounted it so that two ports could be accessed through the original controller port openings.

There’s no details on the software used, but the final image in the gallery shows a game of Starfox being played.

[Thanks Cody]

Using A Flashing LCD Monitor To Transfer Data

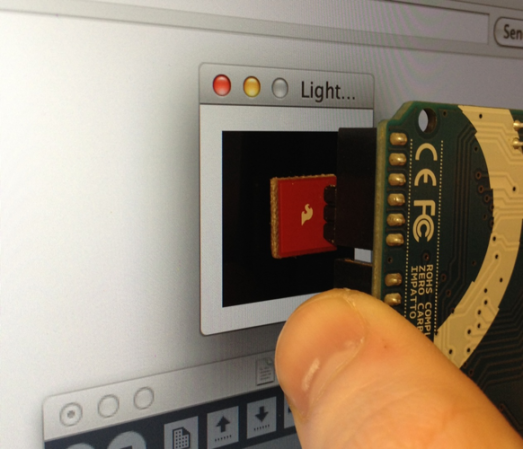
lcd-screen-data-transferWe love the concept of using an LCD screen to transfer data. The most wide-spread and successful method we know of is the combination of a QR code and the camera on a smart phone. But for less powerful/costly devices data can be transferred simply by flashing colors on the screen. That’s what [Connor Taylor] is testing out with this project. He’s using a TEMT6000 light sensor to turn a white and black flashing monitor into binary data.
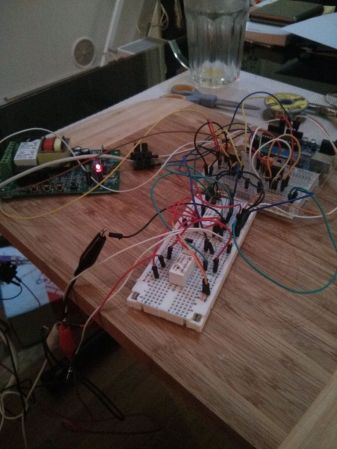
So far this is just a proof of concept that takes measurements from the light sensor which is held in front of a Macbook Retina display with different backlight levels. At 3/4 and full brightness it provides more than enough contrast to reliably differentiate between black and white when measuring the sensor with the Arduino’s ADC. What he hasn’t gotten into yet is the timing necessary to actually transfer data. The issue arises when you need to have multiple 1’s or 0’s in a row. We’ve tried this ourselves using an LDR with limited success. We know it’s possible to get it working since we’ve seen projects like this clock which can only be programmed with a flashing screen.

[Connor’s] choice of the TEMT6000 should prove to be a lot more sensitive than using just an LDR. We figure he could find a way to encode using multiple colors in order to speed up the data transfer.

Add Motorized Blinds To Your Home Theater

motorized-blinds

[Chipsy] found himself with an interesting problem. The room that serves his home theater has a wall mirror which reflects part of the screen during viewing. In an otherwise dark room this was very distracting. His solution was to add a blind that covers the mirror during viewing, but who wants to constantly pull that down and back up again? Since the motorized projection screen he is using has a remote control he figured out a way to motorize the blind and synchronize it with the screen’s remote.

The screen uses mechanical relays to switch the motor. He patched into these with an Arduino to detect whether the screen was going up or down. It was easy enough to use his own relay and motor with the blind, but he needed a way to stop the blind once it was in position. For covering up the mirror he simply sets an 18 second timer, but for retracting the blind he wanted precise alignment so he added a magnet and sense its position with a reed switch. See the synchronized screen and blind in the clip after the break.

Continue reading “Add Motorized Blinds To Your Home Theater”

Laptop LCD Resurrection Gets Some Clean Packaging

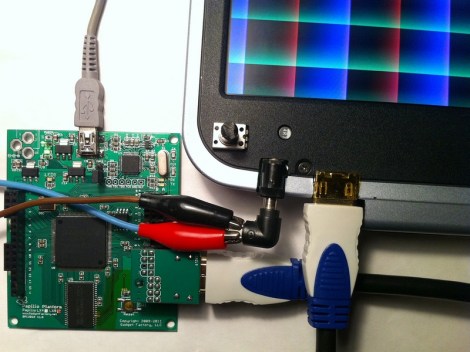
We love to see derivative works that take a great hack and make it even better. This LCD Laptop resurrection project is an excellent example. [Alex] took the work seen on this other FPGA LCD driver and delivered a leap forward on the final hardware packaging.

The link at the top drops you into the second page of [Alex’s] project thread. But if you go back to the beginning you’ll see the protoboard and spaghetti wiring which started off the process. Obviously if he plans to use this for a length of time it needs to be fortified or he’ll be cracking it open and grabbing a soldering iron again before long. But rather than just tidying up he ended up spinning his own circuit boards that make the screen look like it was manufactured to be used in this way.

He was able to mount the add-on board inside the LCD bezel, cutting out a space for the HDMI connector, barrel jack, trimpot, and the head of the inductor which was just a bit too large to fit inside. The trimpot allows him to adjust the LCD brightness. As far as we can tell the HDMI connector is just an easy way for him to deliver the drive signals from the Papilio board (FPGA) to the screen.

Using A Raspberry Pi As Your Travel Computer

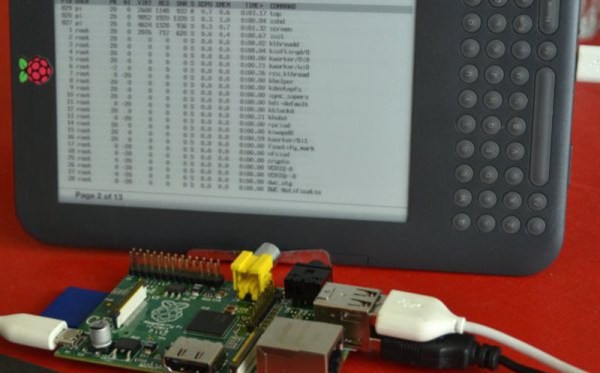
Do you think you could travel for the entire summer and leave your laptop at home? [Gef] did just that. With the help of his Kindle he used a Raspberry Pi as his travel computer. This was an easy association to think up, since he planned to bring the Kindle along as his reading material anyway. All it was going to take was some creative hacking to get it working as a display for the single-board computer.

The Kindle is merely connecting to the Raspberry Pi through a terminal emulator. This happens via USB, and requires that you Jailbreak the kindle and install a package called USBnetwork. The problem with the technique is that you’re going to go crazy trying to use the tiny keyboard that is built into the eBook reader. [Gef] decided to take a USB keyboard along with him, but how is he going to use it to control the terminal screen on the Kindle? The answer is the ‘screen’ application. We’ve used it a lot to keep programs running on a machine after we’ve exited from an SSH session. It turns out it can also be used to host multiple users on the same terminal session. Pretty neat!

[via Make]

A Fifty-dollar Projection Screen You Can Be Proud Of

[Lou] wrote in to share the fifty-dollar projection screen he built in his home. We’ve seen several of these projects lately. Unlike the one used at a lake cabin, or the other that fills an awkward alcove, this version doesn’t use fabric for the screen. He actually painted it right on the wall.

The key to achieving a great end product is to make sure your wall is flat. [Lou’s] instructional video (embedded after the break) shows how to patch holes in the wall, and repair high spots. Before beginning the process he uses his projector’s grid feature to map out the portion of the wall that will be used as a viewing area (that’s the grid seen on the screen above). Once the area has been marked with masking tape and carefully repaired he paints it with bright white or silver paint. You might also consider a paint additive for better results. We’ve seen sand blasting beads used for this purpose.

A frame is added to the area to make it look like a proper screen. This is nothing more than molding covered in black fabric. [Lou] stretches the fabric around the molding, using duct tape to hold it in place until it can be stapled down.

Continue reading “A Fifty-dollar Projection Screen You Can Be Proud Of”