Fail Of The Week: Capturing Data From A Laser Rangefinder

fotw-laser-measuring-tape

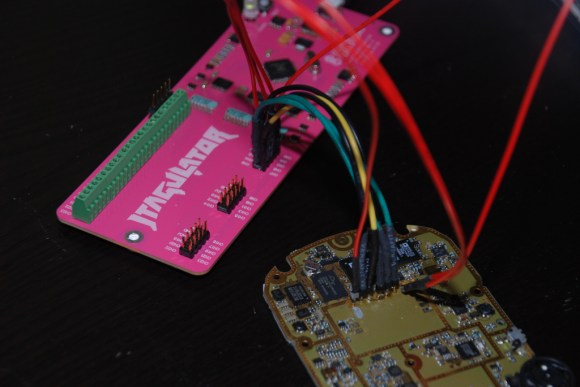
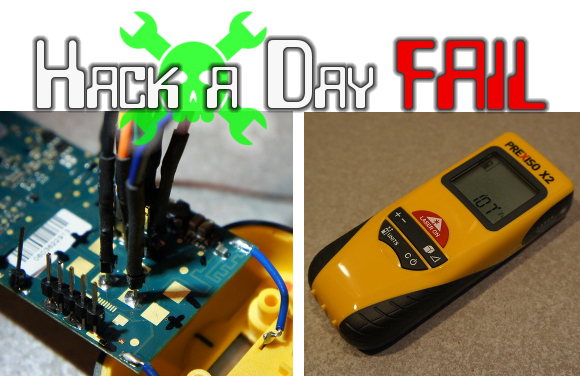
We’re changing it up this week with a reverse engineering fail which [Itay] pointed out to us. A couple of years ago [Nate] over at Sparkfun agreed to help a friend with a project that required precise distance measurement. He knew that laser rangefinders are a good way to go and mentions their use in golfing and the building trades. He picked up this handheld version billed as a laser tape measure. He put up a valiant effort to reverse engineer the PCB in hopes of finding a hook for the measurement data.

Obviously his endeavor failed or we wouldn’t be talking about it in this column. But there’s a lot to learn about his methods, and a few of the comments associated with his original post help to shed light on a couple of extra things to try.

Continue reading “Fail Of The Week: Capturing Data From A Laser Rangefinder”

Change The TV Channel Over IP

tv-channel-change-over-ip

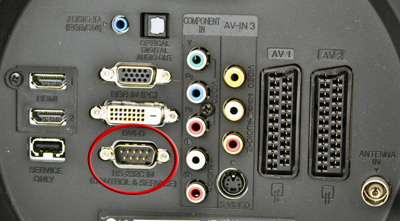
[Mustafa Dur] wrote in to tell us about his hack to control the television with a smartphone. Now the one-IR-remote-to-rule-them hacks have been gaining popularity lately so we assumed that’s how he was doing it. We were wrong. He’s using his satellite receiver to provide the Internet connection. It pushes commands to his LG 47LH50 TV which has an RS-232 port.

The image above is the back of another LG television (it came from a forum post about controlling the TV with a PC). [Mustafa] is using a Dreambox DM800 satellite receiver which also has a serial port an he can telnet into it. He searched around the Internet and discovered that it should be possible to connect the two using a null modem cable. His initial tests resulted in no response, but a tweak to the com port settings of the box got his first command to shut off the television. After a bit of tweaking he was able to lock in reliable communications which he made persistent by writing his own startup script. From there he got to work on a Python script which works as the backend for a web-based control interface.

If you want to find out what else you can do with this type of serial connection read about this hack which used a script to try every possible command combination.

Hacking A Medion WiFi Streaming Radio Found At Aldi

hacking-medion-streaming-wifi

On a shopping trip at Aldi [Aaron Christophel] came across this Medion streaming device which connects to your home network via WiFi and works as an Internet radio. He couldn’t resist buying one, and managed to do quite a bit of hacking on the device (translated) once he got it home.

His first order of business was a hardware teardown. An inspection of the board showed what was obviously an unpopulated footprint for a USB mini jack. He added the component, thinking it would allow him to connect it to a computer, but that didn’t work. To investigate the issue further he connected to the device’s serial port using the hard-to-guess credentials root and password. It’s running a Linux kernel and the lsusb command revealed that the USB is enabled as host mode. This mean you can attach mass storage… sweet!

He also did some firmware hacking. Above is the confirmation screen for flashing his altered image file. This resulted in a custom splash screen when it boots up.

Benchmarking USB Transfer Speeds

boards

[Paul Stoffregen], creator of the Teensy series of microcontroller dev boards, noticed a lot of project driving huge LED arrays recently and decided to look into how fast microcontroller dev boards can receive data from a computer. More bits per second means more glowey LEDs, of course, so his benchmarking efforts are sure to be a hit with anyone planning some large-scale microcontroller projects.

The microcontrollers [Paul] tested included the Teensy 2.0, Teensy 3.0, the Leonardo and Due Arduinos, and the Fubarino Mini and Leaflabs Maple. These were tested in Linux ( Ubuntu 12.04 live CD ), OSX Lion, and Windows 7, all running on a 2012 MacBook Pro. When not considering the Teensy 2.0 and 3.0, the results of the tests were what you would expect: faster devices were able to receive more bytes per second.  When the Teensys were thrown into the mix, though, the results changed drastically. The Teensy 2.0, with the same microcontroller as the Arduino Leonardo, was able to outperform every board except for the Teensy 3.0.

[Paul] also took the effort to benchmark the different operating systems he used. Bottom line, if you’re transferring a lot of bytes at once, it really doesn’t matter which OS you’re using. For transferring small amounts of data, you may want to go with OS X. Windows is terrible for transferring single bytes; at one byte per transfer, Windows only manages 4kBps. With the same task, Linux and OS X manage about 53 and 860 (!) kBps, respectively.

So there you go. If you’re building a huge LED array, use a Teensy 3.0 with a MacBook. Of course [Paul] made all the code for his benchmarks open source, so feel free to replicate this experiment.

Giving The Nexus 4 A Serial Port

Having a serial port on any Linux box is always useful, but with the tiny computers we’re carrying around in our pockets now, that isn’t always an option. Some of the more advanced phones out there break out a UART on their USB OTG port, but the designers of the Nexus 4 decided to do things differently. They chose to put the Nexus 4’s serial port on the mic and headphone input, and [Ryan] and [Josh] figured out how to access this port.

Basically, the Nexus 4 has a tiny bit of circuitry attached to the microphone input. If the Nexus detects more than 2.8 Volts on the mic, it switches over to a hardware UART, allowing everything from an Arduino to an old dumb terminal to access the port.

The guys used a USB to serial FTDI board wired up to a 3.5 mm jack with a few resistors to enable the hardware UART on their phone. With a small enclosure, they had a reasonably inexpensive way to enable a hardware serial port on a mobile device with GPS, cellular, a camera, and a whole bunch of other sensors that any portable project would love.

EDIT: An anonymous little bird told us this: “You should add a note to the Nexus 4 serial cable post that TX and RX need to be 1.8V.  If you use 3.3V USB cables, you will likely eventually fry something.  FTDI makes 1.8V IO cables that work – you just need to make the trigger voltage for the mic line.” Take that for what you will.

HP16500B Logic Analyzer Controlled With RS-232 And More

hp16500b-logic-analyzer

We’re pretty spoiled these days in that hobby electronics has made a lot of cool tools available on a budget. It’s hard to think of a better example than a logic analyzer, which you can get for a day or two of pay. Consumer-level devices just didn’t exist until a few years ago. [Jouko S] has this HP16500B industrial grade logic analyzer in his shop. It’s from the early 1990’s and it’s got a ton of features. Grabbing a still functional yet super-old model used to be the only way for hobbyists. But one thing you won’t find on it is the ability to connect it to your USB port to get screen captures. Younger readers might not recognize the slot at the top for magnetic media called a floppy disk which is the in-built way of recording your sessions. He set out to find an easier way to get color screen captures and ended up adding RS-232 control to the old hardware.

There is a 25-pin port on the back of the old hulk. But it is a female connector and he didn’t have the adapters on hand to make it work with his serial-to-USB converter. During development he used a breadboard and solder-tail connector to patch into the necessary signals. This was all hooked up to a Raspberry Pi which he planned to dedicate to the system. It worked, and he was able to use an interactive terminal for the rest of his sleuthing. With much trial and error he figured out the commands, and wrote some Python code for the Pi side of the equation. He can now pull color screenshots with ease thanks to the utilities available in the Python Imaging Module.

Two-wire Serial Backpack For GLCD Screens

[Debraj] wrote in about his 2-wire serial backpack he developed for a Graphic LCD screen. It’s build on a hunk of protoboard and uses a pair of 595 shift registers to translate incoming serial data to the parallel interface which is used by the LCD screen. It takes more time to push commands this way, but the interface is still quite snappy as you can see in the clip after the jump.

The real trick here is how the hardware has been configured to get away without a third wire for latching the shift registers (if you need a primer on 595 chips check out this feature). The idea of using a latch is that all of the data can be shifted in over the serial pin before it appears on the output pins. Otherwise, the GLCD would see each bit as it shifts into the register, wreaking havoc on its communication protocol. [Debraj] gets around this by using a diode AND gate trick he learned from this other serial LCD project.

One good thing about this method is the 595 chips have a wide range of control voltage that will allow you to drive this with 3.3V or 5V microcontrollers. But you do need to implement the communication protocol and push those commands via serial. For nearly the same cost in chips something like an ATtiny2313 could be substituted to make an even simpler addressing scheme — or even switch to 1-wire protocol. But you’d then lose the wide input voltage tolerance.

Continue reading “Two-wire Serial Backpack For GLCD Screens”