Virtual Serial Bridge

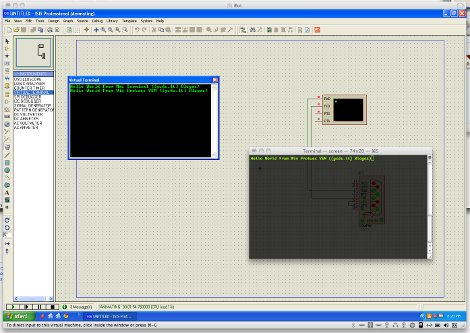
When you are running emulators or virtual machines it may be sometimes handy to be able to connect a serial port from the guest machine to the host machine. [Aurimas] had that issue, and also had a fun fix for that using 2 USB <> Serial adapters, but as you can imagine that is not a ideal solution, enter the Virtual Serial Bridge.

Digging around Vmware it was found that the support for what he needed was there, but not really used. A little addition of a few lines to the guest OS vmx file and configuring the socat multipurpose relay package. Though the instructions revolve around the Mac platform as the host and Windows as the guest socat and Vmware you can probably mix it up with any software that uses the serial port and a *x or windows host.

The Basics Of Controlling An Arduino With PHP

You can easily add Internet-based control for your Arduino if it is close enough to your server to be connected via USB. This tutorial will give the basics you need to get it working.

The gist of this method involves a webpage that includes PHP elements. When one of those elements is manipulated, a command is sent via serial connection to the Arduino which then reacts based on what it received. This example uses an Ubuntu box that is running an Apache server. The Arduino sketch sets up the serial connection and then listens for incoming traffic. Whenever it receives a non-zero character an LED will blink. On the server side of things you’ll need to make sure that the system user that runs Apache (www-data) has permission to write to a serial port.

This base example may seem extremely simple, but there’s no end to what you can build on top of it. Different PHP events can be added to push new commands over the serial connection with matching test conditions added to the sketch.

[Thanks Jarryd]

Interfacing An Arduino With A TFT LCD

tft_lcd

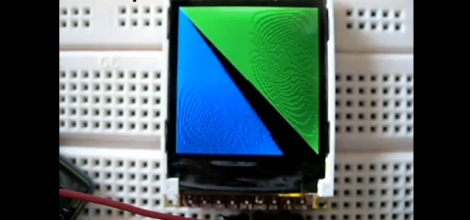
Seven-segment displays and monochrome LCDs are fine for most projects, but some things simply look better in color. [John] over at the Little Bird Electronics blog recently wrote up a tutorial demonstrating the use of a TFT LCD panel with an Arduino. The specific panel he chose was a 4D Systems 1.44” TFT LCD that happened to feature a dedicated graphics processor, which should allow for some fantastic visuals when used to its fullest potential.

The LCD takes its commands over a serial interface, making it a simple five-wire display solution for your projects. The display can be programmed manually by sending hex commands over the serial interface, but there are also some user-developed libraries available that will allow you to use the majority of the most popular functions without the learning curve. One thing to note is that the LCD must be flashed with a particular flavor of firmware before it can communicate over the serial interface, a process for which [John] provides a walk through.

The LCD panel can be used with any Arduino-compatible board, so it can be useful in a whole host of projects.

Stick around to see a simple demo of the board in use.

Continue reading “Interfacing An Arduino With A TFT LCD”

Patching Into An Optical Mouse With A PIC

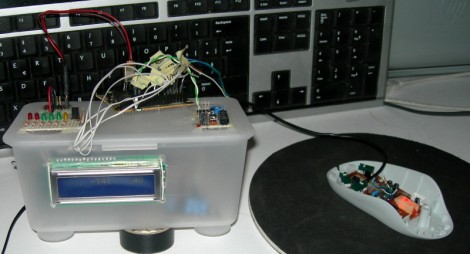
[MikyMouse] cracked open a couple different optical mice (or is it mouses?) in order to play with the data communications coming off of the chips inside. Once he figured out the protocol, it wasn’t too hard to grab the data for use in his own projects. The chip that controls the mouse is one of two he looked at, either an ADNS2051 or an ADNS2610. They run at 5V and use serial communications via SDIO and SCK pins. The clip after the break shows the test apparatus displaying coordinates of the mouse on an LCD screen. This seems like an easy and inexpensive way to get position data from your project. The only tricky part is going to be deciding when and how to to zero out the location.

Not interested in this type of mouse hack? Can we spark your curiosity with this mouse auto-fire project?

Continue reading “Patching Into An Optical Mouse With A PIC”

Broken Laptop Recovered Using An Arduino

We see Arduino boards used in a lot of projects but we’ve never thought of using one as a USB crossover cable. That’s basically what [Jack the Vendicator] did to get his broken laptop running. When his video card stopped working he found himself unable to access the laptop. Newer machines don’t have a serial connector, which could have been used for a serial terminal, so he was at a bit of a loss since neither SSH nor VNC were installed. But he thought he might be able to use the Arduino as a serial terminal connector over USB. He plugged the Arduino into the laptop, and connected a USB serial converter from his desktop computer to the Arduino’s serial pins. In effect he’s just taking advantage of the FTDI chip, translating those signals back into USB on either end. Once he booted the headless laptop it took just a couple of blindly typed commands to get SSH running in order to regain control.

Unlocking RS232 Serial Comm On A Multimeter

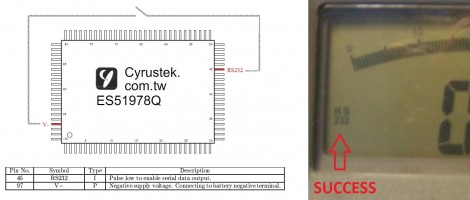
[Craig] cracked open a multimeter to unlock RS232 serial communications that can be used for data logging. There’s a couple of things that make this possible. First of all, the multimeter’s processor is not covered in a black epoxy blob, leaving the pins exposed for hacking. Second, the chip model is known and [Craig] was able to get his hands on the datasheet. One of the pins enables serial output when pulsed low. Touching it to V- even turns on an RS232 icon on the display, as seen above. To make this accessible without opening the case a momentary push button can be added, as well as connector for signal output, and a bit of parsing on the PC side to handle incoming data.

Interface Up To 12 Servos Using Arduino

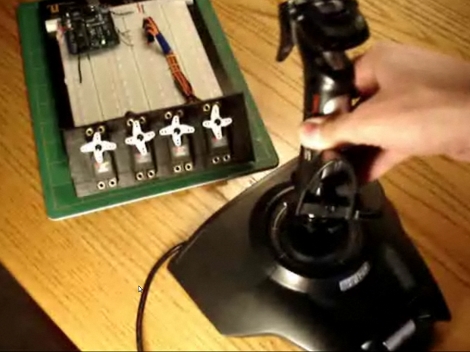
[Brian] is using an Arduino to control multiple servo motors. This is nothing new and has been happening since the earliest days of Arduino. But rather than develop a project and share it, [Brian] did a fantastic job of making the code scalable, readable, and even explained how the different parts work.

His code listens for serial commands and manipulates the motors accordingly. He wrote a Python script using pyserial which talks to the Arduino. As an example, he uses a joystick to send data for X and Y axes as well as pitch and roll. Want to know how those serial communications work? He explains that in detail. He also outlines the process of scaling up from the 4 servo demo to 12 servos on a standard Arduino. Sounds like it might be time to build your own version of a mouse-controlled Lynxmotion arm using the tools [Brian] has put together.