Making Something Useful With The ESP8266

The ESP8266 is the latest and greatest way to get a project connected to the Internet, but so far we haven’t seen many projects that actually do something with this very cool chip. Yes, there are a few people pinging away with AT commands, and there is a thriving community building interpreters and flashing new code on this chip, but not much in the way of actual projects. [Martin] is the exception. He’s come up with two projects that use the ESP8266.

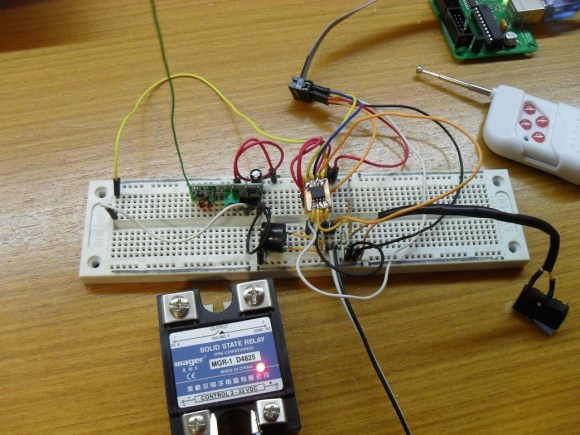
The first project is one that puts the readings from a DHT22 temperature/humidity sensor up on the Internet. Following the spirit of all the recent development of the ESP8266, [Martin] isn’t using an external microcontroller. Instead, he’s using the SDK to run an HTTP daemon using [Sprite_TM]’s code. This web server provides an interface to turn an LED on and off, and reports the temperature and humidity readings from the DHT22. It’s simple, but it’s easy to see how this tiny chip could become the basis for a smart thermostat.

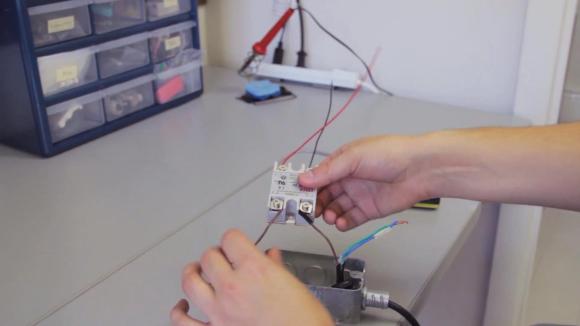
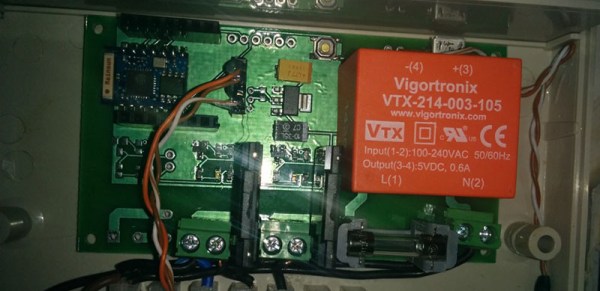
If lighting up LEDs isn’t enough, [Martin] has another project that includes three solid state relays. This one is a bit more complex with MQTT support, a fancy jQuery interface, and support for network time. [Martin] isn’t quite ready to publish the complete code for this project, but that’s only because there are a few features he’d like to implement before making it public. These include dynamic DNS, scheduling functionality, and support for an I2C status display. Even without these fancy features, it’s still a great project that’s still extremely capable for an Internet of Things thing. You can check out [Martin]’s video demo of this board below.

Continue reading “Making Something Useful With The ESP8266”

Hackaday Links Column Banner

Hackaday Links: January 4, 2015

Chips as furniture is now a thing. It started off with a 555 footstool from Evil Mad Scientist and moved on to an EPROM coffee table. Now [msvm] over on the War Thunder forums has constructed a Nixie tube driver table. It’s based on the K155, and as a neat little addition, he’s included a real vintage chip under glass in the table.

Have some tongs, an anvil, and a blowtorch? Make some bottle openers out of framing nails. There’s a lot of variety here in the shapes of the bottle openers.

[Stephen] used a solid state relay he found on eBay to drive some Christmas lights. The SSR failed. That meant it was time to see inside of this relay looked like. The short answer is, ‘a lot of goop and epoxy’, but the traces look big enough to support the current it’s rated for.

Imagine a part of your 3D printer breaks. That’s alright, just print another…. oh, yeah. Well, I guess it’s time to make a bearing bracket out of wood.

The Electronica MK-54 and MK-61 (actually the Электроника МК-54) were incredibly popular Soviet programmable calculators. Now there’s an emulator for them.

[Rue Mohr] found a very cheap TFT display on an Arduino shield. The chip for the display was an SPF5408, a chip that isn’t supported by the most common libraries. He eventually got it to work after emailing the seller, getting some libraries, and renaming and moving a bunch of stuff. If you have one of these displays, [Rue] just saved you a bunch of time.

Now You’re Washing With Gas

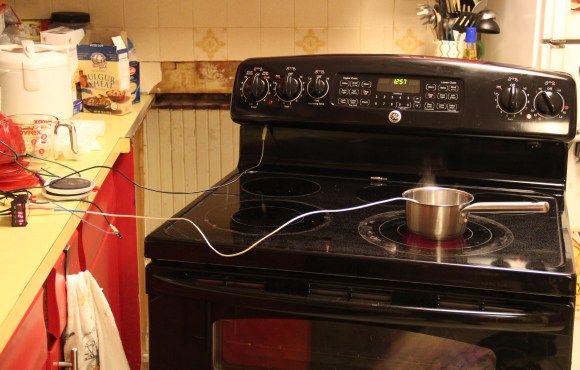
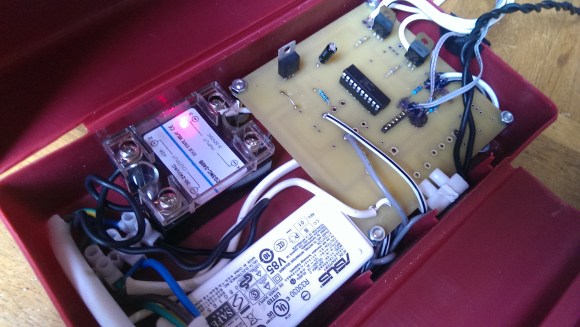
[Michiel] likes to wash his clothes in warm water. Like a lot of machines, his draws from the cold water line and  heats it electrically. Gas is much cheaper than electricity in the Netherlands, so he wanted to be able to heat the water with gas instead. Hot-fill machines already exist, but few models are available and they’re all too expensive.  [Michiel] rolled up his sleeves and hacked his brand new washer into a hot-fill machine.

He started out thinking that he’d just connect the hot water line instead, but that proved to be too hot. He found out it needs to be about 35°C (95°F), so he decided to mix input from the hot and cold lines. Since it’s a shiny new machine, [Michiel] wanted an externally mounted system to keep from voiding  the warranty. He got two solenoid valves from the electronic bay and used a PIC16F to make them dance. He wired up a light switch on a two-panel face and used the blank plate for power and status LEDs.

[Michiel]’s design works like a charm. The machine used to draw 2000W to heat the water, and peak usage now is as low as 200W. He noticed that the washer drew a lot of power in standby mode so he added a solid state relay and a bit more code. Now the electricity to the machine is cut after two hours and [Michiel] saves about €97 per year.

DIY Home Control Using A SSRelay

ssrelay

[Ben Jones] just started a new site called Maker-Guide, where he makes some very informative and well produced DIY videos on anything from homemade photography hacks, to controlling an outlet using a solid-state relay.

It’s not the first time we’ve seen a relay controlled outlet, or this one… but it’s certainly one of the cleanest jobs we’ve seen. In his video guide, [Ben] shows us exactly how to fit a standard solid state relay into a regular outlet box, and easily control it with an Arduino Uno.

It even looks like there might be enough space inside the box for a small wireless setup — maybe using a Trinket even? What about using Power-Line networking to control each box via LAN? Could be the easiest home automation implementation yet! Well, aside from certain NEC (national electrical code) concerns of running high and low voltage in the same box…

Anyway if that wet your whistle, check out the great video guides after the break!

Continue reading “DIY Home Control Using A SSRelay”

Hack Your Stove In The Name Of Homebrewing

stovehack

[Tim] is a homebrewer. Temperature profiling during the mashing process is apparently even more critical than the temperature curve of a solder reflow oven. His stove just wasn’t giving him the level of control he needed, so [Tim] added a PID temperature controller to his stove. Electric stoves generally use an “infinite switch” to control their burners. Infinite switches are little more than a resistor and a bimetallic strip in a single package. Not very good for accurate temperature control. The tricky part of this hack was to make it reversible and to have little visual impact on the stove. A stove top with wires hanging out would not only be dangerous electrically, it would also create a hazardous situation between [Tim] and his wife.

[Tim’s] brewpot only fit on the stove’s largest burner, so that was the only one that needed PID control. To keep things simple, he kept the commercial PID controller outside the stove’s enclosure. Inside the stove, [Tim] added a solid state relay. The relay is mounted to a metal plate, which screws to the back of the stove. The relay control lines run to an audio jack on the left side of the stove. Everything can be bypassed with a switch hidden on the right side of the stove. In normal operation, the switch is in “bypass” mode, and the stove works as it always has. When mashing time comes along, [Tim] flips the switch and plugs the jack into his PID controller. The temperature sensor goes into the brewpot itself, so no stove modification was needed there.

The end result is a very clean install that both [Tim] and his wife can enjoy.  Save a few bottles for us, [Tim]!

Update: Grow Controller Rebuilt To Last

new-grow-controller

[The Cheap Vegetable Gardener] assembled his first grow controller about three and a half years ago. He’s been very happy with it and knows that he’ll be using it for years, maybe even decades to come. He just finished overhauling the grow controller design to help make sure he doesn’t burn down his garage one day. You have to admit, without knowing anything about the project this rendition does look safer than his original offering.

Pictured above is the weather-proof enclosure he used to house four mains-rated solid state relays. This box is isolated from the control hardware, providing heavy-duty utility plugs to interface with the heater, lights, fan, and water pump.  He mounted the Arduino board which controls the relays to the outside of the box, using the Ethernet wire to switch the SSRs. It uses a manufactured shield he designed which will help ease the pain of fixing the system if parts ever go bad.

Later on in the build he shows the grow light and heaters used in his operation. The heaters simply screw into light sockets; something we’ve never come across before.

RF Switching Module Can Learn New Remotes

rf-remote-also-learns-by-itself

This breadboarded circuit is [Sergio’s] solution to controlling appliances wirelessly. Specifically he wanted a way to turn his pool pump on and off from inside the house. Since he had most of the parts on hand he decided to build a solution himself. What he ended up with is an RF base station that can learn to take commands from different remote devices.

The main components include the solid state relay at the bottom of the image. This lets the ATtiny13 switch mains voltage appliances. The microcontroller (on the copper clad square at the center of the breadboard) interfaces with the green radio frequency board to its left. On the right is a single leaf switch. This acts as the input. A quick click will toggle the relay, but a three-second press puts the device in learning mode. [Sergio] can then press a button on an RF remote and the device will store the received code in EEPROM. As you can see in the clip after the break, he even included a way to forget a remote code.

Continue reading “RF Switching Module Can Learn New Remotes”