Coffee Cupping Is A Grind — Spectroscopy Could Brew Better Beans

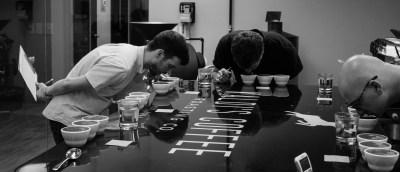
If you’ve ever bought whole coffee beans, chances are good that there was all kinds of information on the bag that led to your decision, like the origin, the roast type, and the flavor notes. Traditionally, coffee grading — that’s judging the aroma of both dry and wet grounds and slurping the coffee evenly across the tongue to determine the flavor profile — is done by humans in a process called cupping. To call it a process is too clinical — it’s really more like a ceremony performed with the grave sincerity that coffee deserves.

A traditional cupping ceremony. Image via Kaldi’s Coffee

There’s an industry standard coffee flavor wheel, so why not leverage that to make a robot that can remove the human bias and possible error of doing things the traditional way? That’s exactly what Demetria, a Columbian-Israeli company is doing.

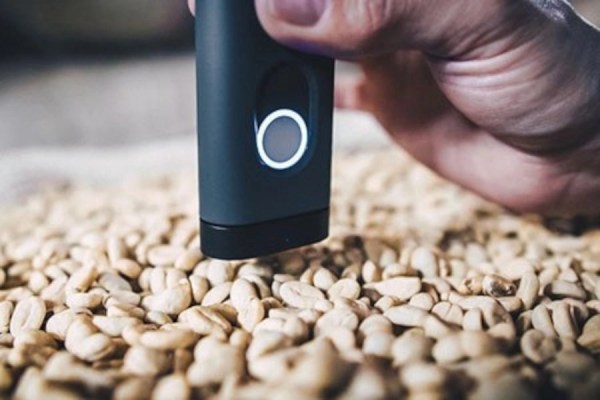
They’ve developed an AI platform that can determine bean quality as judged by handheld scanners that were born on Kickstarter. The scanner uses near-infrared to look for biochemical markers in the bean, which it uses to match up with a profile backed by the all-knowing coffee flavor wheel.

Demetria is using SCiO scanners and a custom app to judge beans before they’re even roasted, which greatly speeds up the process but makes us wonder how green bean spectroscopy stacks up against roasted beans as judged by humans. You may remember the SCiO, a pocket-sized, connected spectrometer made by Consumer Physics that finally started delivering the goods a few years after funding. If you got your hands on a SCiO, you might like to know that there’s an open project out there to hack them. Sparkfun did a nice, thorough teardown, and it seems to be a well-engineered piece of hardware.

On the one hand, cupping is a tradition and thus may people feel that robbing coffee of this tradition will rob coffee of its soul. On the other hand, cupping is wasteful, as the coffee must be roasted and ground immediately prior to the ceremony and it requires the availability of Q graders who have been trained in the ways of coffee grading.

Want to know more about coffee production? Might as well learn the Retrotechtacular way.

[Main and thumbnail images via Demetria]

Pi-Based Spectrometer Puts The Complexity In The Software

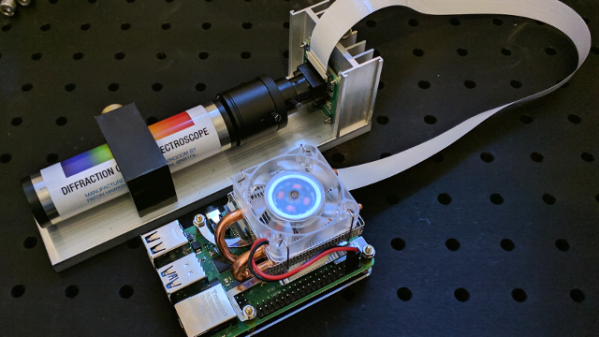
Play around with optics long enough and sooner or later you’re probably going to want a spectrometer. Optical instruments are famously expensive, though, at least for high-quality units. But a useful spectrometer, like this DIY Raspberry Pi-based instrument, doesn’t necessarily have to break the bank.

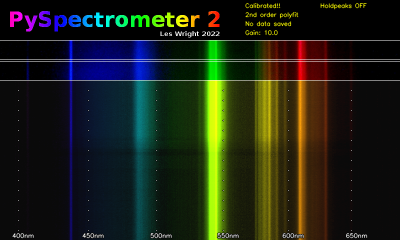
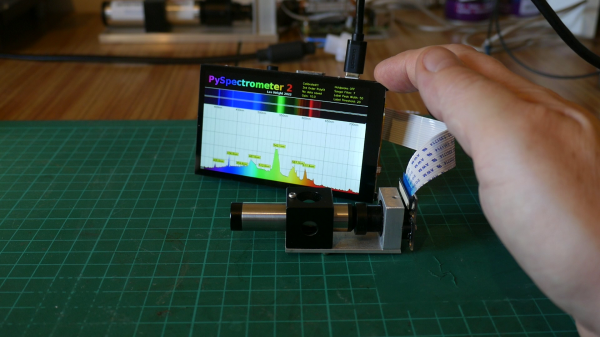
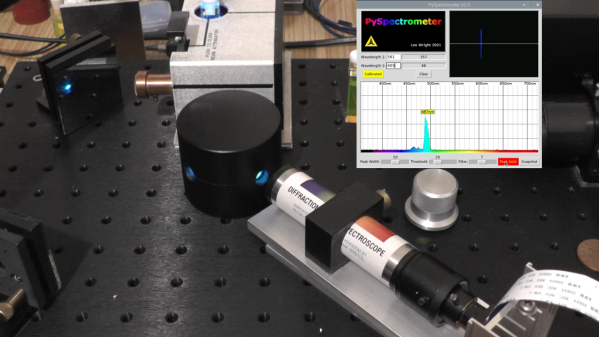
This one comes to us by way of [Les Wright], whose homebrew laser builds we’ve been admiring for a while now. [Les] managed to keep the costs to a minimum here by keeping the optics super simple. The front end of the instrument is just a handheld diffraction-grating spectroscope, of the kind used in physics classrooms to demonstrate the spectral characteristics of different light sources. Turning it from a spectroscope to a spectrometer required a Raspberry Pi and a camera; mounted to a lens and positioned to see the spectrum created by the diffraction grating, the camera sends data to the Pi, where a Python program does the business of converting the spectrum to data. [Les]’s software is simple by complete, giving a graphical representation of the spectral data it sees. The video below shows the build process and what’s involved in calibrating the spectrometer, plus some of the more interesting spectra one can easily explore.

We appreciate the simplicity and the utility of this design, as well as its adaptability. Rather than using machined aluminum, the spectroscope holder and Pi cam bracket could easily be 3D-printer, and we could also see how the software could be adapted to use a PC and webcam.

Continue reading “Pi-Based Spectrometer Puts The Complexity In The Software”

Vintage Spectrometer Gets Modern Interface Upgrade

There’s plenty of specialized, high-end scientific equipment out there running on antique hardware and software. It’s not uncommon for old lab equipment to run on DOS or other ancient operating systems. When these expensive tools get put out to pasture, they often end up in the hands of hackers, who, without the benefit of manuals or support, may try and get them going again. [macona] is trying to do just that with a 740AD spectrometer, built by Optronic Laboratories in the 1990s.

Originally, the device shipped with a whole computer – a Leading Edge 386SX25 PC running DOS and Windows 3.0. The tools to run the spectrometer were coded in BASIC. Armed with the source code, [macona] was able to recreate the functionality in LabVIEW. To replace the original ISA interface board, an Advantech USB-4751 digital IO module was used instead, which dovetailed nicely with its inbuilt LabVIEW support.

With things back up and running, [macona] has put the hardware through its paces, testing the performance of some IR camera filters. Apparently, the hardware, or the same model, was once used to test the quantum efficiency of CCDs used on the Hubble Space Telescope.

Seeing old lab equipment saved from the scrap bin is great, but you can’t always rely on what you want being thrown out. In those cases, you’ve got to build your own from the ground up. Video after the break.

Continue reading “Vintage Spectrometer Gets Modern Interface Upgrade”

High-Speed Spectrometer Built With Cheap Linear CCD

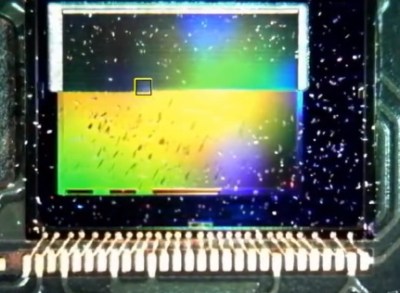
If you’ve ever dreamed of building a proper spectrometer, it looks like the ESPROS epc901 CCD sensor is absolutely worth your attention. It’s fast, sensitive, easy to interface with, and at just $24 USD, it won’t break the bank. There’s only one problem: implementing it in your project means either working with the bare 2×16 0.5 mm pitch BGA device, or shelling out nearly $1,400 USD for the development kit.

Thankfully, [Adrian Studer] has come up with a compromise. While you’ll still need to reflow the BGA to get it mounted, his open hardware breakout and adapter boards for the ESPROS epc901 make the sensor far easier to work with.

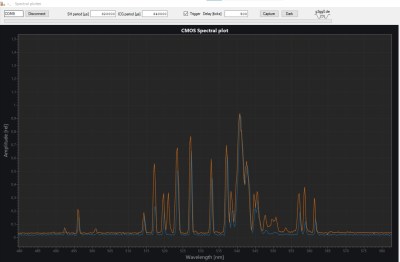
It’s not just a hardware solution either, he also provides firmware code for the STM32L4 based Nucleo development board and some Python scripts that make it easy to pull data from the sensor. The firmware even includes a simple command line interface to control the hardware that you can access over serial.

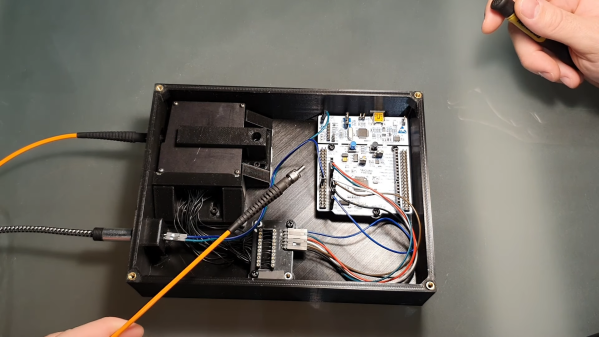
With the sensor successfully wrangled, [Adrian] partnered with [Frank Milburn] to build an affordable spectrometer around it. The design makes use of a 3D printed chamber, a simple commercial diffraction grating, and an array of entrance slits ranging from 0.5 to 0.0254 millimeters in width that were laser-cut into a sheet of stainless steel.

In the videos after the break, you can see the finished spectrometer being used to determine the wavelength of LEDs, as well as a demonstration of how the high-speed camera module is able to study the spectral variations of a CFL bulb over time. [Adrian] tells us that he and [Frank] are open to suggestions as to what they should point their new spectrometer at next, so let them know in the comments if you’ve got any interesting ideas.

We’ve seen an incredible number of spectrometer builds over the years, and some of the more recent ones are really pushing the envelope in terms of what the DIY scientist is capable of doing in the home lab. While they’re still fairly niche, these instruments are slowly but surely finding their way into the hands of more curious hackers.

Continue reading “High-Speed Spectrometer Built With Cheap Linear CCD”

Probe The Galaxy On A Shoestring With This DIY Hydrogen-Line Telescope

Foil-lined foam insulation board, scraps of lumber, and a paint-thinner can hardly sound like the tools of a radio astronomer. But when coupled with an SDR, a couple of amplifiers, and a fair amount of trial-and-error tweaking, it’s possible to build your own hydrogen-line radio telescope and use it to image the galaxy.

As the wonderfully named [ArtichokeHeartAttack] explains in the remarkably thorough project documentation, the characteristic 1420.4-MHz signal emitted when the spins of a hydrogen atom’s proton and electron flip relative to each other is a vital tool for exploring the universe. It lets you see not only where the hydrogen is, but which way it’s moving if you analyze the Doppler shift of the signal.

But to do any of this, you need a receiver, and that starts with a horn antenna to collect the weak signal. In collaboration with a former student, high school teacher [ArtichokeHeartAttack] built a pyramidal horn antenna of insulation board and foil tape. This collects RF signals and directs them to the waveguide, built from a rectangular paint thinner can with a quarter-wavelength stub antenna protruding into it. The signal from the antenna is then piped into an inexpensive low-noise amplifier (LNA) specifically designed for the hydrogen line, some preamps, a bandpass filter, and finally into an AirSpy SDR. GNURadio was used to build the spectrometer needed to determine the galactic rotation curve, or the speed of rotation of the Milky Way galaxy relative to distance from its center.

We’ve seen other budget H-line SDR receiver builds before, but this one sets itself apart by the quality of the documentation alone, not to mention the infectious spirit that it captures. Here’s hoping that it finds its way into a STEM lesson plan and shows some students what’s possible on a limited budget.

Spectrometer Is Inexpensive And Capable

We know the effect of passing white light through a prism and seeing the color spectrum that comes out of the other side. It will not be noticeable to the naked eye, but that rainbow does not fully span the range of [Roy G. Biv]. There are narrowly absent colors which blur together, and those missing portions are a fingerprint of the matter the white light is passing through or bouncing off. Those with a keen eye will recognize that we are talking about spectrophotometry which is identifying those fingerprints and determining what is being observed and how much is under observation. The device which does this is called a spectrometer and [Justin Atkin] invites us along for his build. Video can also be seen below.

Along with the build, we learn how spectrophotometry works, starting with how photons are generated and why gaps appear in the color spectrum. It is all about electrons, which some of our seasoned spectrometer users already know. The build uses a wooden NanoDrop style case cut on a laser engraver. It needs some improvements which are mentioned and shown in the video so you will want to have some aluminum tape on hand. The rest of the bill of materials is covered including “Black 2.0” which claims to be the “mattest, flattest, black acrylic paint.” Maybe that will come in handy for other optical projects. It might be wise to buy first surface mirrors cut to size, but you can always make bespoke mirrors with carefully chosen tools.

Continue reading “Spectrometer Is Inexpensive And Capable”

Vintage Plotter Turned Fruit Spectrometer

Fruit can be a tricky thing: if you buy it ripe you’ll be racing against time to eat the pieces before they turn into a mushy mess, but if you buy the ones which are a bit before their prime it’s not always easy to tell when they’re ready to eat. Do you smell it? Squeeze it? Toss it on the counter to see if it bounces? In the end you forget about them and they go bad anyway. That’s why here at Hackaday we sustain ourselves with only collected rainwater and thermo-stabilized military rations.

But thankfully Cornell students [Christina Chang], [Michelle Feng], and [Russell Silva] have come up with a delightfully high-tech solution to this decidedly low-tech problem. Rather than rely on human senses to determine when a counter full of fruit has ripened, they propose an automated system which uses a motorized spectrometer to scan an arrangement of fruit. The device measures the fruit’s reflectance at 678 nm, which can be used to determine the surface concentration of chlorophyll-a; a prime indicator of ripeness.

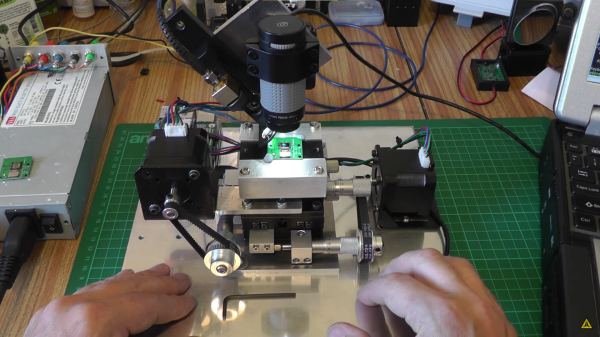
If that sounds a bit above your pay grade, don’t worry. The students were able to build a functional prototype using a 1980’s era plotter, a Raspberry Pi, and a low-cost AS7263 NIR spectral sensor from SparkFun which just so happens to have a peak responsivity of 680 nm. The scanning is performed by a PIC32MX250F128B development board with an attached TFT LCD display so the results can be easily viewed. The Raspberry Pi is used in conjunction with a Adafruit PCA9685 I2C PWM driver to control the plotter’s stepper motors. The scanning and motor control could be done with the PIC32 alone, but to save time the students decided to use the Raspberry Pi to command the PCA9685 as that was what the documentation and software was readily available for.

To perform a scan, the stepper motors home the AS7263 sensor module, and then passes it under the fruit which is laying on a clear acrylic sheet. Moving the length of the acrylic sheet, the sensor is able to scan not only multiple pieces of fruit but the entirety of each piece; allowing it to determine for example if a section of a banana has already turned. The relative ripeness of the fruit is displayed to the user on the LCD display as a heatmap: the brighter the color the more ripe it is.

At the end of their paper, [Christina], [Michelle], and [Russell] note that while the scanner worked well there’s still room for improvement. A more scientific approach to calculating how ripe each fruit is would make the device more accurate and take out the guess work on the part of the end user, and issues with darker colored fruit could potentially be resolved with additional calibration.

While a spectrometer might sound like the kind of equipment that only exists in multi-million dollar research laboratories, we occasionally see projects like this which make the technology much more accessible. This year we saw a compact spectrometer in the Hackaday Prize, and going a bit farther back in time we even featured a roundup of some of the most impressive spectrometer builds on Hackaday.io.

Continue reading “Vintage Plotter Turned Fruit Spectrometer”