There are a ton of apps out there for taking notes and recording ideas, but sometimes the humble pen is best. However, if you have the tendency to lose, crumple, or spill caffeinated beverages on your pen and paper notes, having a digital copy is quite nice.
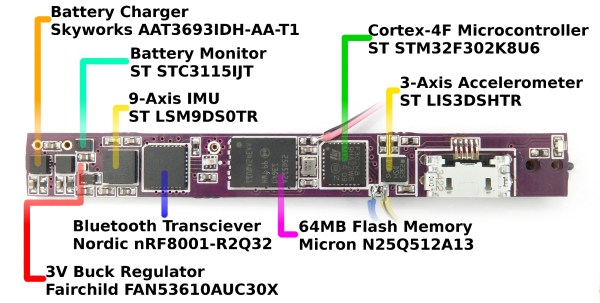
The NoteOn Smartpen by [Nick] aims to digitize your writing on the fly while behaving like a normal pen. It does this by using the ST LSM9DS0TR: a 9-axis inertial measurement unit (IMU). These inertial measurements are processed by a STM32 Cortex M4F processor and stored on the internal flash memory.
To retrieve your notes, the Nordic nRF8001 Bluetooth Low Energy radio pairs the MCU with a phone or computer. The USB port is only used to charge the device, and the user interface is a single button and LED.
The major hardware challenge of this device is packaging it in something as small as a pen. Impressively, the board is a cheap 2 layer PCB from OSHPark. The assembled device has a 10 mm diameter, which is similar to that of ‘dumb’ pens.
The NoteOn doesn’t require special paper, and relies only on inertial measurements to reconstruct writing. With the hardware working, [Nick] is now tackling the firmware that will make the device usable.
 The project featured in this post is a quarterfinalist in The Hackaday Prize.