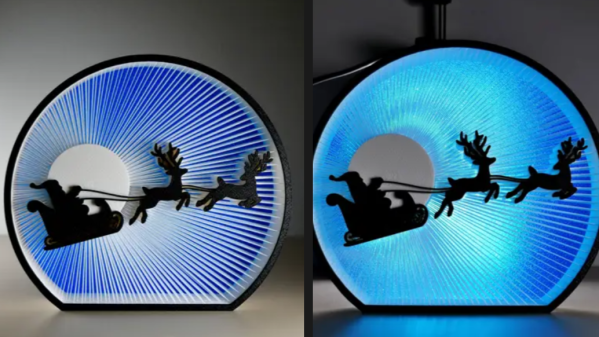
Stringing is when a 3D printer’s hot end moves through open air and drags a wisp of melted plastic along with it. This is normally undesirable, but has in the past been done intentionally to create some unconventional prints. Moonlight Santa from [3dprintbunny] shows considerable refinement in the technique, complete with color changes that really make the result pop.
Using a 3D printer’s stringing in a constructive way is something that has been leveraged really well. We remember seeing a lion with a fantastic mane by combining this method with a little post-processing and a blast from a heat gun. The technique has also been applied to make brush bristles (the printer strings filament across two handles, and after printing it is cut in half to make two brushes.)
This isn’t [3dprintbunny]’s first rodeo, either. We loved seeing her show what kind of objects were possible by using clever design, with no reliance on custom G-code or weird slicer tricks. The color changes by filament swaps really make this new one stand out.
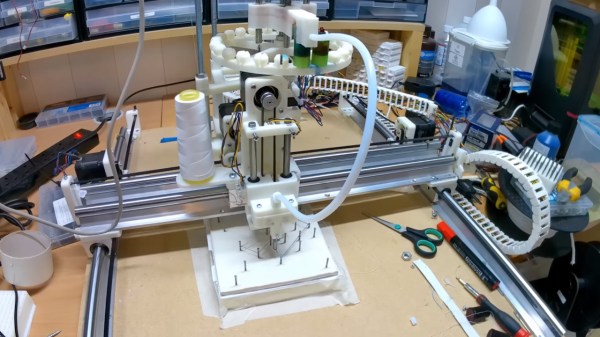
String art is as old as, well, string and something to hang it from. But, like most things, it gets more enjoyable when you involve a CNC. [Paul MH] went the whole hog with this build, creating a CNC string art builder that could handle the whole process, from placing the nails to running the string.
It’s an impressive build: you feed in an image, and the system calculates the location of the pins and the path that the string will need to follow. It then puts the nails into the board, pushes them in, and, with a custom attachment for the CNC, runs the string to create the art.
Of course, the path to this was filled with prototypes, failures, and dead ends. [Paul] has laid these out pretty well in the video for the project, which he just released. In this, problems like detecting when the nails are picked up and placed are detailed, and the prototypes and Rube Goldberg solutions that [Paul] came up with are covered.
Like all great projects, it is still a work in progress, but [Paul] has made some impressive progress, although he hasn’t posted the code and models for his custom parts yet. We’ve featured several string art builds, from polar platforms to fully formed commercial-grade builds that print your work for you.
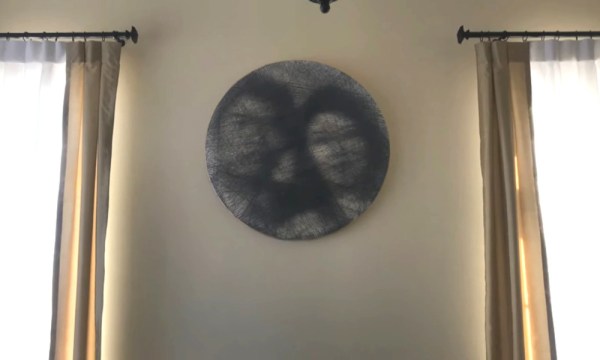
We’ve all been there — through the magic of the internet, you see someone else’s stunning project and you just have to replicate it. For [Jenny Ma], that project was computer-generated string art, as in the computer figures out the best nail order to replicate a given image, and you lay out the thread yourself.
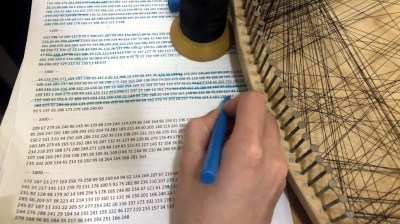
So, how does it work? Although a few algorithms are out there already, [Jenny] wanted to make her own using Python. Essentially it crops the image into a circle and then lays out evenly-spaced software nails around the circumference. The algorithm starts from a random nail and then determines the best next nail to wrap around by drawing a line from that nail to every other nail and choosing the darkest one based on the darkness of the image underneath that little line. It repeats this one chord at a time, subtracting from the original image until every pixel has been replaced with a thread or lack thereof, and then it spits out an ordered list of nail numbers.
Once the software was ready, [Jenny] made a wood canvas that’s 80 cm (31.5″) in diameter and started laying out the nail hole locations. There wasn’t quite enough room for 300 nails, so instead of starting over, [Jenny] changed the algorithm to use 298 nails and re-ran it.
[Jenny] does a great job of discussing the many variables at play in this hardware representation of software-created art. The most obvious of course is that the more nails used, the higher the resolution would be, but she determined that 300 is the sweet spot — more than that, and the resolution doesn’t really improve. We have to wonder if 360 nails would make things any easier. Check out the build video after the break.
Pandemic lockdowns have been brutal, but they’ve had the side-effect of spurring creativity and undertaking projects that are involved enough and complex enough to keep from going stir crazy. This CNC string art robot is a great example of what’s possible with a little imagination and a lot of time. (Video, embedded below.)
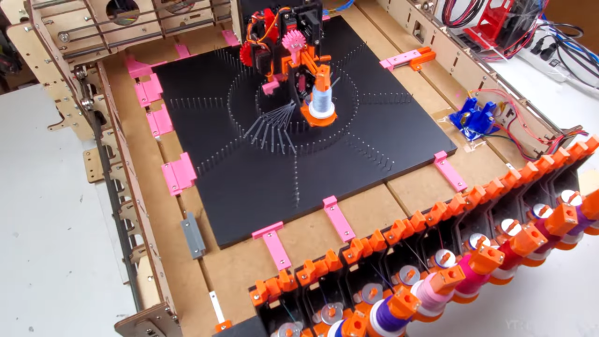
According to [knezuld11], the robot creates its art through mathematical algorithms via a Python program that translates them into nail positions and string paths. The modified CNC router frame, constructed of laser-cut plywood, has two interchangeable tool heads. The first places the nails, which are held in a small hopper. After being picked up by a servo-controlled magnetic arm and held vertically, a gear-driven ram pushes each nail into a board at just the right coordinates. After changing to a different tool, the robot is able to pick up one of nine different thread dispensers. A laser sensor verifies the thread nozzle position, and the thread starts its long journey around the nails. It’s a little mesmerizing to watch, and the art looks great, with a vibe that brings us right back to the 70s. Groovy, man.
This reminds us a little of a recent [Barton Dring] project that makes art from overlapping strings. That one was pretty cool for what it accomplished with just one thread color, while this one really brings color to the party. Take your pick, place your nails, and get stringing.
We know you love the original art on Hackaday. Those fantastic illustrations are the work of Joe Kim, and he joins us as a guest on this week’s episode to talk about his background, what inspires him, and how he pulls it all off.
This episode is still packed with hacks. Editors Mike Szczys and Elliot Williams somehow stumble into two projects that end up generating hydrogen (despite that not being their purpose). But that art angle this week goes beyond Joe’s guest appearance as we look at a hack to add green curve tracing goodness on a black and white CRT, and an incredible take on a string art building machine. We get a look at interesting hardware that landed on the clearance rack, ultralight robots that move with flex PCB actuators, a throwback to mechanical computing, and giving up control of your home heating and cooling to a Raspberry Pi.
Links for all discussed on the show are found below. As always, join in the comments below as we’ll be watching those as we work on next week’s episode!
Take a look at the links below if you want to follow along, and as always, tell us what you think about this episode in the comments!
We have semi-fond memories of string art from our grade school art class days. We recall liking the part where we all banged nails into a board, but that bit with wrapping the thread around the nails got a bit tedious. This CNC string art machine elevates the art form far above the grammar school level without all the tedium.
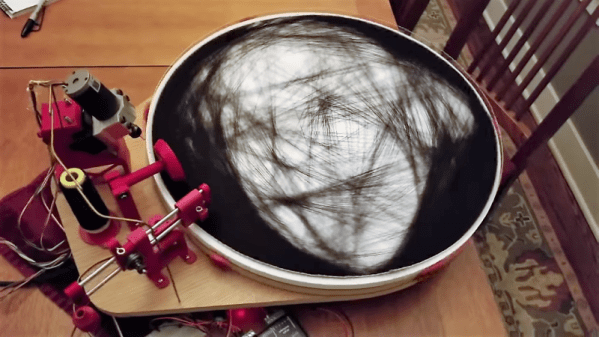
Inspired by a string art maker we recently feature, [Bart Dring] decided to tackle the problem without using an industrial robot to dispense the thread. Using design elements from his recent coaster-creating polar plotter, he built a large, rotating platform flanked by a thread handling mechanism. The platform rotates the circular “canvas” for the portrait, ringed with closely spaced nails, following G-code generated offline. A combination of in and out motion of the arm and slight rotation of the platform wraps the thread around each nail, while rotating the platform pays the thread out to the next nail. Angled nails cause the thread to find its own level naturally, so no Z-axis is needed. The video below shows a brief glimpse of an additional tool that seems to coax the threads down, too. Mercifully, [Bart] included a second fixture to drill the hundreds of angled holes needed; the nails appear to be inserted manually, but we can think of a few fixes for that.
We really like this machine, both in terms of [Bart]’s usual high build-quality standards and for the unique art it creates. He mentions several upgrades before he releases the build files, but we think it’s pretty amazing as is.
In the depths of Etsy and Pinterest is a fascinating, if tedious, artform. String art, the process of nailing pins in a board and wrapping thread around the perimeter to create shapes and shading, The most popular project in this vein is something like putting the outline of a heart, in string, in the shape of your home state. Something like that, at least.
While this artform involves about as much effort as pallet wood furniture, there is an interesting computational aspect of it: you can create images with string art, and doing this is a very, very hard problem to solve with an algorithm. Researchers at TU Wien have brought out the best that string art has to offer. They’ve programmed an industrial robot to create portraits out of string.
The experimental setup for this is about as simple as it gets. It’s a circular frame studded with 256 hooks around the perimeter. An industrial robot arm takes a few kilometers of thread winds a piece of string around one of these hooks, then travels to another hook. Repeat that thousands and thousands of times, and you get a portrait of Ada Lovelace or Albert Einstein.
The real trick here is the algorithm that takes an image and translates it into the paths the string will take. This is an NP-hard problem, but it is a surprisingly well-studied problem. The first autorouters — the things you should never trust to route traces between the packages on your PCB — we created for wire wrapped computers. Here, computers would find the shortest path between whatever pins had to be connected together. There were, of course, limitations: pins could only have so many connections on them thanks to the nature of wire wrapping, and you couldn’t have one gigantic mass of wires for a parallel bus. The first autorouters were string art algorithms, only in reverse.