DIY Relay Module Saves Time

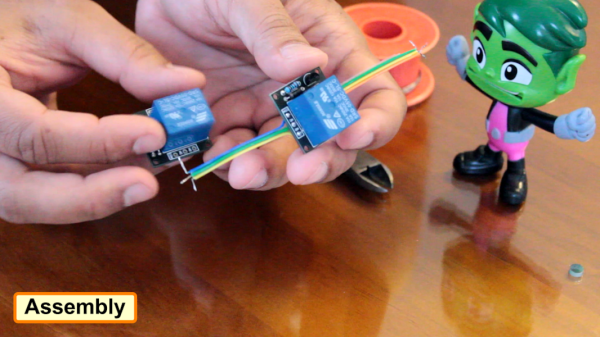
As any programmer could tell you, there’s significant value in automating a process that is performed often enough. The more times that process is used, the more it makes sense to automate it or at least improve its efficiency. This rule isn’t limited to software though; improvements to hardware design can also see improvements in efficiency as well. For that reason, [Hulk] designed a simple relay module in order to cut the amount of time he spends implementing this solution in his various other projects.

While driving a relay with a transistor is something fundamental, this project isn’t really about that per se. It’s about recognizing something that you do too much, and then designing that drudgery out of your projects. [Hulk] was able to design a PCB with 12 modules on it, presumably saving fabrication costs. He can then easily populate them with specific components as soon as he needs one. Another benefit of designing something like this yourself, rather than an off-the-shelf relay module, is that you can do away with any useless features you’ll never need (or add ones that aren’t available in commercial devices).

We can appreciate the efficiency gains this would make for our next project that needs a simple driver for a light, garage door opener, or any other binary electronic device. It can be a hassle to go find the correct transistor and relay, solder it all on the project board, and hope it all works. A pre-made solution solves all these issues, but we do wish the schematics were available to keep us from having to design our own. Driver boards are a pretty common project for all the different types of relays we see around here, so there is probably one available out there.

Tiny Ethernet Switch Gets Even Smaller

As a project gets more complicated, some kind of internal communication network is often used to that all of the various modules and sensors can talk with each other. For hardware hackers like us, that usually means SPI, I2C, or maybe even good old fashioned UART. But if you’re pushing a lot of data around, like live video feeds from multiple cameras, you’ll need something a bit faster than that.

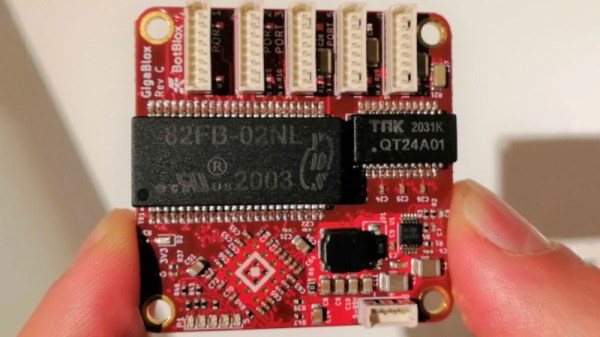
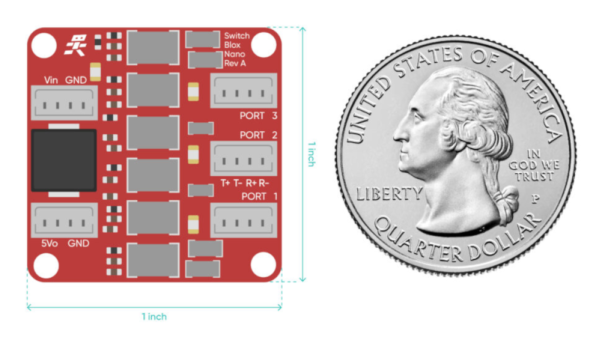
Which is why [Josh Elijah] has created the SwitchBlox Nano, a three port 10/100 Ethernet switch that fits on a one inch square PCB. All you need to do is provide it with power, with a generous input range of 5 to 50 volts, connect your devices to the Molex Picoblade connectors on the board, and away you go. There’s even a 5 V 1 A regulated output you can use to run your downstream devices.

If you’ve got a feeling that you’ve seen something very similar on these pages earlier in the year, you’re not imagining things. Back in April we covered the original five port SwitchBlox in a post that garnered quite a bit of attention. In fact, [Josh] tells us that the design of this new switch was driven largely by the feedback he got from Hackaday readers. The Nano is not only smaller and cheaper than the original, but now maintains full electrical isolation between each port.

The average Hackaday reader is as knowledgeable as they are opinionated, and we’re glad [Josh] was able to put the feedback he received to practical use. We’re proud that our community has had a hand in refining successful commercial products like the Arduboy handheld game system and the Mooltipass hardware password keeper. Now it looks like we can add a tiny Ethernet switch to the list of gadgets we’ve helped push up the hill. Maybe we should get a stamp or something…

Nintendo Switch Gets A Stylish Dock In A Broken NES

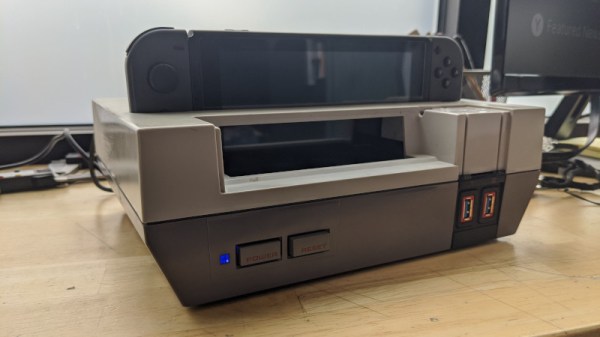
The Switch is Nintendo’s latest home console, which has forever blurred the line between handhelds and consoles you plug in to your TV. It does both! Typically, hooking up to a screen is done through the dock, but that wasn’t quite cool enough for [sturm]. He took a NES and turned it into a tidy Switch dock instead!

The build starts with an original NES shell, which is gutted of its original hardware. The PCB from the original dock is installed, and a slot cut in the top of the NES to allow the Switch to be inserted. Naturally, there’s a spring flap reminiscent of the Super NES to keep the dock looking clean when not in use. When it is installed, a series of cables and bezels break out the USB ports to the original controller ports on the NES.

It’s a tidy build that brings a touch of nostalgia to the modern console. We’re sure an official version would sell like hotcakes, too. There’s plenty of similarly inspired builds for the Switch, with the Gamecube Joycons a particular highlight!

Continue reading “Nintendo Switch Gets A Stylish Dock In A Broken NES”

3D Printed Switch Uses Paperclip

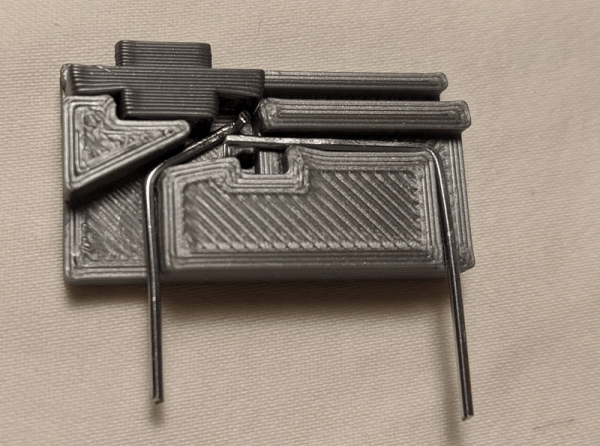
We live in a time when all manner of electronic components are practically a mouse click away. Still, we like to see people creating their own components. Maybe a stock part won’t fit or isn’t immediately available. Or maybe you just want to build it yourself, we get that. [Aptimex] shows off a design for a 3D printed slide switch that uses a paperclip for the contact material.

Of course, it had better be a metal paperclip and we’d make sure the shiny metal was pretty conductive. Of course, you could probably use thick wire to get the same effect. It sounds like [Aptimex] was inspired by an earlier Hackaday.io project that created a few different kinds of switches using similar techniques.

Continue reading “3D Printed Switch Uses Paperclip”

Keyboard Switch Is Really A Transformer

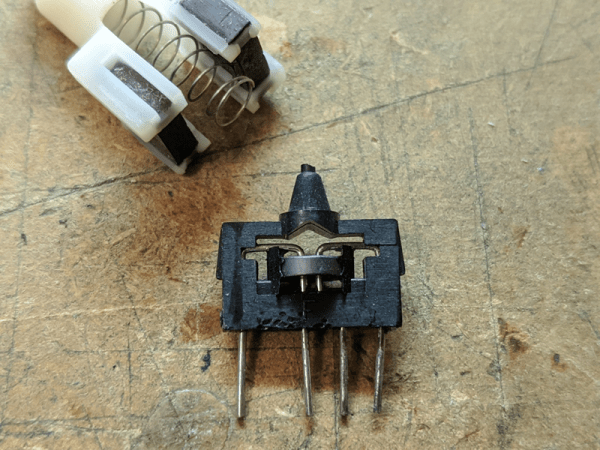
We don’t know why [TubeTime] decided to show off this oddball keyboard switch as a series of Twitter posts, but we were glad to see them somewhere. At first, the switch looks pretty conventional. But as the pictures reveal the insides, you’ll notice something unusual: a ferrite toroid! These switches operate as a transformer and are known as magnetic valve switches.

The switches have two sets of two pins — one set for the primary and one for the secondary of the transformer wound around the ferrite core. That transformer remains stationary, but a pair of permanent magnets move. When the key is up, the magnets are close to the core and cause the transformer to saturate, so there is little or no output at the secondary. When you depress the key, the magnet moves away from the core, allowing the signal to pass through the transformer. What that means is there is no mechanical contact, which is good for switch life. It is also important in environments where a small spark could cause an explosion. You can watch a video about a keyboard that used those switches, below.

Continue reading “Keyboard Switch Is Really A Transformer”

Impractical Switches For The Bored Maker

Cabin fever: the inability to socialize with other humans does weird things to the human brain. Then again some of us are born to stand out, and one such amazing maker, [Lee], is spending time making weird switches from basically anything.

So what would you consider weird? How about using a piece of pasta? How about using the conductivity of an empty sink? There is even an experiment with breakfast cereal, though we do not recommend it for production use. [Lee] continues to pour experiments into Twitter and recently has gotten some conductive tape. Stick some on a game joystick and you got yourself an instant switch on a switch.

These experiments prove that there is a lot you can do with the stuff you have around your house and the other end of the circuit doesn’t necessarily need to be a humble LED. You could get more interesting results with adding the likes of a microcontroller like an ATtiny. Coupling it with a DIY LED badge would be a great idea and we’d love to see what you come up with.

Giving An Industrial Push Button USB, Elegantly

[Glen]’s project sounds perfectly straightforward: have a big industrial-style push button act as a one-key USB keyboard. He could have hacked something together in any number of ways, but instead he decided to create a truly elegant solution. His custom PCB mates to the factory parts perfectly, and the USB cable between the button and the computer even fits through the button enclosure’s lead hole.

It turns out that industrial push buttons have standardized components which can be assembled in an almost LEGO-like manner, with components mixed and matched to provide different switch actions, light indicators, and things of that nature. [Glen] decided to leverage this feature to make his custom PCB (the same design used in his one-key keyboard project) fit just like a factory component. With a 3D printed adapter, the PCB locks in just like any other component, and even lines up with the lead hole in the button’s enclosure for easy connecting of the USB cable.

What does [Glen] use the big button for? Currently he has two applications: one provides a simple, one-button screen lock on a Linux box running a virtual machine at his place of work. It first disengages the keyboard capture of the virtual machine, then engages the screen lock on the host. The other inserts a poop emoji into Microsoft documents. Code and PCB design files for [Glen]’s small keyboards are available on GitHub.