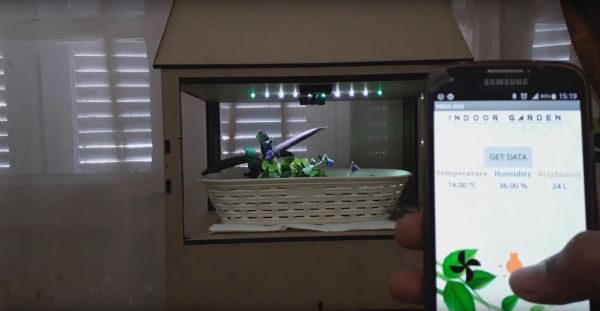
Gardening is a rewarding endeavour, and easily automated for the maker with a green thumb. With simplicity at its focus, Hackaday.io user [MEGA DAS] has whipped up a automated planter to provide the things plants crave: water, air, and light.
[MEGA DAS] is using a TE215 moisture sensor to keep an eye on how thirsty the plant may be, a DHT11 temperature and humidity sensor to check the airflow around the plant, and a BH1750FVI light sensor for its obvious purpose. To deliver on these needs, a 12V DC water pump and a small reservoir will keep things right as rain, a pair of 12V DC fans mimic a gentle breeze, and a row of white LEDs supplement natural light when required.
The custom board is an Arduino Nano platform, with an ESP01 to enable WiFi capacity and a Bluetooth module to monitor the plant’s status while at home or away. Voltage regulators, MOSFETs, resistors, capacitors, fuses — can’t be too careful — screw header connectors, and a few other assorted parts round out the circuit. The planter is made of laser cut pieces with plenty of space to mount the various components and hide away the rest. You can check out [MEGA DAS]’ tutorial video after the break!


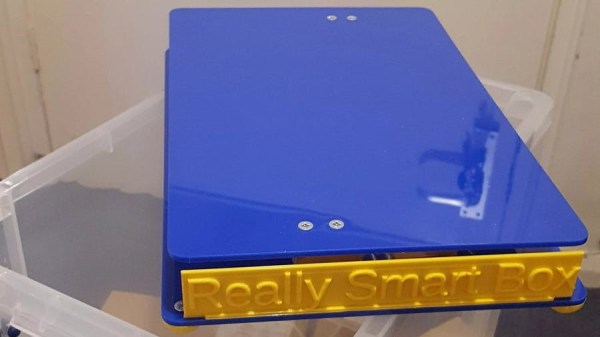
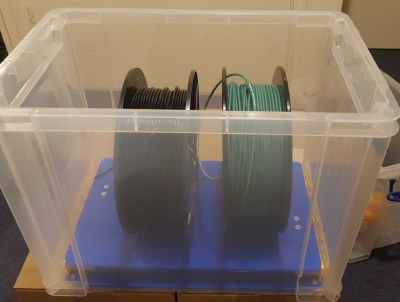 It does this by measuring the weight of the stuff piled on top of it, while also monitoring temperature and humidity. The platform communicates this information wirelessly to a back end, allowing decisions to be made about stock levels, usage, and monitoring of storage conditions. It’s clearly best applied to consumables or other stock that comes and goes. The Really Smart Box platform is battery-powered, but spends most of its time asleep to maximize battery life. The prototype uses the SigFox IoT framework for the wireless data, which we have seen before in a