USB-C Is Taking Over… When, Exactly?

USB is one of the most beloved computer interfaces of all time. Developed in the mid-1990s, it undertook a slow but steady march to the top. Offering an interface with good speeds and a compact connector, it became the standard for hooking up interface devices, storage, and even became the de-facto way to talk old-school serial, too.

In late 2014, the USB Implementers Forum finalised the standard for the USB-C plug. Its first major application was on smartphones like the Nexus 5X, and it has come to dominate the smartphone market, at least if you leave aside the iPhone. However, it’s yet to truly send USB-A packing, especially on the desktop. What gives? Continue reading “USB-C Is Taking Over… When, Exactly?”

Solving Buyer’s Remorse With A Rotary Tool And Soldering Iron

At this point, it’s pretty clear that USB-C has become the new standard connector for an increasing amount of applications, but predominantly charging. Even Apple is on board this time, and thanks to backwards compatibility, you don’t have to abandon devices using the older standards you may prefer for their simplicity or superior lint-resilience either. For [Mat] on the other hand, it’s USB-C all the way nowadays. Yet back in the day when he bought his laptop, he had the price tag convince him otherwise, and has come to regret it, as all the convenience of a slim design is cancelled out by dragging a bulky charger for the laptop’s proprietary charging port along.

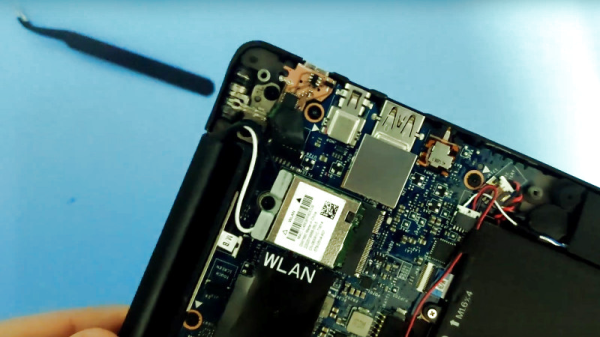
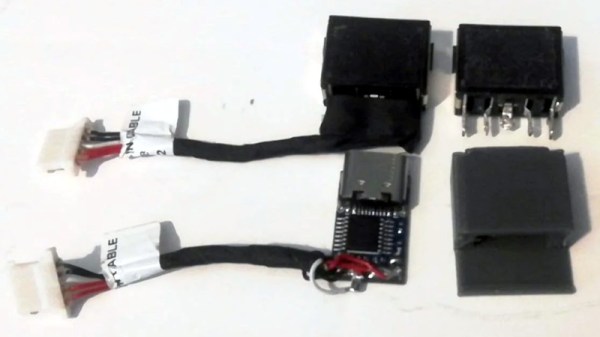
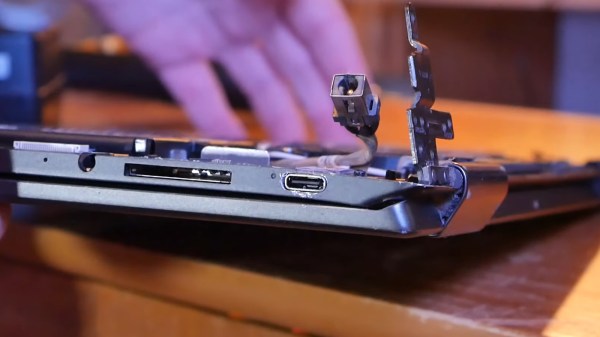
Well, as the saying goes for situations like this: love it, leave it, or get out the tools and rework that sucker. Lucky enough, the original charger provides 20 V, which matches nicely the USB power delivery (PD) specification, and after opening up the laptop, [Mat] was happy to see that the interior provided enough room to fit the USB-C module he was planning to use. Even better, the charging port itself was a standalone component attached to a cable, so no modifications to the mainboard were necessary. Once the USB-C module was soldered to that same cable, the only thing left to do was carving a bigger hole on the laptop case, and saying good bye to the obsoleted charger.

The downside is of course the lack of actual USB functionality with that shiny new charging port, but that was never the goal here anyway. With more and more USB-C devices popping up, it’s also no surprise that we’ve seen modifications like this before, and not only with laptops. In case you’re thinking of upgrading one of your own devices to USB-C, and do wish for actual USB functionality, don’t worry, we got you covered as well.

Continue reading “Solving Buyer’s Remorse With A Rotary Tool And Soldering Iron”

Have JBC Soldering Handle, Will USB-C Power Deliver

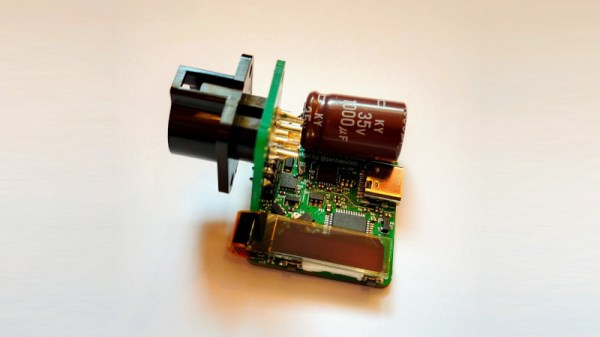
Frequent converter-of-tools-to-USB-C [Jana Marie Hemsing] is at it again, this time with a board to facilitate using USB Power Delivery to fuel JBC soldering iron handles. Last time we saw [Jana] work her USB-C magic was with the Otter-Iron, which brought Power Delivery to the trusty TS100 with a purpose built replacement PCBA. This time he’s taking a different approach by replacing the “station” of a conventional soldering station completely with one tiny board and one giant capacitor.

If you’ve been exposed to the “AC fire starter” grade of soldering iron the name JBC might be unfamiliar. They make tools most commonly found with Metcal’s and high end HAKKOs and Wellers on the benches of rework technicians and factory floors. Like any tool in this class each soldering station comes apart and each constituent piece (tips, handles, base stations, stands, etc) are available separately from the manufacturer and on the used market at often reasonable prices, which is where [Jana] comes in.

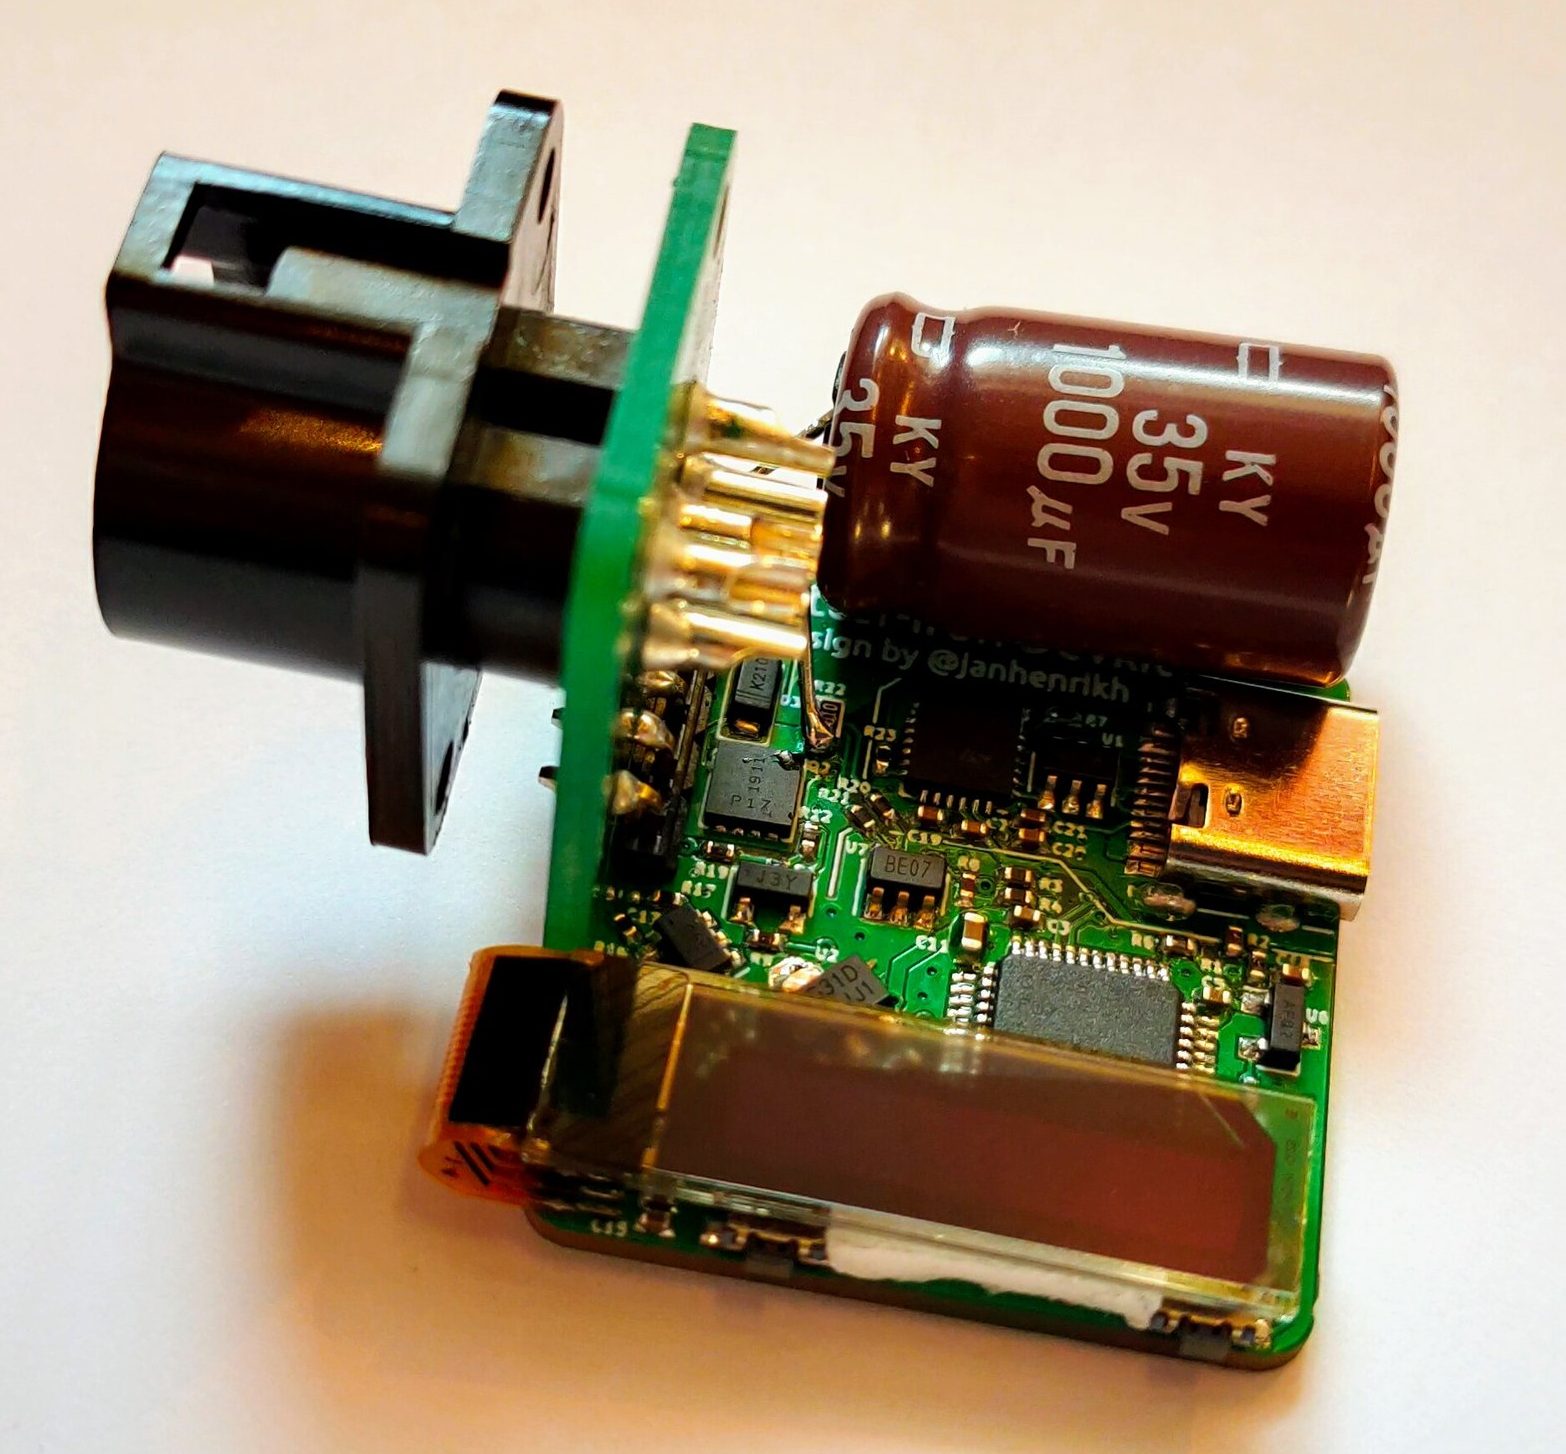
The Otter-Iron PRO is a diminutive PCBA which accepts a USB-C cable on one side and the connector from a standard JBC T245-A handle on the other. JBC uses a fairly typical thermistor embedded in the very end of the iron tip, which the Otter-Iron PRO senses to provide closed loop temperature control. [Jana] says it can reach its temperature setpoint from a cold start in 5 seconds, which roughly matches the performance of an original JBC base station! We’re especially excited because this doesn’t require any modification to the handle or station itself, making it a great option for JBC users with a need for mobility.

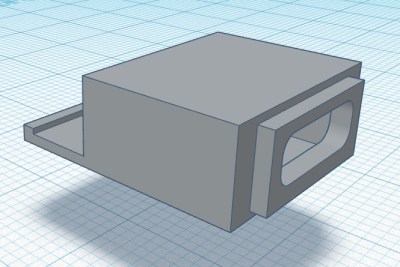
Want to make an Otter-Iron PRO of your own? Sources are at the link at the top. It sounds like v3 of the design is coming soon, which will include its own elegant PCB case. Check out the CAD render after the break. Still wondering how all this USB-PD stuff works? Check out [Jason Cerudolo’s] excellent walkthrough we wrote up last year.

Continue reading “Have JBC Soldering Handle, Will USB-C Power Deliver”

A Nano With An Otter’s Bite

The would-be microcontroller experimenter is now faced with a bewildering array of choices when it comes to a tiny development board for their projects. Everything from descendants and clones of the original Arduino through to full-fat Linux powerhouses such as the Raspberry Pi Zero and similar boards can be had, and often for a reasonable price.

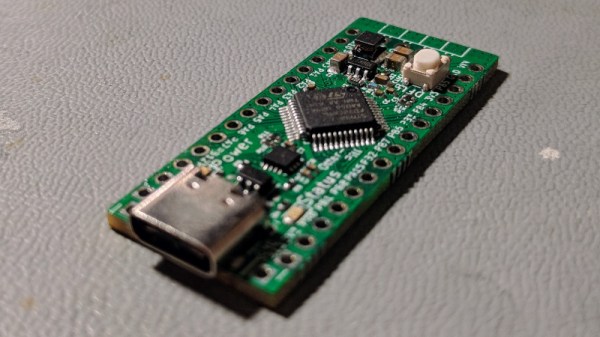
A new entrant has now joined the fray, the OtterPill is an STM32F072-based board with an Arduino-Nano-like pinout, and it comes from the bench of [Jana Marie]. With so many competitors you might ask yourself what it can offer, and it would be a valid point given that a Nano clone can be had for relative pennies. Aside from the Nano shield compatibility and extra power of the ARM Cortex M0 then, it’s an open source development board with USB-PD included from its USB-C socket, and with some elite BoM wizardry she’s managed to get the cost of its components to below three dollars. A USB-PD example firmware is available and a blank firmware is on its way. For now the board exists only in prototype form, but she’s putting together a production run if you would like one too. We saw an early development of it at eth0 back in the autumn, and given the progress since then we’re sure that we won’t have to wait for long.

Regular readers will recognise [Jana Marie]’s work, because otter-themed boards have made their way to these pages before. Our most recent ones were the USB-C replacement board bringing USB-PD to the TS-100 soldering iron, and  a nifty little USB board for addressable LEDs.

Adding USB-C To The TS100, But Not How You Think

USB-C has its special Power Delivery standard, and is capable of delivering plenty of juice to attached hardware. This has led many to modify their TS-100 soldering irons to accept the connector. [Jana Marie] is the latest, though she’s taken rather a different tack than you might expect.

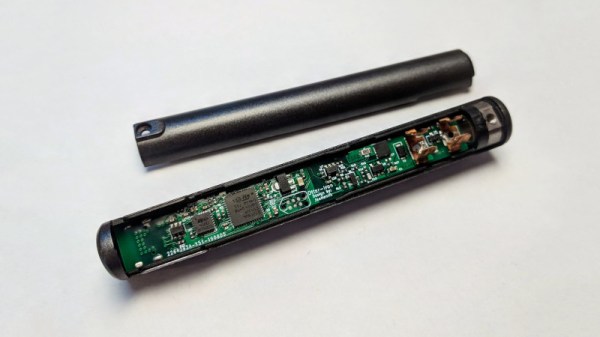
[Jana] didn’t want to modify the original hardware or hack in an adapter. Instead, she struck out on her own, developing an entire replacement PCB for the TS-100 iron. The firmware is rough and ready, and minimal work has been done on the GUI and temperature regulation. However, reports are that functionality is good, and [Jana]’s demonstration shows it handling a proper desoldering task with ease.

Files are on Github for those that wish to spin their own. The PCB is designed to snap neatly inside the original case for a nice fit and finish. Power is plentiful too, as the hardware supports USB Power Delivery 2.0, which is capable of running at up to 100 W. On the other hand, the stock TS-80 iron, which natively supports USB-C, only works with Quick Charge 3.0, and thus is limited to a comparatively meager 36 W.

We’ve seen plenty of TS-100 hacks over 2019. Some have removed the standard barrel jack and replaced it with a USB-PD board. Meanwhile, others have created adapters that plug in to the back of the iron. However, [Jana] is dictating her own terms by recreating the entire PCB. Sometimes it pays to go your own way!

[Thanks to elad for the tip!]

A USB-C Bench Power Supply

A bench power supply is one of those things that every hacker needs, and as the name implies, it’s intended to occupy a place of honor on your workbench. But with the addition of USB-C support to his DPH5005 bench supply, [Dennis Schneider] is ready to take his on the road should the need ever arise.

The build started with one of the common DPH5005 bench power supply kits, which [Dennis] says he was fairly happy with aside from a few issues which he details in the post on his blog. Even if you aren’t looking to modify your own kit with the latest and greatest in the world of Universal Serial Bus technology, it’s interesting to read his thoughts on the power supply kit if you’ve been considering picking one up yourself.

Under normal circumstances you are supposed to give the DPH5005 DC power via the terminals on the back panel of the supply, which in turn is regulated and adjusted via the front panel controls. To add support for USB-C, all [Dennis] had to do was install a USB-PD trigger module configured to negotiate 20 VDC in the back of the case and connect it to the DC input. To hold it in place while isolating it from the metal case, he used a piece of scrap PCB carefully cut and wrapped in Kapton tape.

This actually isn’t the first portable bench power supply we’ve seen. Last year we saw one that got its input power from Makita portable tool batteries, but we think all things considered, the USB-C option is probably a bit more convenient.

Adding USB-C To The TS100

The TS100 is a popular entry into the new breed of small temperature-controlled soldering irons that, at least for some of us, have started to replace the bulky soldering stations of old. Unfortunately, one downside of this particular model is the need to plug it into a fairly ungainly laptop-style power supply, which certainly hinders its otherwise portable nature. But [Dennis Schneider] has come up with a very slick solution to that problem by adding a USB-PD module to his TS100.

The idea here is very simple: just remove the original DC barrel connector, and in its place install a USB-PD trigger module. In practice it took more than a little fiddling, cutting, persuasion, and creative soldering (ironically, with a soldering station), but the end result does look quite professional.

It helps that the USB-PD module [Dennis] used was almost the exact same width as the TS100 PCB, meaning that the modified iron could go back into its original case. Though as we saw not so long ago, there’s a growing community of 3D printed replacement cases should you select a trigger module that doesn’t so neatly fit the footprint of the original board. Or if you didn’t want to modify the iron at all, you could always just make an external adapter.

Those that have some experience with these irons might be wondering what the point of modifying the TS100 to take USB-C is when we already have the TS80. As it turns out, while the TS80 is using a USB-C connector it doesn’t actually use USB-PD, so its not taking advantage of the enhanced power delivery capabilities. We know, it’s all kind of confusing.