DIY Machine Enables PEMF Therapy On A Budget

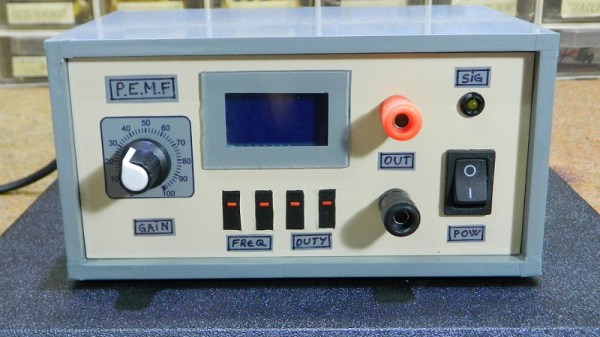
We’re certainly not qualified to say whether or not pulsed electromagnetic field (PEMF) therapy will actually reduce your stress or improve your circulation, but there seems to be enough legitimate research going on out there that it might be worth a shot. After all, unless you’ve got a pacemaker or other medical implant, it seems pretty unlikely a magnetic field is going to make anything worse. Unfortunately commercial PEMF machines can cost thousands of dollars, making it a fairly expensive gamble.

But what if you could build one for as little as $10 USD? That’s the idea behind the simple DIY PEMF machine [mircemk] has been working on, and judging by its ability to launch bits of metal in the video below, we’re pretty confident it’s indeed producing a fairly powerful electromagnetic field. Even if it doesn’t cure what ails you, it should make an interesting conversation piece around the hackerspace.

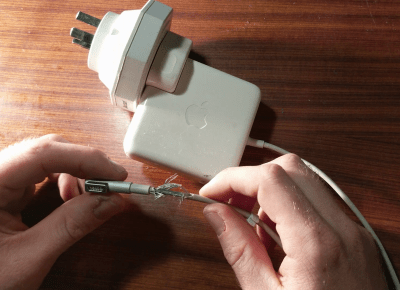
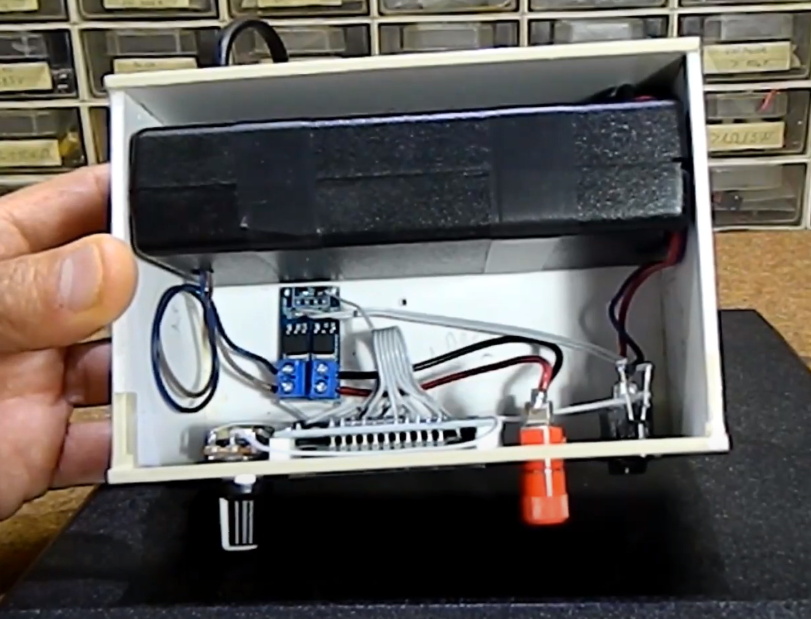
While the outside of the machine might look a bit imposing, the internals really are exceptionally straightforward. There’s an old laptop power supply providing 19 VDC, a dual-MOSFET board, a potentiometer, and a simple signal generator. The pulses from the signal generator trip the MOSFET, which in turn dumps the output of the laptop power supply into a user-wound coil. [mircemk] has a 17 cm (6.7 inch) open air version wrapped with 200 turns of copper wire used for treating wide areas, and an 8 cm (3 inch) diameter version with 300 windings for when you need more targeted energy.

Some skepticism is always in order with these sort of medicinal claims, but commercial PEMF machines do get prescribed to users to help promote bone growth and healing, so the concept itself is perhaps not as outlandish as it might seem.

Continue reading “DIY Machine Enables PEMF Therapy On A Budget”

Solving Buyer’s Remorse With A Rotary Tool And Soldering Iron

At this point, it’s pretty clear that USB-C has become the new standard connector for an increasing amount of applications, but predominantly charging. Even Apple is on board this time, and thanks to backwards compatibility, you don’t have to abandon devices using the older standards you may prefer for their simplicity or superior lint-resilience either. For [Mat] on the other hand, it’s USB-C all the way nowadays. Yet back in the day when he bought his laptop, he had the price tag convince him otherwise, and has come to regret it, as all the convenience of a slim design is cancelled out by dragging a bulky charger for the laptop’s proprietary charging port along.

Well, as the saying goes for situations like this: love it, leave it, or get out the tools and rework that sucker. Lucky enough, the original charger provides 20 V, which matches nicely the USB power delivery (PD) specification, and after opening up the laptop, [Mat] was happy to see that the interior provided enough room to fit the USB-C module he was planning to use. Even better, the charging port itself was a standalone component attached to a cable, so no modifications to the mainboard were necessary. Once the USB-C module was soldered to that same cable, the only thing left to do was carving a bigger hole on the laptop case, and saying good bye to the obsoleted charger.

The downside is of course the lack of actual USB functionality with that shiny new charging port, but that was never the goal here anyway. With more and more USB-C devices popping up, it’s also no surprise that we’ve seen modifications like this before, and not only with laptops. In case you’re thinking of upgrading one of your own devices to USB-C, and do wish for actual USB functionality, don’t worry, we got you covered as well.

Continue reading “Solving Buyer’s Remorse With A Rotary Tool And Soldering Iron”

Hacking Dell Laptops To Use Off-Brand Chargers

Dell, along with many other manufacturers, have begun to implement smart features into their laptop charging circuitry. This leaves the user out of luck if they wish to use an off-brand part, or get caught short when their original charger fails. [Neutrino] was in just such a position, and decided to hack around the problem.

The laptop verifies the identity of the attached charger by a third pin. This communicates with a One-Wire IC embedded in the charger, which reports the charger’s identity when queried by the laptop. When [Neutrino]’s charger broke, an attempt was made to use an off-brand charger, with the third pin hooked up to the original failed unit. This tricked the laptop into charging successfully.

For a more permanent workaround, [Neutrino] harvested the One-Wire IC from inside the original charger, and instead hooked it up inside the laptop, directly to the charge port. Thus, the laptop always thinks a Dell charger is connected when power is applied. There is some risk, in that if the user plugs in a lower-power charger than the original, there could be an overload event, but that’s just the risk inherent in the hack.

It’s a tidy workaround for an annoying problem that is all too common in the post-DRM world. Laptop chargers are often prime candidates for failure too; we’ve seen fixes as creative as repairing a Magsafe with a pistacchio nut before!

[Thanks to Levi for the tip]

Laptop Chargers Team Up To Get The Juice Flowing

There’s perhaps nothing harder to throw away than a good power supply. Whether it’s the classic “wall wart” whose mate has long since been misplaced or a beefy ATX you pulled out of a trashed computer, it always seems like there should be something you could do with these little wonders of modern power conversion. So into the parts bin it goes, where it will stay evermore. But not for the [TheRainHarvester], who figured out that the secret to putting a drawer full of old laptop chargers to use was combing them like hacker Voltron.

Using three old IBM laptop chargers, he’s able to produce up to 48 volts DC at a healthy 4.5 amps. His cobbled together power supply even features an variable output, albeit with some mighty coarse adjustment. As each charger is individually rated for 16V, he can unplug one of the adapters to get 32V.

In the video after the break [TheRainHarvester] walks viewers through the construction of his simple adapter, which could easily be made with salvaged parts. Built on a trace-free piece of fiber board, the adapter consists of the three barrel jacks for the chargers and a trio of beefy Schottky diodes.

The nature of the barrel jacks (which short a pin once the plug is removed) along with the diodes allows [TheRainHarvester] to combine the output of the three adapters in series without running the risk of damaging them if for example one is left plugged into the adapter but not the wall. He’s also looking to add some status LEDs to show which chargers are powered on.

Unfortunately, [TheRainHarvester] realized a bit too late that what he thought was an inert piece of board actually had a ground plane, so he’s going to have to come up with a new way to tie the whole thing together on the next version which he says is coming now that he knows the concept seems workable.

In the meantime, if you’re thinking of hacking something together with the wealth of old laptop chargers we know are kicking around the lab, you might want to take a look at our primer for understanding all those hieroglyphs on the back of the thing.

Continue reading “Laptop Chargers Team Up To Get The Juice Flowing”

Repairing A Macbook Charger… With A Pistachio Nut

Laptop chargers face a hard life. They’re repeatedly plugged and unplugged, coiled up, stuffed into bags, thrown around, and just generally treated fairly poorly. Combine this with fairly lightweight design and it’s not uncommon for a laptop charger to fail after a few years. It’s usually the connector that goes first. Such was the case when I found myself face to face with a failed Macbook charger, and figured it’d be a simple fix. Alas, I was wrong.

Unlike most PC manufacturers, who rely on the humble barrel jack and its readily available variants, Apple liked to use the Magsafe connector on its Macbook line. This connector has many benefits, such as quick release in the event someone trips over the cable, and the fact that it can be plugged in without regard to orientation. However, it’s not the easiest to fix. When the charger began failing, I noticed two symptoms. The first was that the charger would only function if the cable was held just so, in exactly the right orientation. The other, was that even when it would charge, the connector would become very hot. This led me to suspect an intermittent connection was the culprit, and it was quite a poor one at that; the high resistance leading to the heat issue.

It’s at this point with any other charger that you get out your trusty sidecutters, lop the end off, and tap away at Digikey to get a replacement part on the way. With Magsafe? No dice. Replacement parts simply aren’t available — a common problem with proprietary connectors. I endeavoured to fix the problem anyway. I began to strip away the metal shell around the back of the connector with my sidecutters, and eventually an angle grinder. A Dremel would have been the perfect tool for the job, actually, but I persevered regardless. After much consternation, I had the connector peeled back and was able to identify the problem.

Continue reading “Repairing A Macbook Charger… With A Pistachio Nut”