We know you like soldering irons, we’re quite fond of them ourselves. But the reality is, modular components and highly capable development boards allow the modern hardware hacker to get things done with far less solder smoke then ever before. In fact, sometimes all you need to finish your project is the right code.
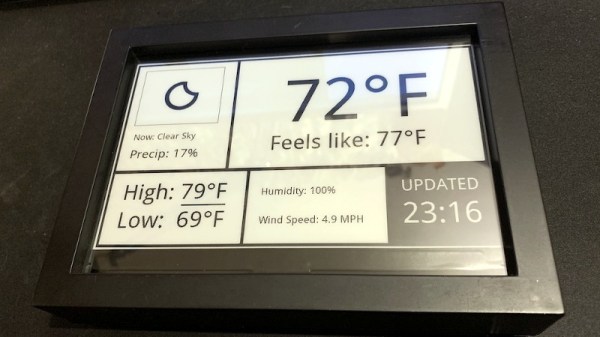
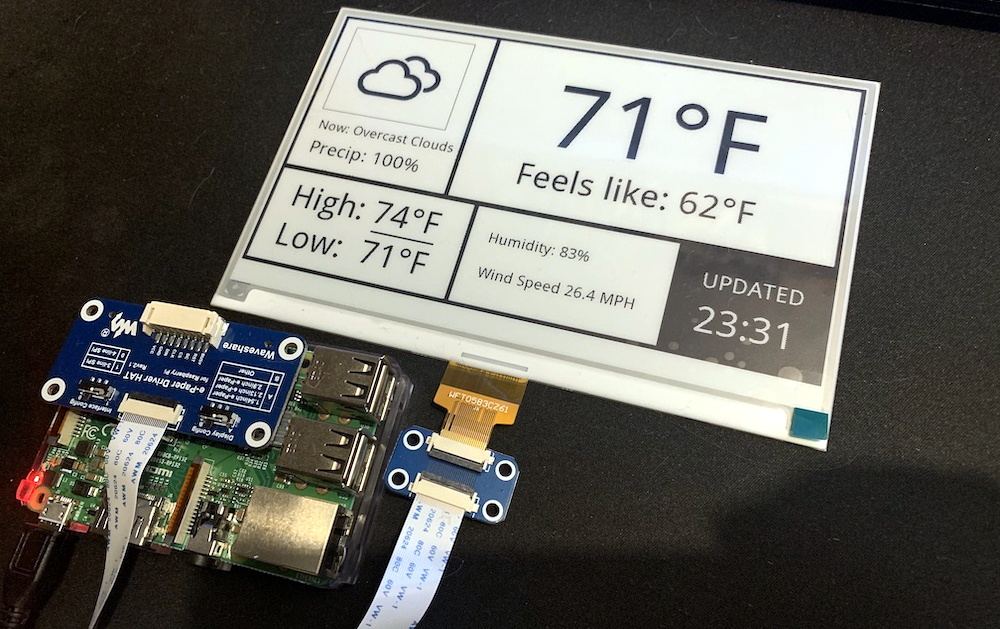
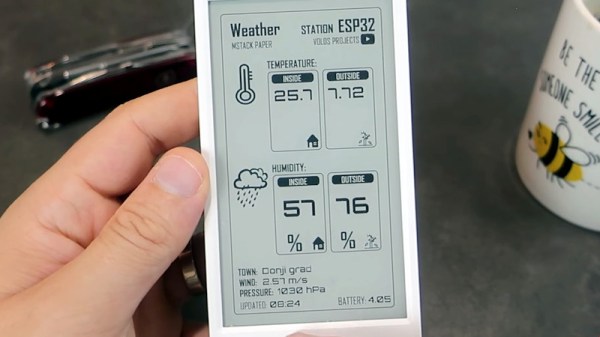
Case in point, check out the slick electronic paper weather display that [Danko Bertović] shows off in the latest Volos Projects video. While it certainly fits the description of a DIY project, he didn’t have to put any of the hardware together himself. The M5Paper is an ESP32 development kit designed around a crisp 4.7″, 960 x 540 e-paper panel that includes everything from environmental sensors to an internal 1150 mAh battery. To make your handheld e-paper dreams come true, the only thing you need to provide is the software.
The weather display code provided by [Danko] should certainly get you going in the right direction. Now don’t get us wrong, there’s certainly no shame in just flashing his code to the device and plunking it on your desk. It’s a gorgeous looking interface, and we all know that a sprinkling of open source code is often all it takes to make a standard consumer device extraordinary. But by using the code he’s provided as a launching point, you can take this turn-key device and really make it your own.
Continue reading “M5Paper Gets Open Source Weather Display Firmware”