Wire-bots, Roll Out!

Designing and 3D-printing parts for a robot with a specific purpose is generally more efficient than producing one with a general functionality — and even then it can still take some time. What if you cut out two of those cumbersome dimensions and still produce a limited-yet-functional robot?

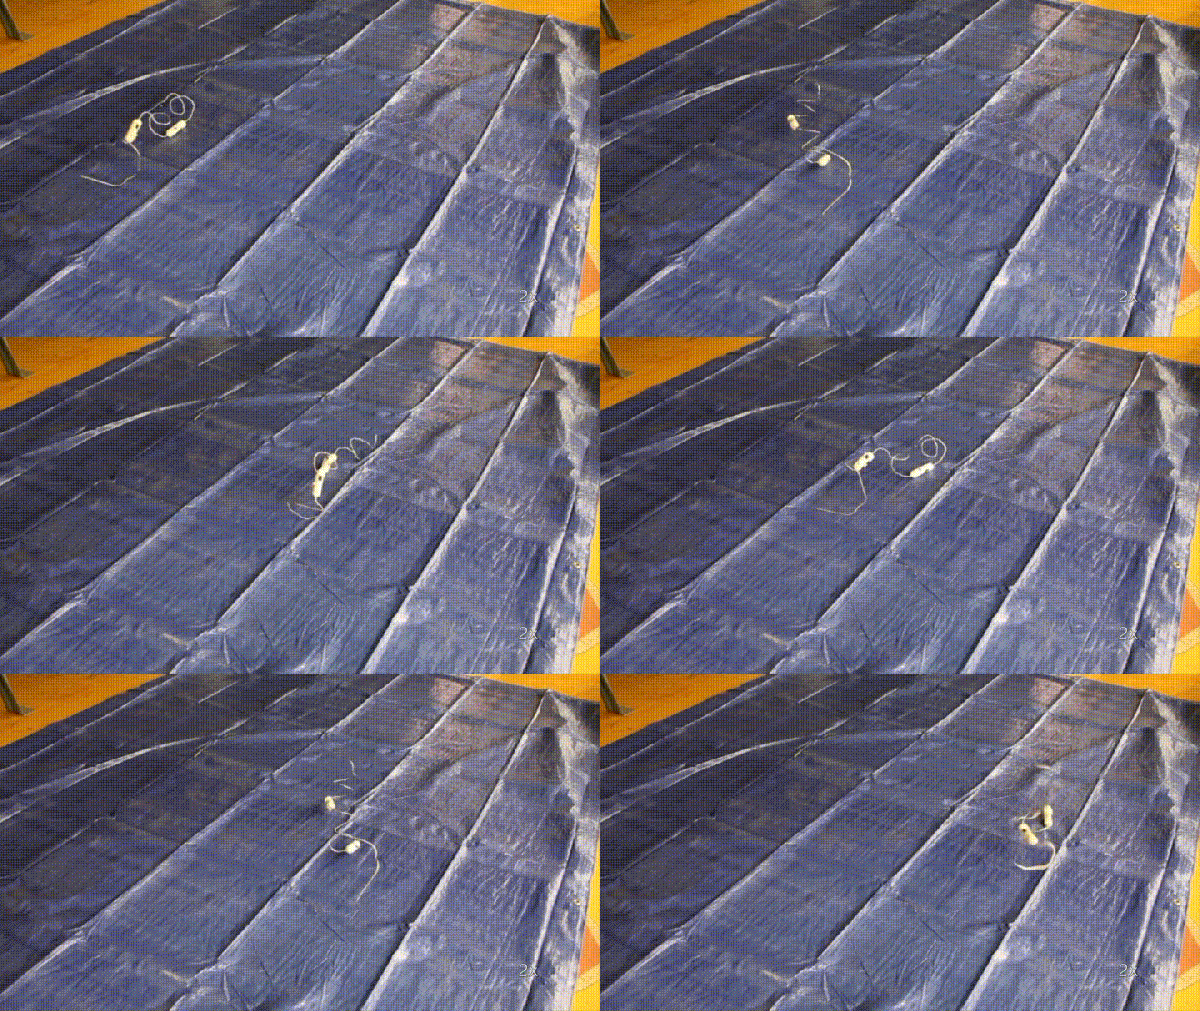
[Sebastian Risi] and his research team at the IT University of Copenhagen’s Robotics, Evolution, and Art Lab, have invented a means to produce wire-based robots. The process is not far removed from how industrial wire-bending machines churn out product, and the specialized nozzle is also able to affix the motors to the robot as it’s being produced so it’s immediately ready for testing.

A computer algorithm — once fed test requirements — continuously refines the robot’s design and is able to produce the next version in a quarter of an hour. There is also far less waste, as the wire can simply be straightened out and recycled for the next attempt. In the three presented tests, a pair of motors shimmy the robot on it’s way — be it along a pipe, wobbling around, or rolling about. Look at that wire go!

Continue reading “Wire-bots, Roll Out!”

Adding Copper Wire To A 3D Print

Conductive filaments and printing solder are one thing, but what if you could spice up your 3D prints by embedding wire right inside the filament? That’s what [Bas] is doing, paving the way for printable electronics, PCBs, coils, and odd-shaped antenna.

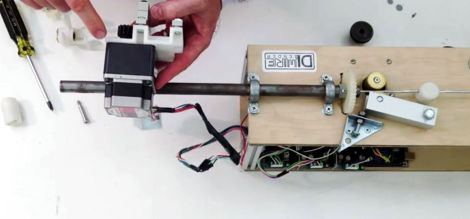
The general idea of [Bas]’ technique of embedding thin copper wire inside a single layer of a print is to lay the wire down in front of the nozzle, effectively turning bare wire into insulated wire in whatever shape you can imagine. The trick, however, is figuring out how to put wire  down in front of a nozzle. [Baz] accomplished this with a slew ring turned by a stepper motor connected to a 5th axis on the control board.

There are a few things this prototype doesn’t cover – cutting the wire, connecting the wire to components, fine-tuning, and a host of other things that prevent [Bas]’ machine from building real functional circuits. Despite these limitations, the machine could probably fabricate the secondary for a tesla coil right now, something that’s really annoying to make unless you have a lathe.

Video demo below.

Continue reading “Adding Copper Wire To A 3D Print”

Fail Of The Week: Rewiring Robosapien

fotw-rewiring-robosapien

Our first thought was “check out all of those TO-92 components!”, but then we saw the wiring nightmare. [Tom] picked up a Robosapien from an estate sale for just $10. Most hackers couldn’t resist that opportunity, but the inexpensive acquisition led to a time-consuming repair odyssey. When something doesn’t work at all you crack it open to see what’s wrong. He was greeted with wiring whose insulation was flaking off.

This is no problem for anyone competent with a soldering iron. So [Tom] set to work clipping all the bad wire and replacing it with in-line splices. Voila, the little guy was dancing to his own tunes once again! But the success was short-lived as the next day the robot was unresponsive again. [Tom] plans to do some more work by completely replacing the wires as soon as he receives the replacement connectors he ordered. So what do you think, is this an issue that will be resolved with a wire-ectomy or might there be actual damage to the board itself?


2013-09-05-Hackaday-Fail-tips-tileFail of the Week is a Hackaday column which runs every Wednesday. Help keep the fun rolling by writing about your past failures and sending us a link to the story — or sending in links to fail write ups you find in your Internet travels.

Hackaday Links: March 23, 2014

hackaday-links-chain

[Jack] sent us a link to a Metropolitan Museum of Art video showing off a mechanized desk that plays music and has a ton of hidden compartments. Furniture makers of yore built hidden compartments in furniture all the time. After all, there weren’t credit cards back in the day and you had to keep important documents, cash, and everything else on hand. What strikes us is that this mates woodworking of the highest caliber with precision mechanics.

Before you get rid of that old box spring, ask yourself if you need to store dimensional goods. If you rip off the outer fabric, the network of wire inside makes a reasonable lumber rack.

And since we’re talking trash, we enjoyed seeing this water bottle wire spool minder which [Daniel] sent our way.

You know those portable DVD players you can hang from a headrest to entertain the kids on long trips? Well [John’s] broke, and like chasing the dragon, once you’re hooked on watching videos during car trips there’s no going back. Luckily he was able to throw a Raspberry Pi at the problem. He now has a portable OpenElec XBMC device controlled via a smartphone.

[Jaromir] posted some breakout board footprints that you can use. It’s not the footprints that impress us, but the idea of using them to fill up board space when spinning a new PCB. [Thanks Sarah]

LEGO Gachapon. Need we say more? Okay, truth be told we had to look it up too; Wikipedia says it’s spelled Gashapon. These are coin-operated machines that dispense toys inside of plastic capsules. This one’s made of LEGO and it’s awesome.

[Mikhail] actually built his own ballast resistors for some HeNe laser tubes. This is a bit easier than it might sound at first, as they are much lower power than the tubes used in cutters. But none-the-less an interesting, and successful, experiment.

Taking Picture Of Exploding Wire

wire

[Patrick] didn’t just want his name in lights. He wanted his name in glowing plasma explosions, made by sending thousands of volts through a very thin wire.

This project is an experiment in capturing high speed images of exploding wires. [Patrick] wanted to know if he could shape wires in such a way that they would explode into letters of plasma. Of course, photographic proof of this would be needed, and would make for an awesome logo in any event.

To get pictures of wire turning into plasma, [Patrick] first needed to construct the necessary electronics. A simple spark gap was constructed on a large plastic cutting board – an excellent high voltage insulator. The huge capacitors are charged with a pair of high voltage transformers, and the entire assembly is triggered with an optocoupler and a very beefy SCR.

Even though [Patrick] designed the system for a low propagation delay, there was still the matter of capturing an exploding wire on film. The camera delay varied by about 120μs, but with a really great camera trigger, [Patrick] eventually got some impressive pictures.

After getting the electronics and photography portion of the build down, [Patrick] turned to making letters out of expanding plasma. Simply shaping the wire into a letter shape before vaporizing it had no effect, so he turned to 3D printed channels to contain the plasma. After a few attempts, this actually worked, allowing him to form the letters L, U, and X in an expanding ball of vaporized wire.

Using Nichrome Wire To Repair Broken Plastic Parts

nichrome-wire-plastic-repair

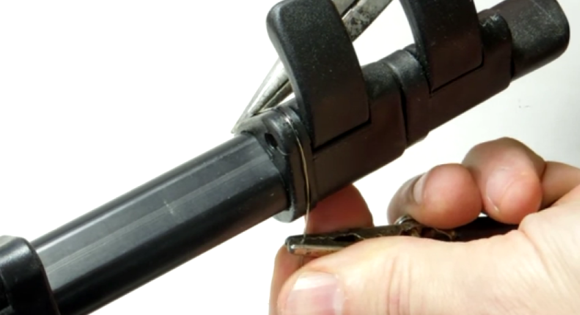
It’s a real bummer when injection molded plastic parts break. We’ve never found a gluing technique that works for a part which is exposed to force like the clamp on this camera tripod. But [Matthias Wandel] may be on to something. Here he’s using nichrome wire to reinforce the broken plastic part.

The repair process is demonstrated in full in the video after the break. He scavenged the wire from the heating element of broken hair driers. the idea is to wrap the wire across the broken piece, then apply power from a bench supply. This heats the wire, which can then be pulled beneath the surface of the plastic. [Matthias] likens it to using rebar in concrete.

His implementation could be improved just a bit. Getting the wire to embed evenly is a problem, but using a pair of pliers instead of just alligator clips may yield better results.

Continue reading “Using Nichrome Wire To Repair Broken Plastic Parts”

A Closer Looks Helps You Build Your Own DiWire Bender

Whether or not you’re actually going to build this CNC wire bender, we think you’ll love getting a closer look at how it’s put together. The team over at PENSA got such a strong response from a look at the original machine that they decided to film a video (embedded after the break) showing how the thing was put together. They’ve also posted a repository with code, bom, etc.

In the image above [Marco] shows off the portion that actually does the bending. It’s designed to mount on the pipe through which the straightened wire is fed. The 3d printed mounting bracket really makes this a lot easier. The assembly provides a place to attach the solenoid which moves a bearing in and out of position. That bearing presses against the wire to do the bending, but must be moved from one side of the wire to the other depending on the direction of the next bend. This is a lot easier to understand after watching the demo video which is also embedded after the break.

Continue reading “A Closer Looks Helps You Build Your Own DiWire Bender”