Before today, we probably would have said that scratch-built relay computers were the sole domain of only the most wizardly of graybeards. But this impressive build sent in by [Will Dana] shows that not only are there young hardware hackers out there that are still bold enough to leave the transistor behind, but that they can help communicate how core computing concepts can be implemented with a bundle of wires and switches.
Created for his YouTube channel WillsBuilds, every component of this computer was built by [Will] himself. Each of the nine relay-packed protoboards inside the machine took hours to solder, and when that was done, he went out to the garage to start cutting the wood that would become the cabinet they all get mounted in.
To be clear, when we are talking about tubes, we mean ordinary cylinders, not vacuum-amplifying elements. With that out of the way, when we need a tube like that, we usually think of PVC or some other kind of pipe product. Or maybe we’ll 3D print what we need. But not [GregO29]. He made his tubes from plywood.
You can make tubes as small as 12 inches in diameter, and [GregO29] made some that were 16 inches. The first step was to make a mold or form. In this case, he elected to make a form that the tube-to-be wraps around. The plywood is thin 2-ply white birch. This makes it easy to shape.
The basic idea is to wrap the wood around the form and glue it. You hold it together with a strap until it dries. Then, you can add more layers until it is the thickness you need.
The real problem turned out to be removing the form once it was done. Why make a tube like this? In [Greg]’s case, he’s building a telescope, which is as good a reason as any to have a tube, we suppose.
With all the tools and services available to us these days, it’s hard to narrow down a set of skills that the modern hacker or maker should have. Sure, soldering is a pretty safe bet, and most projects now require at least a little bit of code. But the ability to design 3D printable parts has also become increasingly important, and you could argue that knowledge of PCB design and production is getting up there as well. With home laser cutters on the rise, a little 2D CAD wouldn’t hurt either. So on, and so on.
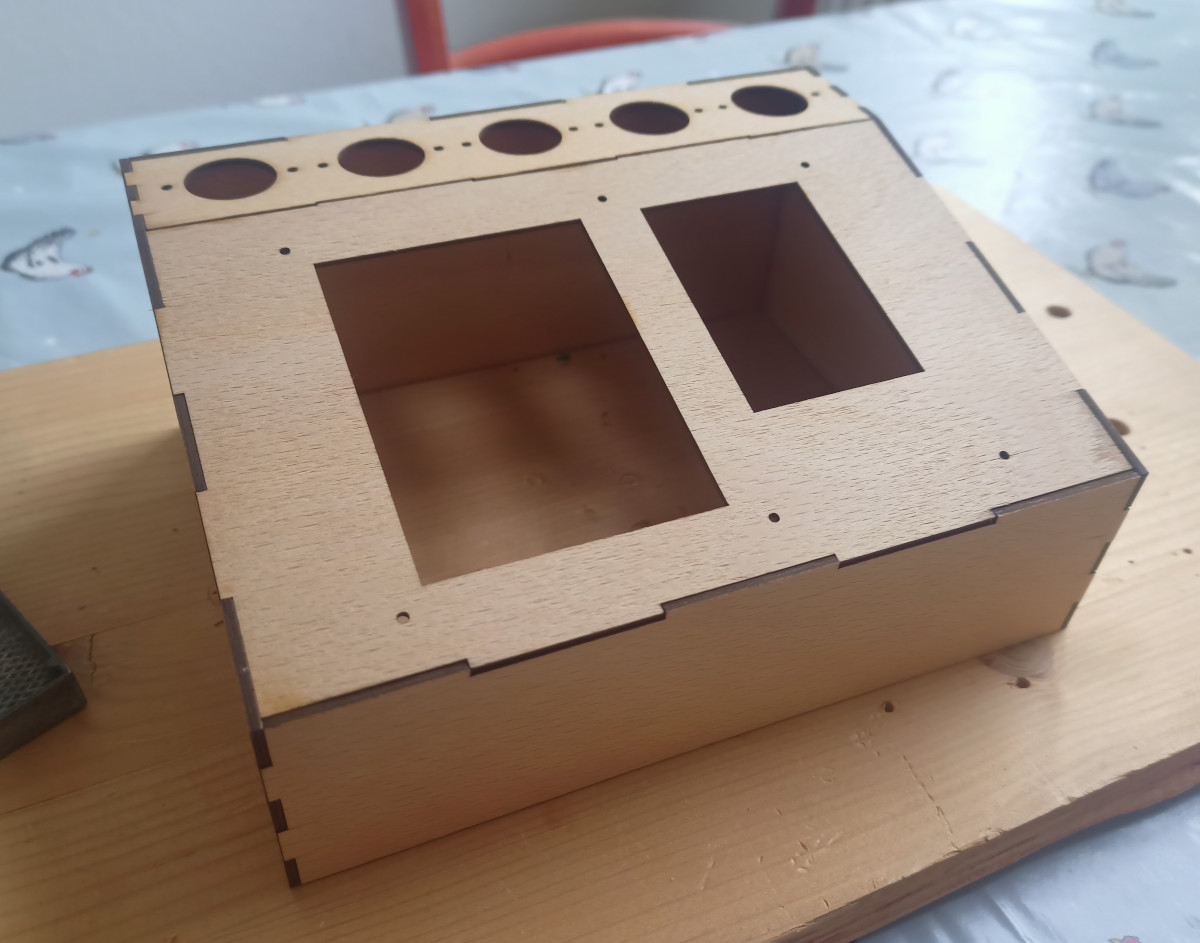
If you ever wanted an example of the multitude of skills that can go into a modern hardware project, take a look at this gorgeous Vacuum Fluorescent Display (VFD) tube calculator built by [oskar2517]. As fantastic as the final product is, we were particularly impressed with everything it took to get this one over the finish line.
A .7 mm walnut veneer covers the pieced together plywood frame.
It’s got it all: 3D printed parts, a laser cut wooden frame, a custom PCB, and even a bit of old school woodworking. To top it all off, the whole thing has been meticulously documented.
But what’s perhaps most impressive here is that [oskar2517] was approaching most of these techniques for the first time. They had never before worked with IV-12 tubes, designed an enclosure in 3D, had parts laser cut, applied wood veneer, or designed a custom PCB. They did have solid experience writing code in C at least, which did make developing the Arduino firmware a bit easier.
Although they might look outwardly similar, VFD tubes like the IV-12 are easier to work with than Nixie tubes thanks to their lower operating voltage. That said, a look through our archives shows that projects using Nixies outnumber VFD tubes by nearly four to one, so there’s no shortage of folks willing to take on the extra effort for that sweet warm glow.
Many beginner woodworkers, looking to offset the introductory costs of starting a hobby, will source their wood from pallets. Generally they’re easily found and can be low or no cost, but typically require a bit of work before they’re usable in a project. [Garage Avenger] is looking to do something a little outside of the box with his pallet project, though. He’s using raw pallets as a chassis for a four-speed go-kart, partially for the challenge and excitement and also to one-up a Pinterest post.
Almost immediately, though, the other major downside of working with pallets arose which is that they’re generally built out of low-grade pine which is soft and flexible. Flexibility is generally not a good thing to have in a vehicle frame so plenty of the important parts of this build were strengthened with steel tubing including the rear axle, steering mounts, and a few longitudinal supports to strengthen the overall frame. After working out some kinks with ordering a few of the wrong parts, and mounting the steering box backwards, it was time to test out the four-speed engine (and brakes) on the the go-kart, making it nearly ready for the road.
To complete the build, some tidying of wiring and fuel lines was done, along with improving some of the non-critical parts of the build like the bucket seat. Of course, adding pallet spoilers and body kit puts the finishing touches on the build and the go-kart is finally ready to tear up the local go-kart track and the less-inspiring Pinterest projects. [Garage Avenger] is no stranger to strange vehicle builds, either. Although it’s a bit out of season for most of our northern hemisphere readers now, his jet-powered street sled is still worth a view.
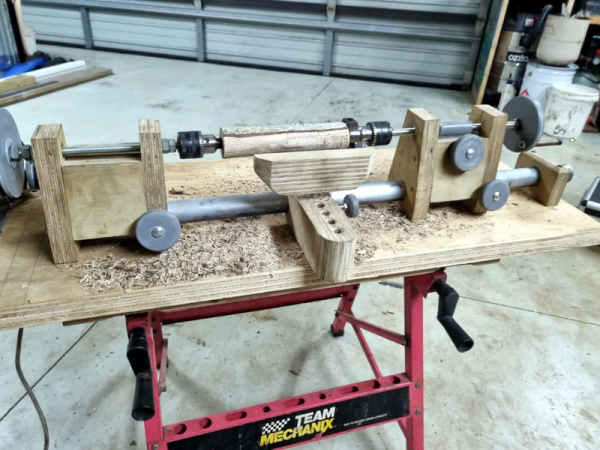
If you need to make round things, you probably need a lathe. Can you build one as nice as one you can buy? Probably not. But can you build one that will work and allow you to do more things than having no lathe at all? [Mikeandmertle] say absolutely! You can see the contraption in operation in the video below.
The build is decidedly functional-looking and only requires a few parts. Most of the components are unremarkable, save for a threaded bar, a metal pipe, some bearings, and a few threaded inserts. Well, there’s also a drill chuck and two lathe centers. Those don’t have to be very expensive, but they may well be the bulk of what you have to spend to make this project.
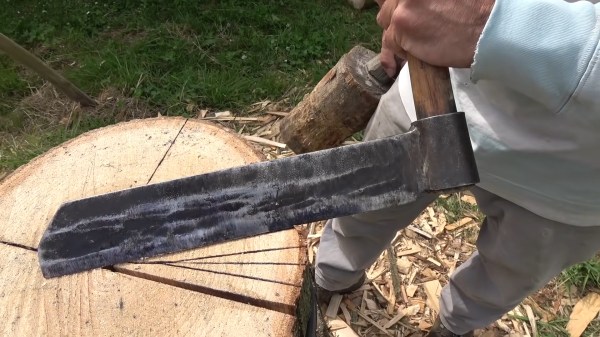
While they have mostly been replaced with other roofing technologies, wooden shingles have a certain rustic charm. If you’re curious about how to make them by hand, [Harry Rogers] takes us through his friend [John] making some.
There are two primary means of splitting a log for making shingles (or shakes). The first is radial, like one would cut a pie, and the other is lateral, with all the cuts in the same orientation. Using a froe, the log is split in progressively smaller halves to control the way the grain splits down the length of the log and minimize waste. Larger logs result in less waste and lend themselves to the radial method, while smaller logs must be cut laterally. Laterally cut shingles have a higher propensity for warping and other issues, but will work when larger logs are not available.
Once the pieces are split out of the log, they are trimmed with an axe, including removing the outer sapwood which is the main attractant for bugs and other creatures that might try eating your roof. Once down to approximately the right dimensions, the shingle is then smoothed out on a shave horse with a draw knife. Interestingly, the hand-made shingles have a longer lifespan than those sawn since the process works more with the grain of the wood and introduces fewer opportunities for water to seep into the shingles.
If you’re looking for something more solarpunk and less cottagecore for your house, maybe try a green solar roof, and if you’ve got a glass roof, try cleaning it with the Grawler.
In 14th Century Japan, there was a shortage of straight lumber for building and flat land on which to grow it. Arborists there developed a technique that looks like growing trees on top of trees, called daisugi.
Similar to the European practice of pollarding for firewood and basket materials, daisugi has been likened to bonsai on steroids. Starting with a Japanese cedar tree, one chops the top off the tree once it has grown to sufficient size to survive this initial shock. The following spring, you start carefully guiding the new growth through pruning to create tall, straight trunks on top of the “platform cedar.” Pruning takes place approximately every two years and harvesting every twenty. A daisugi tree can produce new shoots for several hundred years if properly maintained.
Although often used as a decorative technique today, it seems like an interesting way to grow your own perfect lumber if you have the room for it. We suspect the technique could be used on other species that lend themselves to pollarding like oak or maple, but harvest times and reliable straight trunks might vary. With sustainable production of wood for cross-laminated timber (CLT) and other advanced timbers being of growing importance, we wonder if these techniques could make a comeback?