We think of data storage as a modern problem, but even ancient civilizations kept records. While much of the world used stone tablets or other media that didn’t survive the centuries, the Incas used something called quipu which encoded numeric data in strings using knots. Now the ancient system of recording numbers has inspired a new way to encode qubits in a quantum computer.
With quipu, knots in a string represent a number. By analogy, a conventional qubit would be as if you used a string to form a 0 or 1 shape on a tabletop. A breeze or other “noise” would easily disturb your equation. But knots stay tied even if you pick the strings up and move them around. The new qubits are the same, encoding data in the topology of the material.
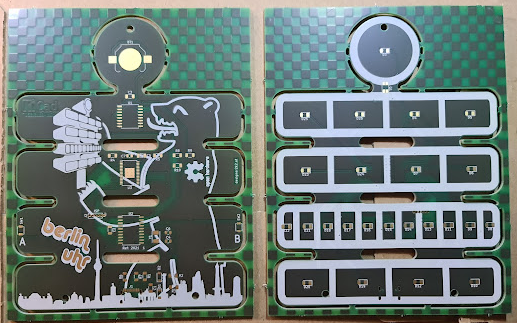
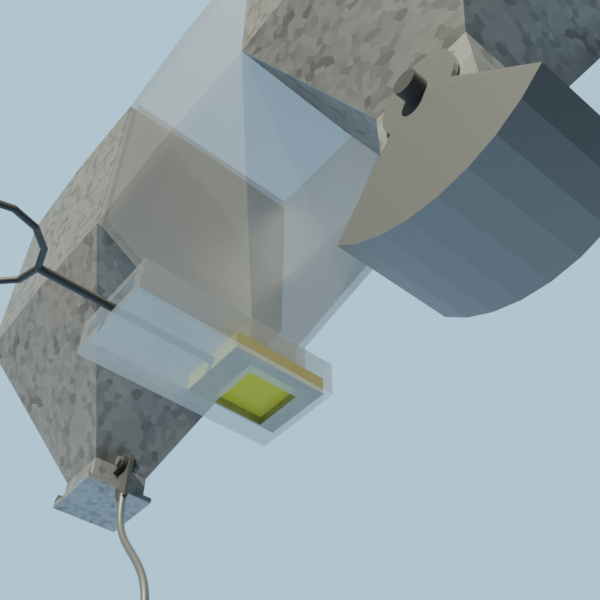
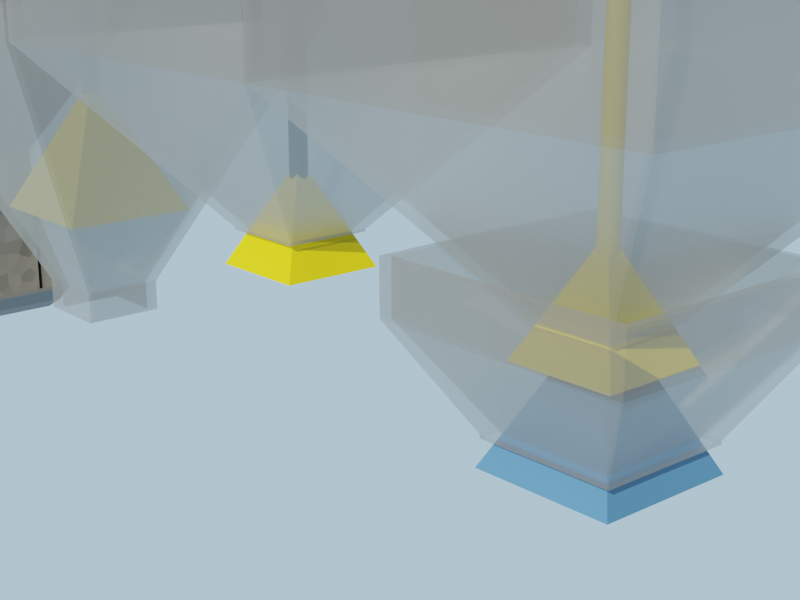
What would a HAL9000 look like if it eye were yellow and sat atop a front panel inspired by an Altair 8800? You’d have today’s feature, [Stephan]’s BerlinUhr, a gorgeous little take on a Berlin Clock.
At Hackaday, we have a soft spot for clock builds. They’ve graced our pages from early times. When we saw this ultra cool Berlin Clock, we couldn’t resist the urge to share it with all of our readers. For those of you not familiar with a Berlin Clock, it’s a clock that consists of 24 lights, and was the first of its kind back in 1975.
[Stephan]’s build is notable because not only is it a beautiful design, but the work that went into the design and build. At several inches tall, the BerlinUhr is supported solely by a USB-C connection, although it can also be hung on a wall. The RTC is backed up by a CR1216, and an ATtiny167 provides the brains for the operation.
A neat part of the build comes with the KPS-3227 light sensor, used to adjust the LED brightness according to ambient lighting. Rather than being a straightforward part to insert into the PCB, KiCad’s footprint had some pins reversed, causing [Stephan] to learn how to correct it and contribute the fix to KiCad. Well done!
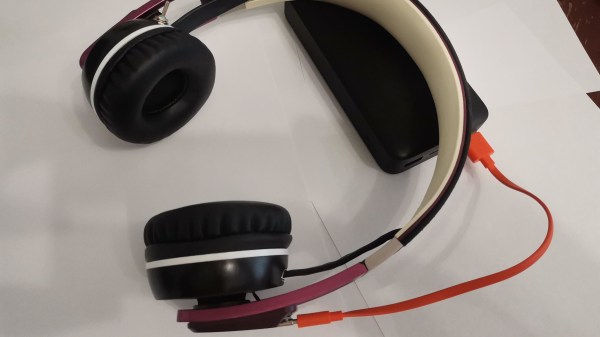
[adblu] encountered the ever-present headphone problem with their Sennheiser Urbanite headphones – the cable broke. These headphones are decent, and despite the cable troubles, worth giving a new life to. Cable replacement is always an option, but [adblu] decided to see – what would it take to make these headphones wireless? And while they’re at it, just how much battery life could they get?
Armed with a CSR8635 Bluetooth audio receiver breakout module and a TP4056 charger, [adblu] went on rewiring the headphone internals. The CSR8635 already has a speaker amplifier inside, so connecting the headphones’ speakers didn’t require much effort – apart from general soldering difficulties, as [adblu]’s soldering iron was too large for the small pads on the BT module. They also found a 2400mAh battery, and fit it inside the headphone body after generous amounts of dremel work.
The result didn’t disappoint – not only does everything fit inside the headphone body, the headphones also provided 165 hours of music playback at varying volume. Electronics-wise, it really is that easy to retrofit your headphones with Bluetooth, but you can always go the extra mile and design an intricate set of custom PCBs! If firmware hacks are more to your liking, you can use a CSR8645 module for your build and then mod its firmware.
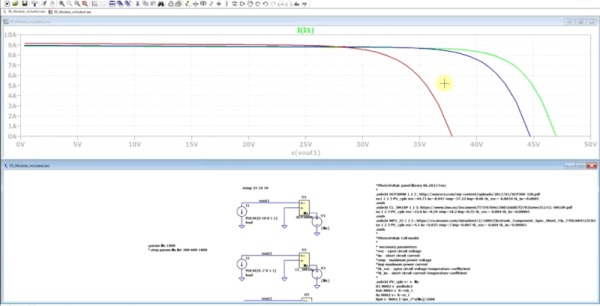
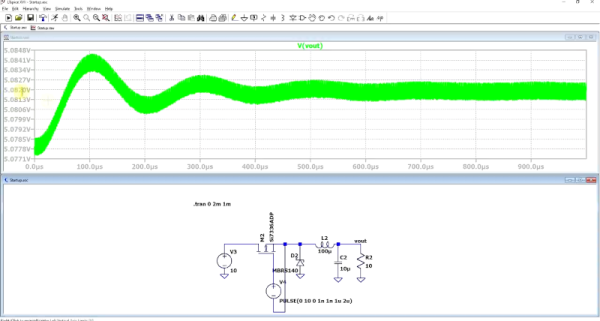
We like to build things using real parts. But we do think the more you can model using tools like LTSpice, the less time you can spend going down dead ends. If you need to model a common component like a resistor or even an active device, most simulators have great models and you can tweak them to have realistic parasitic effects. But what if the component you want isn’t in the library or doesn’t have the fidelity you want? [FesZ] wanted to model photovoltaic cells and had to build his own model. The resulting two videos are well worth watching.
Building your own models in Spice isn’t necessarily very difficult. However, knowing exactly what to add to model different real-world effects can be challenging. The videos do a good job of showing how to mutate a simple diode into one that produces current when exposed to light.
It’s fair to say that there’s really no phase of spaceflight that could be considered easy. But the case could be made that the most difficult part of a spacecraft’s journey is right at the very beginning, within the first few minutes of flight. At this point the vehicle’s booster rocket will be fighting with all its might against its own immense propellant-laden mass, a battle that it’s been engineered to win by the smallest of margins. Assuming the balance was struck properly and the vehicle makes its way off of the launch pad, it will still need to contend with the thick sea-level atmosphere as it accelerates, a building dynamic pressure that culminates with a point known as “Max q” — the moment where the air density imposes the maximum structural load on the rocket before quickly dropping off as the vehicle continues to ascend and the atmosphere thins.
Air-launched rockets avoid flying through dense sea level air.
While the vast majority of rocket launches have to contend with the realities of flying through the lower atmosphere, there are some exceptions. By launching a rocket from an aircraft, it can avoid having to power itself up from sea level. This allows the rocket to be smaller and lighter, as it doesn’t require as much propellant nor do its engines need to be as powerful.
The downside of this approach however is that even a relatively small rocket needs a very large aircraft to carry it. For example, Virgin Orbit’s LauncherOne rocket must be carried to launch altitude by a Boeing 747-400 airliner in order to place a 500 kg (1,100 lb) payload into orbit.
But what if there was another way? What if you could get all the benefits of starting your rocket from a higher altitude, without the cost and logistical issues involved in carrying it with a massive airplane? It might sound impossible, but the answer is actually quite simple…all you have to do it throw it hard enough.
Your [Bornhack] plans include leaving lemons in patterns as an info display. Your squirrel feeder needs to only dispense nuts when the squirrels deserve it. As promised last week, an intro to gating, feeding, and moving bulk material.
Gates
Bulk material flow needs control. Starting is easy, it’s stopping that’s hard.
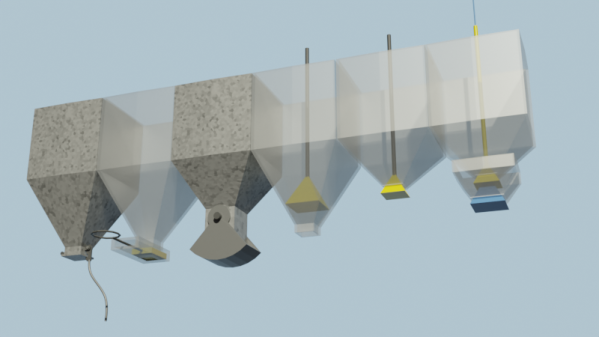
Dump Gate, Slide Gate, Clamshell Gate
If your need is just to dump out the entire contents of the bin, a dump gate works – a trapdoor with a latch. If you need to stop before emptying the bin, you can use a slide valve – a flat piece of material in a box that slides in and out. Friction from material bearing down on them causes large open/close forces. Material can jam between the flap and the housing when closing.
A variation is the clam shell gate — a section of a cylinder on arms that swings aside, like a crane’s grab. They tend to leak, but with the material’s weight against the hinge pin, they are easier to close with a high force against them.
The upward bell gate, helps with in-bin flow pattern and seals well. Open by pulling from above or pushing from below, through the outlet. The material moving around the gate acts to improve the flow, and because the material at the lip is on an inclined surface, they tend to seal better. If it still has a leakage problem, a flexible lip can cure it.
A cone, suspended on a cable below the outlet of the hopper is a downward bell. Lowering the cable lets material flow between the outlet rim and the bell. When the cable is raised, if a lump sticks at one place the bell moves aside. The sealing surfaces are angles, so material rolls off. The bin is shallower and there’s no outlet pipe. This design ensures clearance so large particles don’t wedge against the wall as the bell closes.
Upward Bell, Downward Bell, Double Bell
Any of these gates would close just fine if not for the material in the bin. Double gates exploit this. The main bin has a normal gate and outlet. The outlet is below the lip of the much smaller, lower control bin. If the control bin fills, the main bin stops. The control bin has a gate larger than the main bin. Closing the main gate as far as it will go reduces flow through the control gate to a trickle. The control gate can now be fully closed, which fills the control bin and blocks the main outlet.
You might not want to share environments between bins. Maybe one has pressure, nasty chemicals, or hot gases. In that case, a rotary airlock gate is a paddle wheel apparatus in a close fitting housing. Material is metered out as it turns. A double gate also works (blast furnaces use double bells). If you need to meter a set amount, a sliding cavity like a grocery store bulk bin works. So does a rotary airlock.
Locomotive sander systems spread sand on the rails to increase traction. The sand is gated with a “sand trap”. A pipe supplies sand to a ‘valve’ with a sharp upward U bend. Of course this blocks. A compressed air line from a valve in the cab feeds into the upward end of the U bend. As long as air flows, the blockage is constantly cleared and sand flows. It’s collected and sent to the wheels.
Feeders
If you need a constant flow, independent of how much is in the bin, you need a feeder.
The rotary air lock can be a simple feeder. A conveyor feeder is a belt at the bottom of the bin. One side has a slight gap between bin and belt. Material covers the belt as high as the gap. A screw feeder is a helical screw at the bottom of the hopper, taking material off to the side. The screw needs a varying pitch, starting out slow and increasing, to let it fill gradually from all along the hopper. A vibratory feeder is a chute designed to arch, with a vibrator to make it flow anyway.
Any of these can have a poor pattern of feeding, taking from one place along it’s inlet. Fins and inserts in the bin can help – a doctor blade to regulate how deep the first couple inches of belt feed, or an anti-rathole type insert to keep mass flow going.
Conveyors
Unlike a feeder, a conveyor depends on whatever is feeding it to control the feed rate. Feeders are for controlling feed rate. Conveyors for moving stuff. A feeder will change it’s output when it’s speed changes. A conveyor may change how much is in each section (the ‘loading’) but the output is speed independent.
Screw conveyors should have a fixed pitch, and can be angled up to 45 degrees. Belts can be inclined up to the angle of repose of the material. These are best made with a slight ‘V’ in the belt so the material doesn’t roll off. Boards on the side also work, but introduce friction into the system as the material slides against them.
Don’t overlook skips — a bucket pulled up an incline. The front wheels run on tracks slightly narrower than the back wheels. Dip the inside tracks down at the end to dump.
Moving floors made of long strips will move a pile of material if actuated in the proper sequence. Picture the order as ‘123123123123’: shove 1 backwards suddenly, and the material above it will stay with the mass, do 2 and 3, then slowly move all forward. They also move solid objects, so many trucks have such floors.
Finally, you can always fluidize the material and blow it about with air or water, then remove the fluid at the other end. Think old time logging, with logs floated down the river.
Have fun hacking. We hope we’ve given you some options for dealing with walnuts.
We always enjoy videos from [FesZ], so when we saw his latest about tips and tricks for LTSpice, we decided to put the 20 minutes in to watch it. But we noticed in the text that he has an entire series of video tutorials about LTSpice and that this is actually episode 30. So there’s plenty to watch.
Like any tips and tricks video, you might know some of them and you may not care about some of them — for example, the first one talks about setting the colors which is a highly personal preference. But it is a good bet you’ll find something to like in the video.