Because You Can: Linux On An Arduino Uno

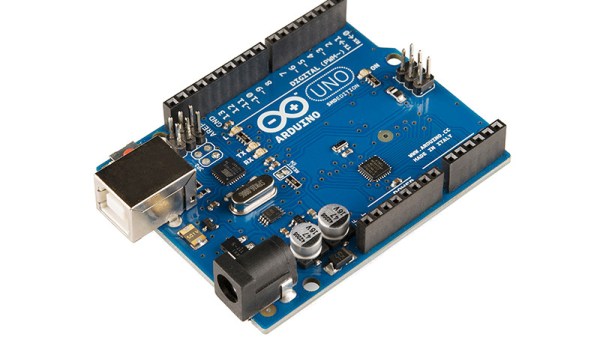
There are a few “Will it run” tropes when it comes to microcontrollers, one for example is “Will it run Doom?“, while another is “Will it run Linux?”. In one of the lowest spec examples of the last one, [gvl610] has got an up-to-date Linux kernel to boot on a vanilla Arduino Uno. And your eyes didn’t deceive you, that’s a full-fat kernel rather than the cut-down μClinux for microcontrollers.

Those of you who’ve been around a while will probably have guessed how this was done, as the ATmega328 in the Uno has no MMU and is in to way powerful enough for the job. It’s running an emulator, in this case just enough RISC-V to be capable, and as you’d imagine it’s extremely slow. You’ll be waiting many hours for a shell with this machine.

The code is written in pure AVR C, and full instructions for compilation are provided. Storage comes from an SD card, as the ATmega’s meagre 32k is nowhere near enough. If you’re having a bit of deja vu here we wouldn’t blame you, but this one is reputed to be worse than the famous 2012 “Worst PC Ever“, which emulated ARM instead of RISC-V.

Thanks [Electronics Boy] for the tip!

Smart Coffee Replaces Espresso Machine Controller With Arduino, Sensors

A common hacker upgrade to an espresso machine is to improve stability and performance with a better temperature controller, but [Schematix]’s Smart Coffee project doesn’t stop there. It entirely replaces the machine’s controller and provides an optional array of improvements for a variety of single-boiler machines (which is most of them).

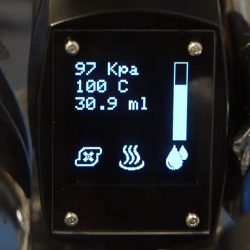
Smart Coffee isn’t free, it costs 16 NZD (about 10 USD) but there is a free demo version. There is no official support, but there are wiring guides and sources aplenty from which to purchase the various optional parts. It runs on an Arduino MEGA 2560 PRO (or similar microcontroller) and supports a wide array of additional hardware including pressure transducer, water level sensor, flow meter, OLED display, and more.

Modification of one’s espresso machine is a rewarding endeavor, but the Smart Coffee project provides a way for one to get straight to the hacking and function modifying, instead of figuring out the wiring hardware interfacing from scratch.

We’ve seen [Schematix]’s work before with a DIY induction heater which showed off thoughtful design, and it’s clear he takes his coffee at least as seriously. Check out the highly comprehensive overview and installation video for Smart Coffee, embedded just below the page break.

Continue reading “Smart Coffee Replaces Espresso Machine Controller With Arduino, Sensors”

Machine Learning Robot Runs Arduino Uno

When we think about machine learning, our minds often jump to datacenters full of sweating, overheating GPUs. However, lighter-weight hardware can also be used to these ends, as demonstrated by [Nikodem Bartnik] and his latest robot.

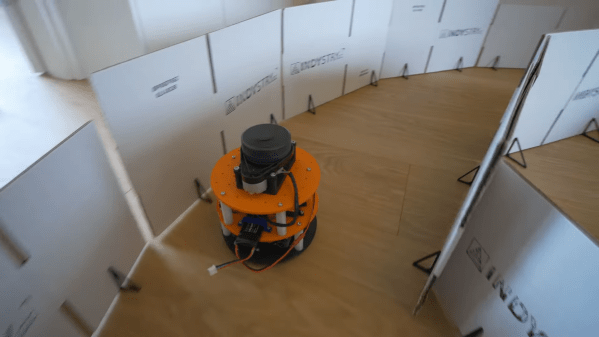
The robot is charged with autonomously navigating a simple racetrack delineated by cardboard barriers. The robot is based on a two-wheeled design with tank-style steering. Controlled by an Arduino Uno, the robot uses a Slamtec RPLIDAR sensor to help map out its surroundings. The microcontroller is also armed with a Bluetooth link and an SD card for storage.

The robot was first driven around the racetrack multiple times under manual control, all the while collecting LIDAR data. This data was combined with control inputs to help create a data set that could be used to train a machine learning model. Feature selection techniques were used to refine down the data points collected to those most relevant to completing the driving task. [Nikodem] explains how the model was created and then refined to drive the robot by itself in a variety of race track designs.

It’s a great primer on machine learning techniques applied to a small embedded platform.

Continue reading “Machine Learning Robot Runs Arduino Uno”

This Arduino Debugger Uses The CH552

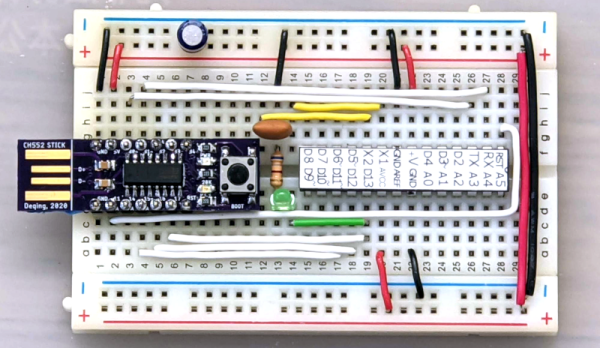
One of the things missing from the “classic” Arduino experience is debugging. That’s a shame, too, because the chips used have that capability. However, the latest IDE has the ability to work with external debuggers and if you want to get started with a classic ATMega Arduino, [deqing] shows you how to get started with a cheap CH552 8-bit USB microcontroller board as the debugging dongle.

The CH552 board in question is a good choice, primarily because it is dirt cheap. There are design files on GitHub (and the firmware), but you could probably pull the same trick with any of the available CH552 breakout boards.

Continue reading “This Arduino Debugger Uses The CH552”

Arduino-Powered Trap Hopes To Catch Mice

The old adage that you’ll make a fortune by developing a better mouse trap is not super realistic, as the engineers behind Sony’s Betamax video tape standard could tell you. However, you can still learn a lot building your own, as this project from [ROBO HUB] demonstrates.

The trap is intended to catch mice in a humane fashion, without injury to the animal. To that end, it uses an Arduino Nano armed with an ultrasonic distance sensor  to detect when mice have entered a plastic container. The container’s hinged door is is held open with a servo. When a mouse is detected, the servo trips the door to snap shut under the power of an elastic band.

The key to making this design work well is ensuring that there are no gaps in the closed container that the mouse can use to escape. They’re wily creatures able to squeeze through positively tiny spaces, so it’s important to get this right. Besides that, you want to check the trap regularly, lest any caught mice simply claw and chew their way out.

We’ve seen a few mousetraps around these parts before, too. Video after the break.

Continue reading “Arduino-Powered Trap Hopes To Catch Mice”

Low Res Arduino Thermal Camera

Do you know how you see those cheap telescopes at the department store? The box has beautiful pictures that probably came from the Hubble. What you will see is somewhat different. You have to carefully look at [upir’s] Arduino thermal camera project because it intersperses pictures of what you expect an 8×8 sensor will produce with images produced by a much better camera.

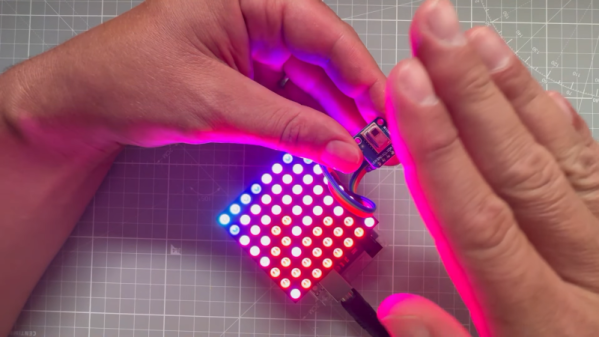
The actual project — watch the video below — is undoubtedly neat. An inexpensive 8×8 IR sensor and an 8X8 LED panel join to form a crude but usable thermal camera.

Continue reading “Low Res Arduino Thermal Camera”

A Usable Arduino Debugging Tool

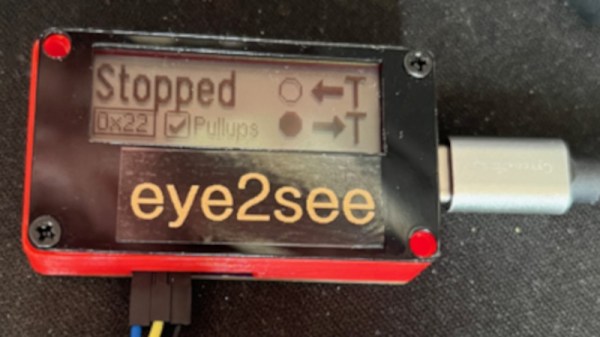
For as popular as the Arduino platform is, it’s not without its problems. Among those is the fact that most practical debugging is often done by placing various print statements throughout the code and watching for them in the serial monitor. There’s not really a great way of placing breakpoints or stepping through code, either. But this project, known as eye2see, hopes to change that by using the i2c bus found in most Arduinos to provide a more robust set of debugging tools.

The eye2see software is set up to run on an Arduino or other compatible microcontroller, called the “probe”, which is connected to the i2c bus on another Arduino whose code needs to be debugged. Code running on this Arduino, which is part of the eye2see library, allows it to send debugging information to the eye2see probe. With a screen, the probe can act as a much more powerful debugger than would otherwise typically be available, being able to keep track of variables in the main program, setting up breakpoints, and outputting various messages on its screen.

The tool is not without its downsides, though. The library that needs to run on the host Arduino slows down the original program significantly. But for more complex programs, the tradeoff with powerful debugging tools may be worth it until these pieces of code can be removed and the program allowed to run unencumbered. If you’d like to skip needing to use a second Arduino, we’ve seen some other tools available for debugging Arduino code that can run straight from a connected PC instead.