Meet Cartesio, Robot Artist

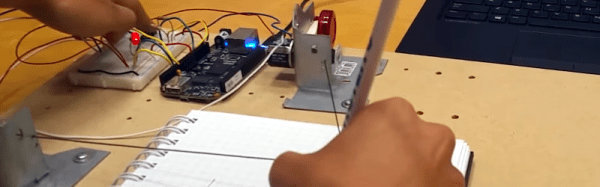
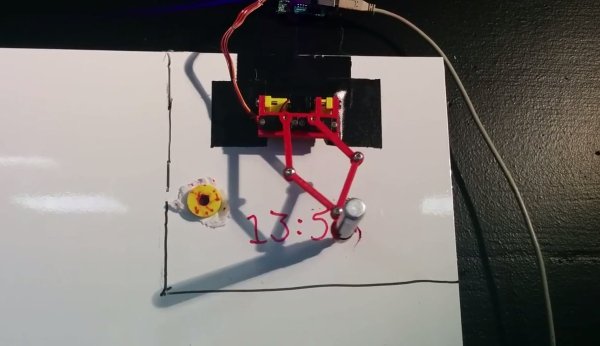
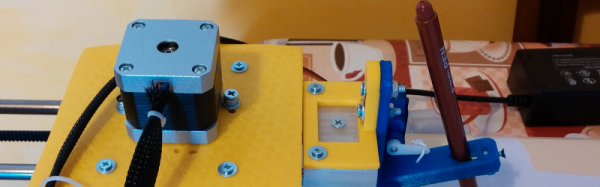
[Robottini] released plans for his robot, Cartesio, that is essentially an Arduino-controlled plotter made to create artwork. The good part about Cartesio is the low cost. [Robottini] claims it cost about $60 to produce.

The robot has an A3-size drawing bed and is practically the XY part of a 3D printer. In fact, most of the parts are 3D printed and the mechanical parts including M8 smooth rod. LM8UU bearings, and GT2 belts and pulleys. If you’ve built a 3D printer, those parts (or similar ones) should sound familiar.

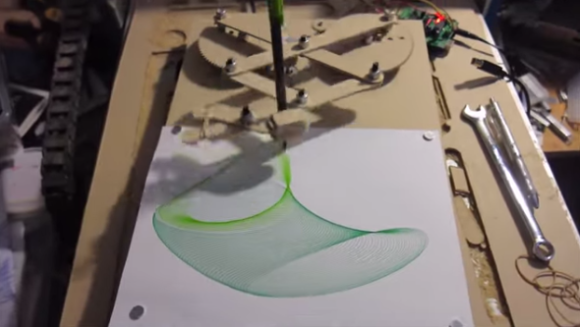
The Arduino uses GRBL to drive the motors from GCODE. [Robottini] has three different workflows to produce drawings from applications like Inkscape. You can see some of the resulting images below.

We’ve covered GRBL before, and it is the heart of many motion control projects. If you’d rather draw on something less permanent, you might try this project.

Continue reading “Meet Cartesio, Robot Artist”

An Excellent Primer For Sketching Mechanical Drawings

Mechanical drawings are an excellent way to convey design information, and while sophisticated 3D modeling is slowly taking over, with some companies accepting files over drawings, the mechanical drawing remains the written contract so to speak for complex parts with tolerances and non-modeled features.

But if you didn’t take a technical drawing class (typically Engineering Drawings 101), how do you learn? Well, if you have 15 minutes, this is an excellent video, which speaking from experience, covers the basics from the 101 course.

The lesson covers all the basics, from 2D projection, multi-view drawings, isometric projection, cross sectioning, linear dimensioning, basic tolerancing and alternate views.

Continue reading “An Excellent Primer For Sketching Mechanical Drawings”

Back To The Drawing Board

Ever try signing your name with a mouse or a trackball? Not so easy. You could buy a graphics tablet with a pen. [Rahul Ramakrishnan] has a different approach. He took two 10-turn pots, and attached some strings and a washer. A pencil goes through the washer, and a BeagleBone Black reads the pots to determine what it is drawing on the paper. A couple of retractable badge lanyards keep tension on the string.

This ingenious design would be easy enough to replicate with any microcontroller that can read the two pots. The only awkward part is the need to press a button down when you want the device to treat the pencil as down (see the video below). It would probably be easy to rig up some switch on the pencil to make operation a little smoother.

Continue reading “Back To The Drawing Board”

Whiteboard Clock

Whiteboard Clock Draws The Time

[Maurice] recently built a clock that draws the time (Google Doc) on a white board. We’ve seen plenty of clock hacks in the past, and even a very similar one. It’s always fun to see the different creative solutions people can come up with to solve the same problem.

This device runs on a PIC16F1454 microcontroller. The code for the project is available on GitHub. The micro is also connected to a 433MHz receiver. This allows a PC to keep track of the time, instead of having to include a real-time clock in the circuit. The USB connector is only used for power. All of the mounting pieces were designed in OpenSCAD and printed on a 3D printer. Two servos control the drawing arms. A third servo can raise and lower the marker to the whiteboard. This also has the added benefit of being able to place the marker tip inside of an eraser head. That way the same two servos can also erase the writing.

The communication protocol for this systems is interesting. The transmitter shows up on [Maurice’s] PC as a modem. All he needs to do to update the time is “echo 12:00 > /dev/whiteboard”. In this case, the command is run by a cron job every 5 minutes. This makes it easy to tweak the rate at which the time updates on the whiteboard. All communication is done one-way. The drawing circuit will verify the checksum each time it receives a message. If the check fails, the circuit simply waits for another message. The computer transmits the message multiple times, just in case there is a problem during transmission.

Art-O-Matic Is Spirograph’s Young Hip Offspring

Art-O-Matic automatic spirograph

Some of our more senior experienced readers may remember a toy called the Spirograph. In case you don’t, it’s a geometric shape drawing toy. The way it works is a plastic disc with gear teeth around the perimeter and various holes on its face is spun around a plastic ring with gear teeth on the inside. A pencil is inserted in one of the holes in the disc and, when spun around the inside of the ring, draws different complex shapes called hypotrochoids.

 Art-O-Matic automatic Spirograph

This was fun enough to keep a kid entertained for a few minutes. It took a while to make a complete shape and sometimes it was easy to mess up (especially if the hole chosen for the pencil was near the outside of the disc). [Darcy] thought it would be neat to combine the Spirograph’s drawing style with modern technology. The result is called the Art-O-Matic and it draws some pretty wild art, you guessed it, automatically.

Click past the break for more!

Continue reading “Art-O-Matic Is Spirograph’s Young Hip Offspring”

Four Cable Drawing Machine Pulls Our Strings

sandplotter

[David] has created a four cable drawing machine for the Telus Spark Science Centre in Canada. Hackaday has featured [David’s] unconventional drawing contraptions before, specifically his center pivot pen plotter. The drawing machine is a new take on a drawbot, and could be considered to be close cousins with [Dan’s] SkyCam. The premise is simple: A stepper motor with a reel of string is placed at each corner of a square. The strings for all four motors come together at a center weight. When all four strings are taut, the weight is lifted off the drawing surface. When a bit of slack is added into the strings, gravity pulls the weight down to touch the sand.

It’s at this point that a simple premise becomes a complex implementation. Moving the weight in one direction is a matter of reeling out string on one motor, and reeling in string on the other. But what about the two “un driven” strings? They have to be slack enough to allow movement in the driven direction, but not so slack that the weight can dig in and tumble on the sand, causing a tangle. To handle some of these questions, [David] called on [Kevin] to write some software. [Kevin] created a custom kinematics module for LinuxCNC to control the drawing machine. The drawing machine runs on Gerber Code, similar to a CNC. Simply feed the machine Cartesian coordinates, and [Kevin’s] module converts to steps.

Continue reading “Four Cable Drawing Machine Pulls Our Strings”

Rabiscoscopio – Oscilloscope Drawing Made Easy

Rabiscoscopio

If you own an oscilloscope, sooner or later the urge to see something other than signals on the screen will strike. Some people ignore the urge and go about their normal business while others give in, spending hours carefully crafting images, games, and more. The process is time consuming and tricky as our own [Kevin Dady] discovered, but rewards come in the form of geek cred and are hard to pass up.

[Alex] wanted to draw on his oscilloscope, but decided that he would try something other than the microcontroller-based solutions we have seen in the past. He figured the easiest and most accessible way to draw on the scope was with sound, so he whipped up a small application he calls Rabiscoscopio to do most of the work for him.

He starts off by drawing an image using a single line, saving it as an SVG file. This image is converted into an audio file by Rabiscoscopio, which can then be fed directly into his oscilloscope from his PC. That’s all there is to it – it really doesn’t get much easier.

While you could claim that [Alex] is cheating his way through the oscilloscope drawing process, we think his application rocks – after all, hacking is about making your technology work for you rather than the other way around.

Give Rabiscoscopio a try and post the results here or in our Flickr stream – we’d love to see what you guys come up with.

In the meantime, check out the video below to see [Alex’s] attempt at replicating the Garoa Hackerspace logo on his scope.

Continue reading “Rabiscoscopio – Oscilloscope Drawing Made Easy”