Alarm Panel Hack Defeats Encryption By Ignoring It

As frustrating as it may be for a company to lock you into its ecosystem by encrypting their protocols, you have to admit that it presents an enticing challenge. Cracking encryption can be more trouble than it’s worth, though, especially when a device gives you all the tools you need to do an end-run around their encryption.

We’ll explain. For [Valdez], the encrypted communication protocols between a DSC alarm panel and the control pads on the system were serious impediments to integration into Home Assistant. While there are integrations available for these alarm panels, they rely on third-party clouds, which means that not only is your security system potentially telling another computer all your juicy details, but there’s also the very real possibility that the cloud system can either break or be shut down; remember the Chamberlain MyQ fiasco?

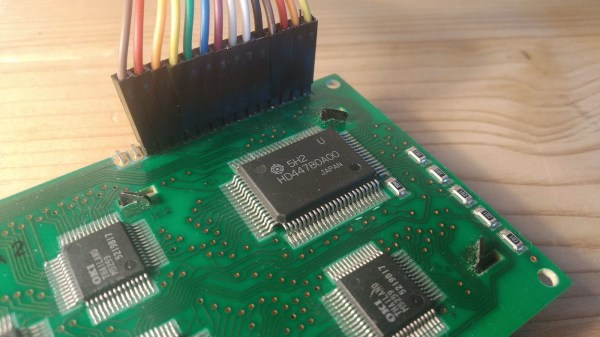
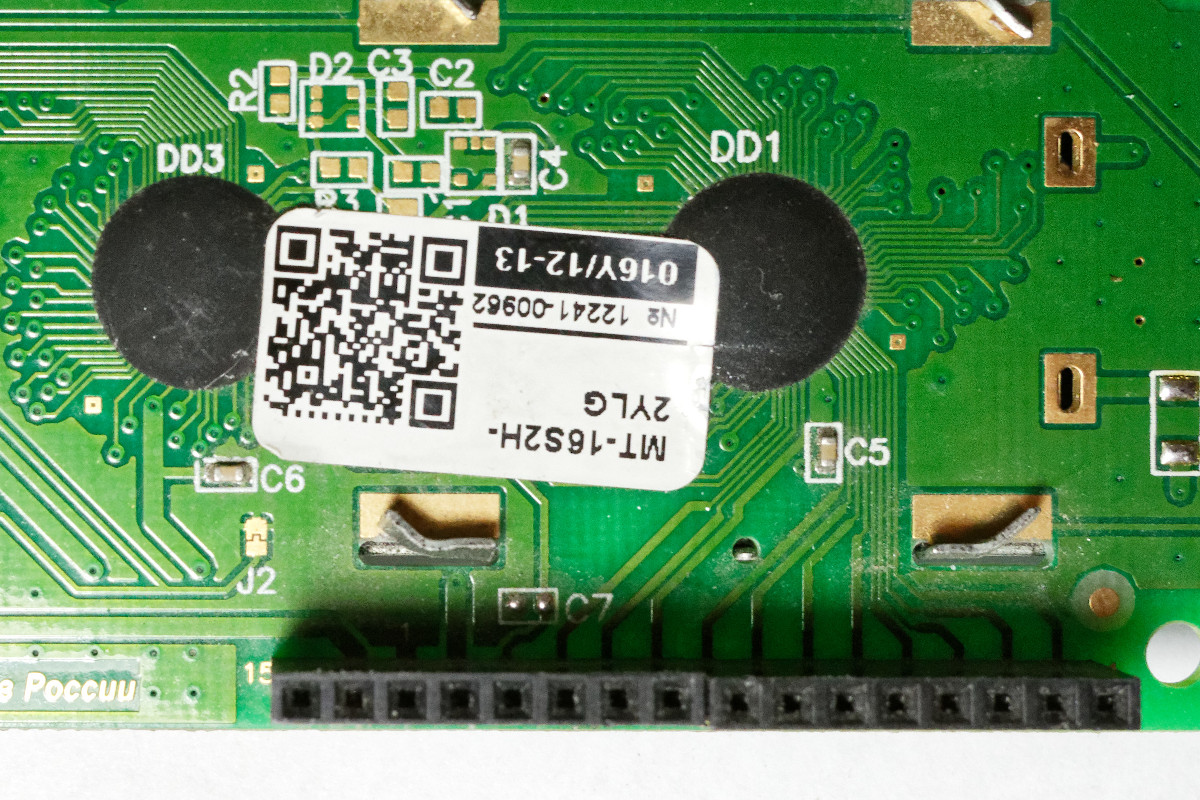
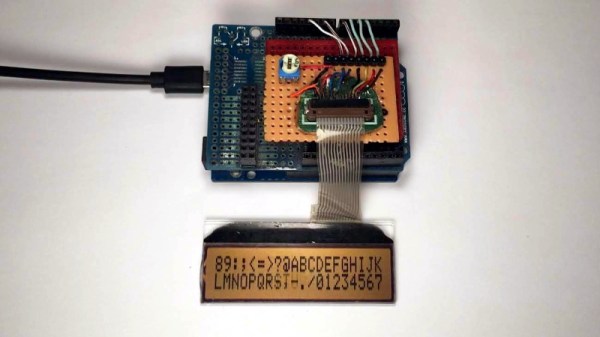
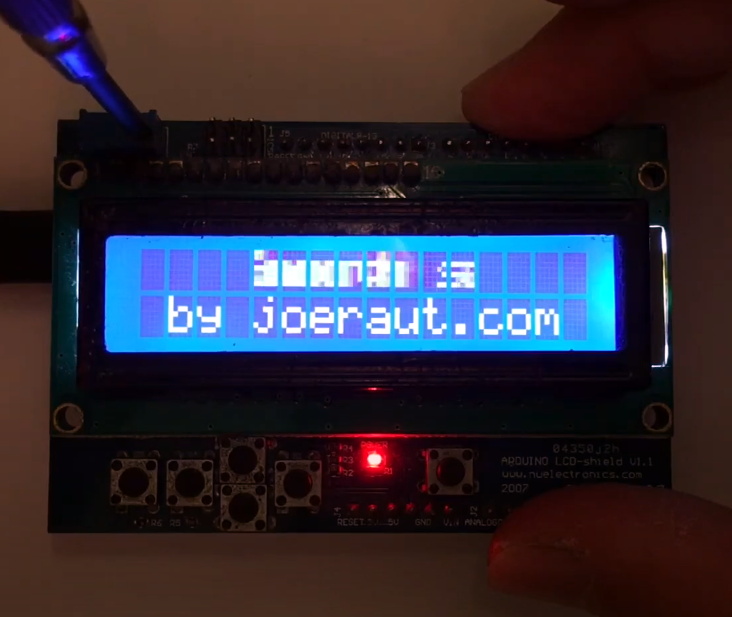
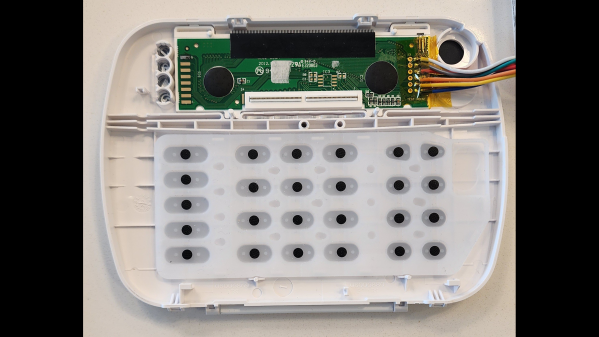
With these facts in mind, [Valdez] came up with a clever workaround to DSC encryption by focusing on physically interfacing with the keypad. The device has a common 16×2 LCD and a 25-key keypad, and a little poking around with a multimeter and a $20 logic analyzer eventually showed that the LCD had an HD44780 controller, and revealed all the lines needed to decode the display with an ESP32. Next up was interfacing with the keypad, which also involved a little multimeter work to determine that the keys were hooked up in a 5×5 matrix. Ten GPIOs on the ESP32 made it possible to virtually push any key; however, the ten relays [Valdez] originally used to do the switching proved unwieldy. That led to an optocoupler design, sadly not as clicky but certainly more compact and streamlined, and enabling complete control over the alarm system from Home Assistant.

We love this solution because, as [Valdez] aptly points out, the weakest point in any system is the place where it can’t be encrypted. Information has to flow between the user and the control panel, and by providing the electronic equivalents to eyes and fingers, the underlying encryption is moot. Hats off to [Valdez] for an excellent hack, and for sharing the wealth with the HA community.

Displays We Love Hacking: The HD44780 Family

There are too many different kinds of displays – some of them, you already know. I’d like to help you navigate the hobbyist-accessible display world – let’s take a journey together, technology by technology, get a high-level overview of everything you could want to know about it, and learn all the details you never knew you needed to know. In the end, I’d like you to be able to find the best displays for any project you might have in mind, whatever it could be.

There’s a HD44780 clone IC under this epoxy blob! CC0 1.0

Today, let’s take a look at a well-known LCD technology – the HD44780 displays, a type of display that we hobbyists have been working with since the 1980s. Its name comes from the HD44780 driver chip – a character display driver IC that connects to a raw display panel and provides an easy interface.

HD44780 displays are not known for power efficiency, cutting-edge technology, ultimate flexibility, or small size, for that matter. However, they’re tried and true, easy to drive, require little to no computing power on your MCU, and you will be able to buy them for the foreseeable future. They’re not about to get taken off the market, and they deserve a certain kind of place in our parts boxes, too.

If you work with HD44780 displays for a project or two, you might acquire a new useless superpower – noticing just how many HD44780 displays are still in use in all sorts of user-facing devices, public or private. Going out and about in your day-to-day life, you can encounter a familiar 16 x 2 grid of characters in cash registers, public transport ticket machines, home security panels, industrial and factory equipment, public coffee machines, and other microcontroller-assisted places of all kinds! Continue reading “Displays We Love Hacking: The HD44780 Family”

A small 16x2 LCD display housed in a green and yellow hobby box.

Arduino-Powered Info Display For Your Windows Computer

If you’ve been pining for a retro-chic 16×2 LCD display to enhance your Windows computing experience, then [mircemk] has got you covered with their neat Windows-based LCD Info Panel.

Your everyday garden variety Arduino is the hero here, sitting between the computer’s USB port and the display to make the magic happen. Using the ‘LCD Smartie‘ software, the display can serve up some of your typical PC stats such as CPU and network utilization, storage capacity etc. It can also display information from BBC World News, email clients, various computer games and a world of other sources using plugins.

It’s clear that the intention here was to include the display inside your typical PC drive bay, but as you can see in the video below, this display can just about fit anywhere. It’s not uncommon to see similar displays on expensive ‘gamer’ peripherals, so this might be an inexpensive way for someone to bring that same LED-lit charm to their next PC build. You probably have these parts sitting in your desk drawer right now.

If you want to get started building your own, there’s more info over on the Hackaday.io page. And if PC notifications aren’t your jam, it’s worth remembering that these 16×2 displays are good for just about anything, like playing Space Invaders.

Continue reading “Arduino-Powered Info Display For Your Windows Computer”

Coding A Dynamic Menu For Character LCDs On Arduino

These days, there’s a huge variety of screens on the market for use with microcontrollers. OLEDs and graphic LCDs abound, while e-ink devices tempt the user with their clean look and low energy consumption. However, for many purposes, the humble HD44780 character LCD does the job just fine. If you’re using such a device, you might want to implement a simple menu system, and in that case, [MyHomeThings] has you covered.

The menu code is simple to modify and implement. It allows the user to define a certain number of menu items, along with button labels and functions to be executed with button presses. By default, it’s set up to work with  left and right function buttons, with up and down buttons to toggle through the menu’s various entries. This suits the commonly available Arduino shields which combine a 16×2 character LCD with a set of four tactile buttons in a cross formation. However, modifying the code to use an alternate button scheme would be simple for those eager to tweak things to their liking.

For the absolute beginner to programming, it’s a great way to put together a simple interface for your microcontroller projects. It’s the sort of thing you might use if you’d built a do-everything Arduino handheld device, as we’ve seen built before. If you find text menus too archaic for your purposes, though, be sure to sound off with your favourite solutions in the comments.

Big Time Character LCD Clock

While the SSD1306 OLED has somewhat become the go-to display for up-to-date projects, the good old character displays with their Hitachi HD44780 controller don’t seem to be disappearing just yet either. And why would they, especially if you want to show just text, having a built-in font has certainly its perk compared to worrying about integrating your own characters — which you can still do on top as well. Or perhaps you can combine both worlds, which is what [oldmaninSC] did with his digital clock that takes an entire 16×2 LCD to show each single digit.

The whole clock uses 16 individual, upright rotated 16×2 LCDs that are arranged in two rows of eight LCDs each, turning the entire construct sort of into a giant 8×2 display itself. For some additional information such as the date, there’s also a smaller font available that uses only half the height, allowing up to four total rows of information. To communicate with each LCD via I2C, two TCA9548A I2C multiplexers are connected to an Arduino, along with an RTC to keep track of the time and date itself.

As the TCA9548A has three pins dedicated to define its own address, the entire clock could be scaled up to a total of 64 LCDs — so how about a 16×4 display made out of 16×4 displays? Sure, adding smooth scrolling might become a bit tricky at some point, but imagine playing Tetris on that one!

Smooth(er) Text Scrolling On HD44780 LCDs

Most Hackaday readers are likely to be familiar with character LCDs driven by the extremely common Hitachi HD44780 controller chip. If you’re looking for a cheap and easy way for your microcontroller project to display some data, they’re pretty much the go-to solution. But as popular as these displays are, there’s no denying that they’re starting to look a bit dated in 2020. Which is why the tweaks [Joseph Rautenbach] is working on are so interesting.

With one of these displays, the controller puts a single character on each 5×8 block of pixels. There’s also support for creating custom characters, which can be used for rudimentary icons. You’re pretty limited by the per-block resolution, but with a little imagination, you can usually get the point across. With a bit of dead space between each block of the display there’s little point in trying to make icons that “bridge” multiple blocks, as they’ll always be segmented.

Hardware support is not guaranteed.

But as [Joseph] realized, that’s less of a problem for scrolling text. So he wrote some code that takes an ASCII string and breaks it down into partial letters and numbers which can be displayed as custom characters. The controller only has space for 8 of these characters though, so the code needs to continually step through the string and generate the appropriate offset characters as the position of the text changes.

While the effect looks pretty good in the video after the break, [Joseph] has found that real-world utilization is a bit finicky. He tried the same code on one of the displays that uses white text on a blue background, and the scrolling text ended up ghosting together so it looked like gibberish. So while he’s released the source code for others to experiment with this trick, your mileage may vary.

This certainly isn’t the first time we’ve seen somebody make clever use of custom characters on the HD44780. We’ve seen it used for an exceptionally tiny game of Tetris, a rendition of Conway’s Game of Life, and even a horizontal space-shooter.

Continue reading “Smooth(er) Text Scrolling On HD44780 LCDs”

Review: Calculator Kit Is Just A Few Hacks From Greatness

While most people are satisfied with a calculator application on their smartphone these days, there’s still something to be said for the old fashioned desk calculator. Maybe it’s the fact the batteries last long enough that you can’t remember the last time you changed them, or the feel of physical buttons under your fingers. It could even be the fact that it keeps your expensive smartphone from needing to sit out on the workbench. Whatever the reason, it’s not uncommon to see a real-life calculator (or two) wherever solder smoke tends to congregate.

Which is precisely the idea behind this DIY calculator kit. Available from the usual overseas retailers for about $15 USD, it has some hobbyist-oriented features such as the ability to decode resistor color bands, convert hexadecimal numbers, and calculate resistor values for driving LEDs. If you’re going to keep a knock-around calculator on your bench, why not build the thing yourself?

Given the dual nature of this product, a DIY electronics kit and a functional desk calculator for electronic hobbyists, it seems only appropriate to review both aspects of it individually. Which is good, since there may be more to this product than just the sum of its parts.

Continue reading “Review: Calculator Kit Is Just A Few Hacks From Greatness”