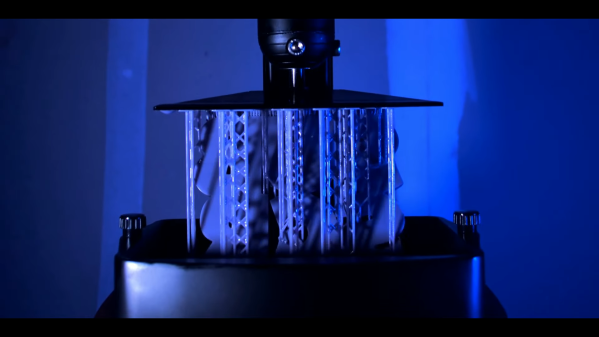
SLA printer rigged for time lapse

Silky Smooth Resin Printer Timelapses Thanks To Machine Vision

The fascination of watching a 3D printer go through its paces does tend to wear off after you spent a few hours doing it, in which case those cool time-lapse videos come in handy. Trouble is they tend to look choppy and unpleasant unless the exposures are synchronized to the motion of the gantry. That’s easy enough to do on FDM printers, but resin printers are another thing altogether.

Or are they? [Alex] found a way to make gorgeous time-lapse videos of resin printers that have to be seen to be believed. The advantage of his method is that it’ll work with any camera and requires no hardware other than a little LED throwie attached to the build platform of the printer. The LED acts as a fiducial that OpenCV can easily find in each frame, one that indicates the Z-axis position of the stage when the photo was taken. A Python program then sorts the frames, so it looks like the resin print is being pulled out of the vat in one smooth pull.

To smooth things out further, [Alex] also used frame interpolation to fill in the gaps where the build platform appears to jump between frames using real-time intermediate flow estimation, or RIFE. The details of that technique alone were worth the price of admission, and the results are spectacular. Alex kindly provides his code if you want to give this a whack; it’s almost worth buying a resin printer just to try.

Is there a resin printer in your future? If so, you might want to look over [Donald Papp]’s guide to the pros and cons of SLA compared to FDM printers.

Continue reading “Silky Smooth Resin Printer Timelapses Thanks To Machine Vision”

Pi Cam Replaces Pinhole And Film For Digital Solargraphy

Solargraph from a one-year exposure on film. Elekes Andor / CC BY-SA

Have you ever heard of solargraphy? The name tells you much of what you need to know, but the images created with a homemade pinhole camera and a piece of photographic film can be visually arresting, showing as they do the cumulative tracks of the sun’s daily journey across the sky over many months. But what if you don’t want to use film? Is solargraphy out of reach to the digital photographers of the world?

Not at all, thanks to this digital solargraphy setup. [volzo] searched for a way to make a digital camera perform like a film-based solargraphic camera, first thinking to take a series of images during the day and average them together. He found that this just averaged out the sun from the final image. His solution was to take a pair of photos at each timepoint — one correctly exposed to capture the scene, and one stopped way down to just capture the position of the sun as a pinprick of light. All the foreground images are averaged, while the stopped-down sun images are overlaid upon each other, producing the track of the sun across the sky. Add the two resulting images and you’ve got a solargraph.

To automate the process, [volzo] used a Raspberry Pi and a Pi-Cam fitted in a weatherproof 3D-printed box. A custom hat powers up the Pi every few minutes, which boots up and takes the two pictures. Sadly, the batteries only last for a couple of days, so those long six-month exposures aren’t possible yet. But [volzo] has made all the sources available, so feel free to build on his work. If you prefer to use a DSLR for the job, this Bluetooth intervalometer might help.

Bluetooth Intervalometer Makes Time Lapses Easy

Taking timelapses is a fun pastime of many a photographer. While most modern cameras have some features to pull this off, if you want to get really into it, you’ll want an intervalometer to run the show. Chasing just that, [Zach] decided that rather than buying off-the-shelf, a DIY build was in order.

The build relies on an Arduino Nano to run the show, in combination with the popular HC-05 Bluetooth module. The Bluetooth module allows the device to communicate with a smartphone app which [Zach] created using RoboRemo. This is a platform that makes creating custom USB, WiFI and Bluetooth apps easy for beginners. The app sends instructions to the intervalometer regarding the number of photos to take, and the time to wait between each shot. Then, it triggers the time lapse, and the Arduino triggers the camera by shorting the relevant pins on a TRS plug inserted into the camera.

It’s a straightforward build that most hackers could probably complete with parts from the junk box. Plus, building your own offers the possibility of customising it exactly to your needs. Of course, you can eschew modernity and do things mechanically instead. Video after the break.

Continue reading “Bluetooth Intervalometer Makes Time Lapses Easy”

Modular Camera Remote Is Highly Capable

Many cameras these days have optional remotes that allow the shutter release to be triggered wirelessly. Despite this, [Foaly] desired more range, and more options for dealing with several cameras at once. As you’d expect, hacking ensued.

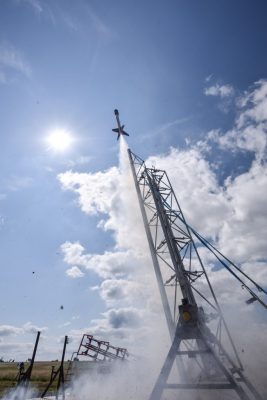
[Foaly] uses Silver modules to photograph rocket launches safely.
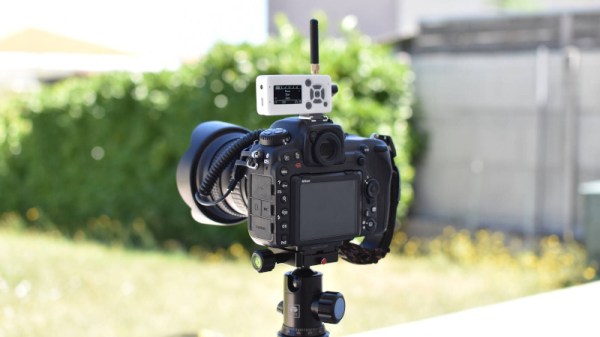
The system goes by the name of Silver, and is modular in nature. Each Silver module packs a transmitter and receiver, and can send and receive trigger orders to any other module in range. This allows a module to be used to trigger a camera, or be used as a remote to control other modules. There’s even a PC interface program that controls modules over USB.

Modules are also capable of sharing configuration changes with other modules in the field, making it easy to control a large battery of cameras without having to manually run around changing settings on each one. Oh, and it can run as a basic intervalometer too.

LoRa is used for wireless communications between modules, giving them excellent range. [Foaly] successfully used the remotes at ranges over 500 meters without any dropouts, capturing some great model rocket takeoffs in the process.

Silver is a highly robust project that should do everything the average photographer could ever possibly need, and probably a good deal more. Firmware and board files are available for those eager to make their own.

We’ve seen several very impressive camera augmentations entered into the 2019 Hackaday Prize, from ultra high-speed LED flash modules to highly flexible automatic trigger systems.

DIY Camera Shutter Control

Full SHTTTRRR Control Lets You Take Your Time…

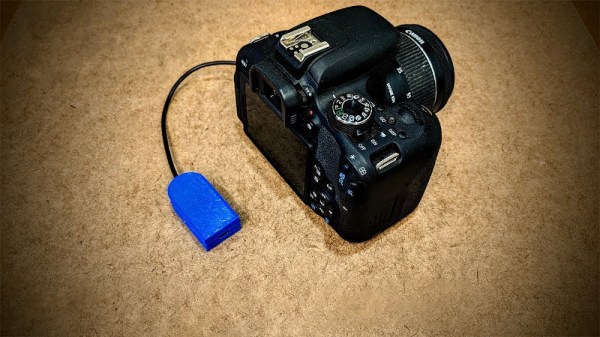
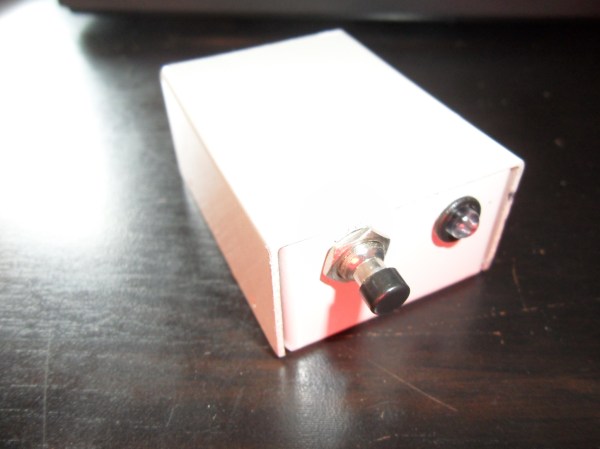
[Glitchmaker] loves photography and wrote in to tell us about his newest project. He has a Canon 1000D camera but, unfortunately, it does not have time lapse capability. So, instead of shelling out a chunk of change for a new camera [Glitchmaker] decided to make an external shutter control device that can continue to instruct the camera to take photos at predetermined intervals. He calls his project: SHTTTRRR. You didn’t think that meant something else, did you?

You can see the unassuming box above, there is just enough stuff packed in there to get the job done, nothing extra or fancy. Luckily, the Cannon camera has a remote shutter input jack that only requires connecting one pin to another in order to take a photo. Inside the box is an ATTINY45 microcontroller. It reads the button pushes from the single panel-mounted button and calculates the time between two button presses. That time between button presses determines the frequency of the photos taken. At the appropriate times, the ATTINY45 signals a transistor to connect the two appropriate pins on the camera’s remote shutter input jack. The device continues to tell the camera to take photos until it is shut off. The result is a series of time-lapse photos that was previously not possible on that camera!

This is a simple project that solves a problem and gets the job done. What’s better than that? [Glitchmaker] is proud of the SHTTTRRR he made and also learned a bunch about programming the ATTINY45 along the way. Check a video of it working after the break.

Continue reading “Full SHTTTRRR Control Lets You Take Your Time…”

100% DIY Intervalometer Is 100% Awesome

It’s easy to tell from this process documentary that [Nagyizee] is not one to settle for prefabricated anything. He could have just bought some off-the-shelf DSLR intervalometer, but that would mean interfacing with someone else’s design through cold, soulless plastic.

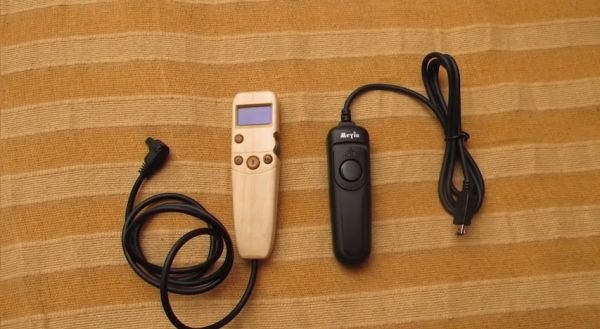
[Nagyizee] wanted a one-of-a-kind tool built from the ground up. In addition to a timer, he was in the market for a light sensor and sound detection. He chose an STM32F100 ARM Cortex M3 running at 8MHz in the name of power efficiency and started designing the UI and firmware. A custom graphic library for the OLED display streamlines it even further. Once the schematic was finalized, [Nagyizee] devised a stylish and ergonomic wooden case to be milled with a tiny Proxxon F70.

With the enclosure decisions out of the way, he etched and drilled the PCB and placed the components. The light sensor needed a lens and a prism, so he made one from a 10mm LED body. Not one to miss a detail, [Nagyizee] also turned some buttons, hand painted them, and made a scroll wheel. He ends the video with a demonstration that proves it is quite capable. In addition to standard cable release mode, it handles long exposure times, sequential shooting, and capture on light, shadow, or sound. But wait, there’s more: [Nagyizee]’s creation combines modes with ease and grace.

Continue reading “100% DIY Intervalometer Is 100% Awesome”

Laser Triggered Camera Flash

High Speed Laser Based Camera Flash Trigger For Only $2

[Matt Kane] works at a really cool company in the UK where he recently finished working on the Triggertrap Ada — the highest-performance, most feature packed camera trigger out there. So just for fun, he decided to challenge himself again — could he make a super basic, super fast, bare-bones camera trigger for $2 instead?

At the most basic level this is just a laser pointer and a light sensor. When the object your photographing breaks the light path, the flash triggers. Typically this is done with an IR laser, but since he’s going for a low-cost system, he’ll use a basic 1mw red laser pointer — the only downfall is you might see it in the picture.

Next up is the sensor. Ideally we’d use a photodiode which is very fast, but also expensive. A photoresistor is cheap, but not fast enough. A nice medium between the two is a phototransistor, which is relatively fast, and cheap. Finally, we need a minimum trigger period to offset the flash. [Matt] thought about using a 555 timer but instead decided to just generate a pulse with an Attiny45.  Continue reading “High Speed Laser Based Camera Flash Trigger For Only $2”