The Magnetic Rubik’s Cube

Ernő Rubik has much to answer for when it comes to the legacy of his namesake cube. It has both enthralled and tormented generations, allowing some to grandstand in the playground while others are forced to admit defeat in the face of a seemingly intractable puzzle. It just so happens that [Tom Parker] has been working on a Rubik’s cube with a novel magnetic design.

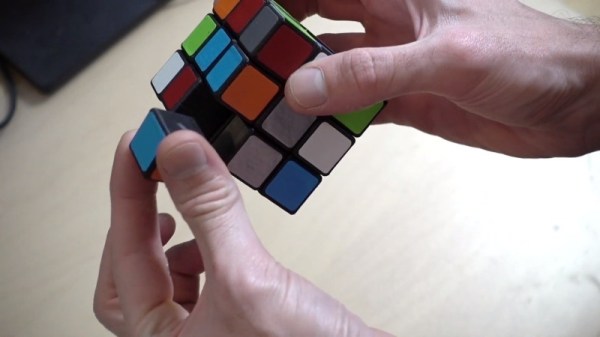
Yes, that’s right – [Tom]’s cube eschews the traditional rotating and sliding mechanism of the original cube, instead replacing it all with magnets. Each segment of the cube, along with the hidden center piece, is 3D printed. Through using a fused deposition printer, and pausing the print at certain layers, it’s possible to embed the magnets inside the part during the printing process.

[Tom] provides several different versions of the parts, to suit printers of different capabilities. The final cube allows both regular Rubik’s cube movements, but also allows for the player to cheat and reassemble it without having to throw it forcefully against the wall first like the original toy.

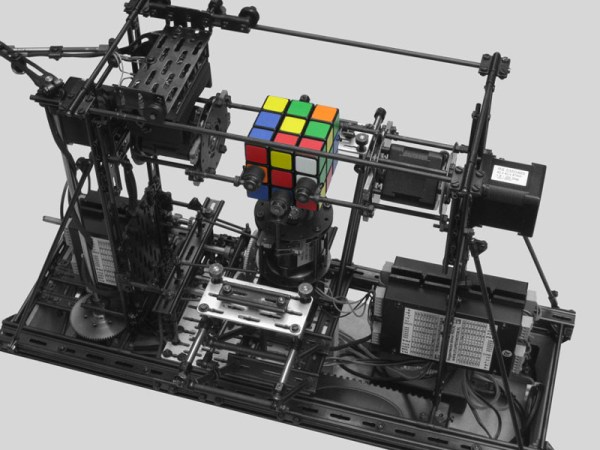
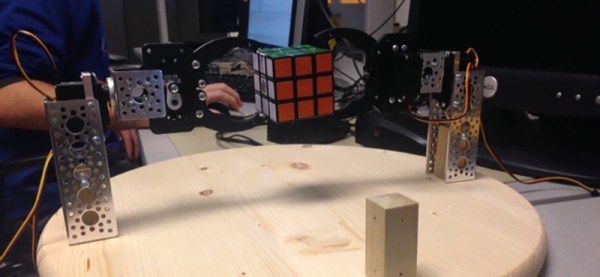
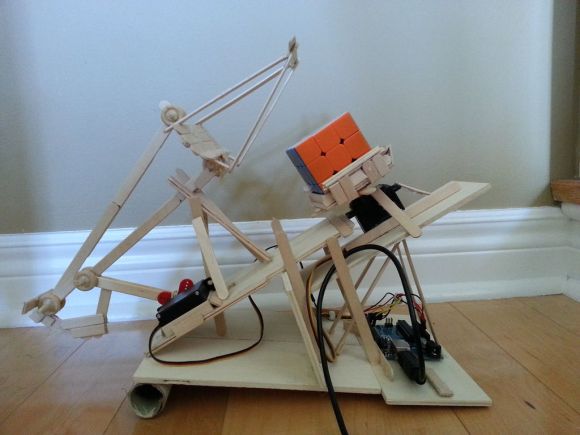
It’s an interesting build, and a great one to get to grips with the techniques involved in embedding parts in 3D prints. It may not be capable of solving itself, but we’ve seen another build that can pull off that impressive feat. Video after the break.

Continue reading “The Magnetic Rubik’s Cube”

Rubik’s Cube Table Has A Hidden Surprise

[Nothorwitzer] built a pretty incredible Rubik’s Cube table with hidden storage. The coolest feature of this table is the way it opens. Twisting the top section of the cube causes two drawers to pop out from the sides. The further you turn the top, the more the drawers extend. As the top hits its rotational limit, the lid of the cube lifts up, revealing the entire top section is hollow.

[Nothorwitzer] built the table from plywood, hardboard, and MDF. Hiding inside the base is an old car wheel hub and bearing. The entire rotating system spins on this assembly. The drawers are actuated by an ingenious set of plywood cams which push the two opposing drawers out as the top assembly rotates. Two levers pop the top open.

The attention to detail here is amazing. [Nothorwitzer] build a set of hidden hinges that make the lid invisible, yet allows it to lift up and over the edge of the cube. A spring ensures that the heavy lid will pop open neatly. The lid fit is so close that air pressure ensures the top doesn’t slam down when it is dropped.

While the internal parts of the table are left in bare wood, that the external parts had to match a real Rubik’s Cube. [Nothorwitzer] scrambled a cube, then copied the colors. The panels are made of cut hardboard. Each panel is spray painted, then hot glued to the cube. The body is plywood which [Nothorwitzer] grooved with a router to match the profile of a real Rubick’s Cube.

The project doesn’t end here. [Nothorwitzer] has created a second cube, which is even more tricky. The lid pops by pressing in one section. The drawers operate in a similar way, but there is a lever to engage or disengage the drawer opening. This may be the perfect place to hide your retro gaming systems!

Continue reading “Rubik’s Cube Table Has A Hidden Surprise”

Symmetry For Beginners – The Rubik’s Cube

Symmetry is everywhere in our natural world. Just take a look at your hands, a butterfly, or a sunflower.  It’s easy to pass off the idea of symmetry and symmetric structures as a simple quirk of existence, and to pay it little mind. If this is your view, I can assure you it will no longer be by the end of this series. If we force ourselves to look beyond the grade school applications of symmetry, we find a world rich in connections via many different types of symmetric identities. One of the most interesting is Gauge Symmetry, which lies at the heart of Quantum Electrodynamics, or QED (we’ll get into this a bit later in the series). Several branches of higher level mathematics study symmetry in detail, allowing a host of sciences, from physics to chemistry,  to view difficult problems and theories from a different perspective.

The subject matter of the ideas explored in symmetry is complicated, and not well known outside of academia and the theoretical sciences. It is the goal of this series of articles to simplify some of the concepts that underpin the study of symmetry, so that the average hacker can gain a basic (and I mean basic) understanding of this fascinating body of knowledge, and put it to use in future projects.  We’ll start things off by taking a look at a machine that has crossed the Hackaday server many times – those nifty Rubik’s Cube solvers. Just how do those things work anyway?

Continue reading “Symmetry For Beginners – The Rubik’s Cube”

Robot Solves Rubik’s Cube In Just One Second

Some of the fastest Rubik’s cube solvers in the world have gotten down to a five second solve — which is quite an incredible feat for a human — but how about one second? Well, [Jay Flatland] and [Paul Rose] just built a robot that can do exactly that.

The robot uses four USB webcams, six stepper motors, and a 3D printed frame. The only modification to the Rubik’s cube are some holes drilled in the center pieces to allow the stepper motors to grip onto them with 3D printed attachments.

The software is running off a Linux machine which feeds the data into a Rubik’s cube algorithm for solving. In approximately one second — the cube is solved.

Continue reading “Robot Solves Rubik’s Cube In Just One Second”

Rubik’s Solver Uses FAC Machine Building System

We love a good Rubik’s Cube solver and the mechanical engineering on this one is both elegant and functional.

This is the first time we remember hearing about the FAC system, which is a standard set of parts which can be used to make any number of mechanical systems. [Wilbert Swinkels] must be a master with the system; the layout of the machine appears simple and uncrowded despite the multiple degrees of freedom built into it. Those include an insertion platform for getting the cube in and out, a gantry for three color sensors, and two axes (three grippers in all) for doing the actual solving. If you’ve used FAC before we want to hear what you think of it in the comments.

[Maxim Tsoy] handled the software which runs on a Rapsberry Pi Compute module. You’ll want to watch the demo video below. First you place the randomized cube on the insertion platform which retracts after the cube is in the grasp of the grippers. These work in conjunction with the color sensor gantry to scan every side of the cube. After a brief pause to compute the solution the grippers go to work.

It is possible to build a solver with just two swiveling grippers. Here’s a really fast way to do it.

Continue reading “Rubik’s Solver Uses FAC Machine Building System”

Solving Rubik’s Cube With An FPGA

For their final project for ECE 5760 at Cornell, [Alex], [Sungjoon], and [Rameez] are solving Rubik’s Cubes. They’re doing it with an FPGA, with homebrew robot arms to twist and turn a rainbow cube into the correct position.

First, the mechanical portion of the build. The team are using a system of three robot arms positioned on the left, right, and back faces of the cube relative to a camera. When a cube is placed in the jaws of this robot, the NTSC camera data is fed into an FPGA, where a Nios II soft core handles the actual detection of the cube faces, the solver algorithm, and the controller to send servo commands to the robot arms.

The algorithm used for solving the cube is CFOP – solve the white cross, the white corners, the middle layer, the top face, and finally the entire cube. In practice, the robot ended up taking between 60-70 moves. This is not the most efficient algorithm; the Thistethwaite algorithm only requires 52 moves. There’s a reason for this apparent inefficiency – the Thistlethwaite algorithm requires large look-up tables.

Once the cube is scanned and the correct moves are computed, the soft core in sends commands out through the FPGA’s GPIO pins. Each cube can be solved in under three minutes after it has been scanned, but the team ran into problems with scanning accuracy. It’s a problem that can be fixed with the right lighting setup and better aberrant cubie detection, and a great final project using FPGAs.

Video demo below.

Continue reading “Solving Rubik’s Cube With An FPGA”

Rubik’s Cube Solver Made Out Of Popsicle Sticks And An Arduino

rubix cube solver

[Matt] recently learned both how to solve a Rubik’s cube and the basics of an Arduino. Putting the two together, he decided to try his hand at making an automatic Rubik’s Cube solver!

We’ve seen this done quite a few times using LEGO Mindstorms, but we’re much more impressed with [Matt’s] clever use of popsicle sticks and mechanical linkages…. The device uses just two servos. One to rotate the base, and the second to flip the cube over.

He’s using an Arduino UNO (R3) with 2 Hitec HS-311 hobby servos, some popsicle sticks, hot glue, a paper towel roll, and a bit of plywood. He wrote the code to solve the cube himself, and has shared it on GitHub — but he didn’t stop there and decided to create a GUI to go with it using Python.

It’s not that fast, but it’ll solve a cube in about 20 minutes — stick around after the break to see it in action!

Continue reading “Rubik’s Cube Solver Made Out Of Popsicle Sticks And An Arduino”