Cyberpunk Guitar Strap Lights Up With Repurposed PCBs

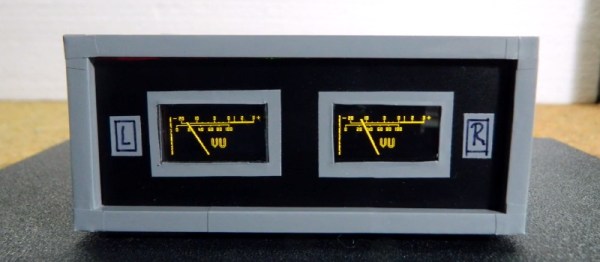
Sometimes, whether we like it or not, ordering PCBs results in extra PCBs lying around, either because of board house minimums, mistakes on either end, or both. What’s to be done with these boards? If you’re Hackaday alum [Jeremy Cook], you make a sound-reactive, light-up guitar strap and rock out in cyberpunk style.

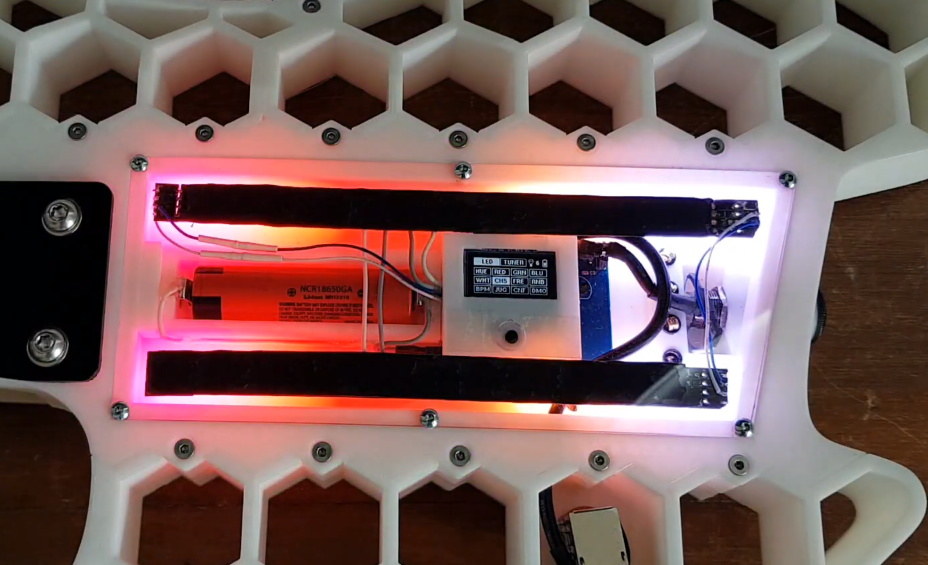
The PCBs in question were left over from [Jeremy]’s JC Pro Macro project, and each have four addressable RGB LEDs on board. These were easy enough to chain together with jumper wires, solder, and a decent amount of hot glue. Here’s a hot tip: you can use compressed air to rapidly cool hot glue if you turn the can upside down. Just don’t spray it on your fingers.

The brains of this operation is Adafruit Circuit Playground Express, which runs off of a lipstick battery and conveniently brings a microphone to the table. These two are united by a 3D print, which is hot-glued to the guitar strap along with all the boards. In the second video after the break, there’s a bonus easy-to-make version that uses an RGB LED strip in place of the repurposed PCBs. There’s no solder or even hot glue involved.

Want to really light up the night? Print yourself a sound-reactive LED guitar.

Continue reading “Cyberpunk Guitar Strap Lights Up With Repurposed PCBs”

Ferrofluid Drum Synth Dances To The Beat

[Love Hultén]’s work often incorporates reactive sound elements, and his Ferrofluid drum synth is no exception. Sadly there are no real build details but have no fear: we’ve gathered plenty of DIY insights when it comes to ferrofluid-based projects.

Ferrofluid isn’t easy to work with, but there are plenty of DIY resources to make things easier.

First of all, ferrofluid is shockingly expensive stuff. But if you can get your hands on some old VHS tapes and acetone, you can make your own. Second, working with ferrofluid to make reactive elements is harder than it may look. Particularly, making the stuff dance to sound beats isn’t as simple as putting a container of the stuff in front of a speaker coil, but people have discovered a few ways that work more reliably than others.

[Love Hultén]’s drum synth was inspired by this custom Bluetooth speaker with dancing ferrofluid by [Dakd Jung], which drives an electromagnetic coil with frequencies selected from the audio with an MSGEQ7 equalizer. That way, only frequencies that work best for moving the fluid in interesting ways get used for the visualization. The MSGEQ7 spectrum analyzer chip is very useful for music-driven projects, as demonstrated by these sound-reactive LED shades which illustrate the audio element nicely.

The coils that create the electromagnetic field causing ferrofluid to move can take different forms, but two very interesting ones are this 12-layer PCB coil and for more intricate displays, there’s a 12×21 coil array that creates a dot-matrix-like display.

We have one last tip to share about enclosures. Some readers may have noticed that this drum synth project is housed in what looks like a piece of painted lumber. Wood is certainly a versatile material for making custom shapes, and for lettering and labels it turns out that toner transfer works just as well on wood as it does for making custom PCBs.

Continue reading “Ferrofluid Drum Synth Dances To The Beat”

Rib Cage Lamp Kicks It Up A Notch With Party Mode

We think [Michelle]’s sound-reactive rib cage lamp turned out great, and the photos and details around how it was made are equally fantastic. The lamp is made of carved and waxed wood, and inside is a bundle of LED lighting capable of a variety of different color palettes and patterns, including the ability to react to sound. Every rib cage should have a party mode, after all.

The LED strip is fashioned into an atom-like structure.

Turns out that designing good rib cage pieces is a bigger challenge than one might think. [Michelle]’s method was to use an anatomical 3D model as reference, tracing each piece so that it could be cut from a flat sheet of wood.

The resulting flat pieces then get assembled into a stack, with each rib pointed downward at a roughly 20 degree angle. This process is a neat hack in itself: instead of drilling holes all at exactly the same angle, [Michelle] simply made the holes twice the diameter of the steel rod they stack on. The result? The pieces angle downward on their own.

The LED lighting is itself a nice piece of work. The basic structure comes from soldered solid-core wire. The RGB LED strip gets wound around that, then reinforced with garden wire. The result is an atomic-looking structure that sits inside the rib cage. An ESP32 development board drives everything with the FastLED library.

Code for everything, including the sound-reactive worky bits, which rely on an INMP441 I2C microphone module is all available on GitHub. And if you want to make your own sound-reactive art, make sure to check out these arms as well.

Want to see the rib cage in action? A short demo video is embedded below that demonstrates the sound reactivity. Equally applicable to either party or relaxation modes, we think.

Continue reading “Rib Cage Lamp Kicks It Up A Notch With Party Mode”

Visualizing Audio With An LCD VU Meter

We all love seeing data represented in pretty ways — whether it’s necessary or not. Take VU meters for example. They’re a super useful tool for audio editors to balance signals, but they also look really cool, even if you’re only listening to music. Who didn’t use a Winamp skin with a built-in VU meter back in the day? Even after the demise of everyone’s favorite media player, we still see these great graphs popping up all over the place.

Most recently, we’ve seen VU meters circle back around to have a bit of a retro vibe in this awesome Arduino-controlled LCD VU meter built by [mircemk]. Based on the KTAudio VU Meter project, it features an ultra-wide LCD, audio input, and volume knob, all tidily wrapped up in a case whose color scheme that can only conjure images of the famed Altair 8800, or an old Tektronix oscilloscope. The LCD itself is fairly responsive — but you can judge for yourself in the video below. The signature fading that so commonly accompanies screen refreshes on LCDs such as this one really adds to the retro effect.

You may just need one of these displays on your desk — after all, while you may not need to know how loud each audio channel is, don’t you at least want the information available? Just in case. Bar graph display a bit too modern-looking for you? Well then you should check out [mircemk]’s OLED version that displays dual analog meters.

Continue reading “Visualizing Audio With An LCD VU Meter”

Analog Style VU Meter With Arduino And OLED Display

Looking for a digital recreation of the classic analog volume unit (VU) meter? If you’ve got an Arduino, a few passive components, and a SSD1306 OLED, then [mircemk] might have the answer for you. As you can see in the video below, his code turns a handful of cheap parts into an attractive and functional audio display.

The project’s Hackaday.IO page explains that the idea is based on the work of [stevenart], with code adapted for the SSD1306 display and some tweaks made to the circuit. While [mircemk] says the code could be modified for stereo as long as the two displays don’t have conflicting I2C addresses, he decided to simply duplicate the whole setup for each channel to keep things simple. With as cheap as some of these parts are nowadays, it’s hard to blame him.

[mircemk] has provided source code for a couple different styles of VU indicators, the colors of which can easily be inverted depending on your tastes. He also clarifies that the jerky motion of the virtual “needle” seen in the video is due to the camera; in real-life it sweeps smoothly like the genuine article.

Much like the project that aimed to recreate authentic “steam gauges” with e-paper displays, this as an excellent technique to file away for use in the future. Compared to authentic analog gauges, these digital recreations are quicker and faster to implement, plus going this route prevents any antique hardware from going on the chopping block.

Continue reading “Analog Style VU Meter With Arduino And OLED Display”

Illuminated 3D Printed Guitar Is Ready To Rock

When we think of 3D printed parts for our projects, most of us imagine little bits like brackets and mounting plates. Perhaps the occasional printed project enclosure. But if you’ve got a big custom printer as [Joshendy] does, plus plenty of time, it opens up a whole new world of large scale projects. Take for example the gorgeous RGB LED guitar body he recently completed.

Despite the considerable 300 x 300 mm build area of his custom 3D printer, [Joshendy] still had to design the guitar body in sections that could be bolted together after being printed in ABS. It took around 60 hours to run off all the parts, with the large central section taking the longest to print at 28 hours. With the generous application of heat-set inserts, the assembled guitar should be plenty strong.

The white ABS of the guitar body helps diffuse the LEDs.

While the skeletal plastic body of the guitar is certainly visually interesting in itself, it only makes up for half of the final look. Inside the central cavity, [Joshendy] has embedded two strips of RGB LEDs, a 128×64 OLED screen, and a custom PCB that plays host to a STM32L4 microcontroller the appropriate voltage regulators necessary to run it all on a battery pack.

The board taps into the audio being produced by the guitar and uses a fast Fourier transform (FFT) to get the LEDs reacting to the beat. As demonstrated in the video after the break, you can use the screen to navigate through the different lighting modes in real-time right on the instrument itself.

We covered the equally impressive large-format 3D printer that [Joshendy] used to produce this guitar earlier in the month, and it’s quite exciting to see the sort of things he’s printing on it already. This project has already set the bar very high, and we can’t wait to see what he comes up with next.

Continue reading “Illuminated 3D Printed Guitar Is Ready To Rock”

Float Spectrum, A Sound-Reactive Installation

[Sam Kent] and friends built a sound-reactive LED display as part of the Leeds (UK) Digital Festival and exhibited it at Hyde Park Book Club. The installation consists of a grid of 25 tubes, each one made out of four recycled 2-liter bottles equipped with a string of a dozen WS2812B LEDs controlled by a central Arduino.

Connected to the Arduino via USB, a computer running a Processing application analyzes the audio input and tells the Arduino which LEDs to light and when. The red tube in the center responds to bass, the ring of yellow LEDs mids, and the outer ring glows blue in response to high frequencies.

It’s amazing how just a simple 2-liter makes a rather effective light pipe to amplify the effect of each burst of color. We think this installation would be a great addition to the magnificent LED dance floor we recently looked at from our friends up in Toronto. If you seek an LED art piece that’s a lot easier to move around, what you’re after is a rave shopping cart.

Continue reading “Float Spectrum, A Sound-Reactive Installation”