Month: June 2010
Nixie-display Brings More Wiring Madness
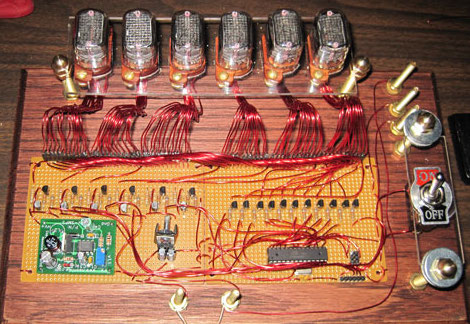
[Tim Anderson] whipped up this nixie tube display using epoxy-coated wires. He’s certainly giving the wire-wrapped LED display a run for its money. He ground the epoxy off the end of each wire using a Dremel before soldering them. We thought you could solder right through the epoxy but maybe not. Was this easier than wire wrapping would have been? We’d bet that because of the voltages wire wrapping wasn’t an option here. That board on the left is the 180V power supply for the tubes with an AVR chip running the Arduino bootloader to the right. After the break there’s a brief demo of data being pulled down over a serial connection. [Tim] also has some plans to add an atomic clock module to this setup sometime down the road.
Wire-wrapping An LED Matrix
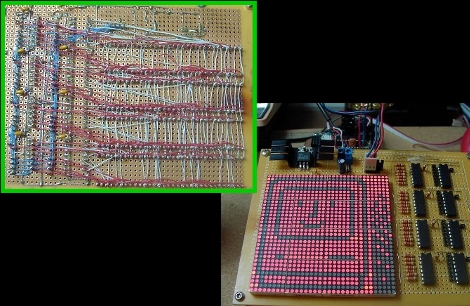
Regular reader [Osgeld] built a 1024 LED display matrix. This is a proof-of-concept design and he admittedly has overloaded the components. Most notably, the 595 shift registers (featured over the weekend) are sourcing too much current if all eight pins are active. That’s easy enough to fix in the next design by moving up to cascading LED drivers. Instead of soldering every connection in the display, [Osgeld] soldered the components in place and then used wire wrapping to make the point-to-point connections. This must have saved him a ton of time and frustration. We can’t wait to see what comes out of this first prototype.
HID Crafting With A PIC And A Joystick
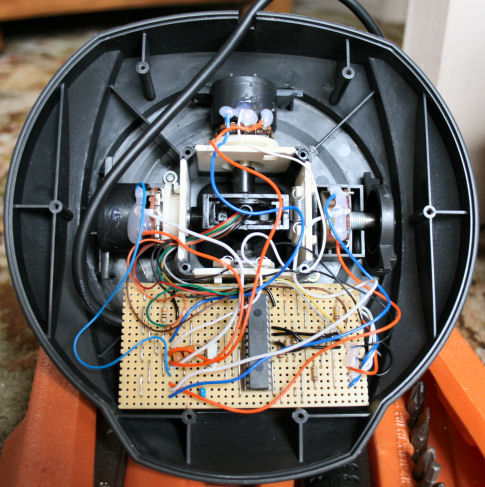
[Amr Bekhit] converted his gameport joystick to use as a USB joystick. Much like a universal USB joystick interface, this uses an additional microcontroller to talk to the serial bus while monitoring the controls on the stick. [Amr’s] discussion about creating HID descriptors is clear and easy to understand. What he’s laid out can be translated to any custom HID your heart desires. Give it a try with that old peripheral that’s been gathering dust in the corner.
Easy Data Input For LabVIEW
[youtube http://www.youtube.com/watch?v=9cKBdn4uHyY%5D
Props go to [Michael Nash] for establishing an interface between National Instrument’s labVIEW and an Arduino (an example video using a potentiometer is above). Personally, from the one time we were forced to use labVIEW, we hated every second of it.
One reason it’s so terrible, is the Data Acquisition Modules cost well into the hundreds of dollars, yet the documentation and help resources are very scarce. By using an Arduino instead of the modules, the price and difficulty decrease a considerable amount. Which begs the question why has it taken so long to get a decent (and so simple) of a setup working?
PartKAM Produces CAM Related Files Online
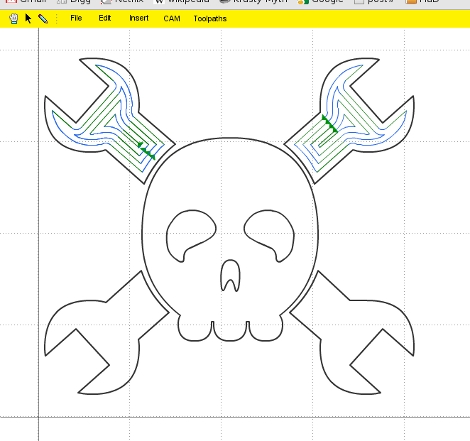
PartKAM is a Flash-based CAM production package created by [Jack Qiao]. There are a ton of computer aided manufacturing suites out there, this one is simple and requires nothing more than having your browser open. We played with it for a few moments and found it useful but still a bit buggy. Most notably, it lacks a ‘undo’ option. That being said, you can export as SVG or gCode for use when you just need to hammer out a few parts with that CNC mill you threw together.
Six Digit LED Clock
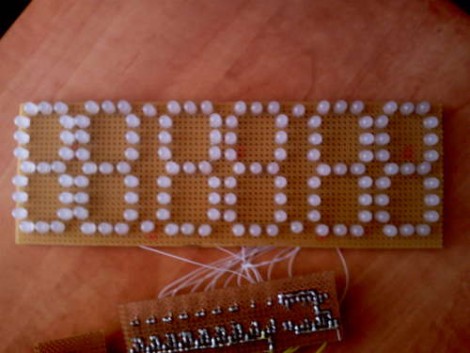
Got a bag of LEDs handy? Why not build a display with them? We’ve seen a lot of clocks that make use of LED modules but soldering your own is a fun pastime. [Vadim Suhovatih] did just that using 130 LEDs to build this clock. Each segment of the 7-segment digits consists of three LEDs in parallel which are switched by some 2N4401 transistors. An ATmega328 in the form of an Arduino controls the device with the aid of a DS1307 real-time clock for timekeeping and a 4017 decade counter to assist with scanning the display. Check out the demo after the break.


