Let There Be Light Inside Picture Frames

[Limpkin] picked up a beautiful painting of Budda while in Bali because he thought it would react well with different colors of lighting. His overall goal was to create a picture frame with built-in LEDs. The major design specification for the project was to provide an indirect light source that would not shine in the viewers eyes. He got down to business designing a frame using SolidWorks for his modelling. The final design has a separate track from the paining with small dividers for each diode.

After about four hours on the CNC machine it was time to get down to soldering. [Limpkin] had 576 RGB LEDs on hand. He’s not looking to drive them individually, just to have independent control of each color. This makes the soldering a bit easier as there will be just three MOSFETs to drive each color. The final product looks great and can display any mix of colored light. Not bad for 50 hours of soldering.


Heat Gun GPU Reflow Fixes Laptop

Solder connections on processors seem to be a very common failure point in modern electronics. Consider the Red Ring of Death (RRoD) on Xbox 360 or the Yellow Light of Death (YLoD) on PlayStation 3. This time around the problem is a malfunctioning Nvidia GPU on an HP Pavilion TX2000 laptop. The video is sometimes a jumbled mess and other times there’s no video at all. If the hardware is older, and the alternative to fixing it is to throw it away, you should try to reflow the solder connections on the chip.

This method uses a heat gun, which we’ve seen repair PCBs in the past. The goal here is to be much less destructive and that’s why the first step is to test out how well your heat gun will melt the solder. Place a chunk of solder on a penny, hold the heat gun one inch above it and record how long it takes the solder to flow. Once you have the timing right, mask off the motherboard (already removed from the case) so that just the chip in question is accessible. Reflow with the same spacing and timing as you did during the penny test. Hopefully once things cool down you’ll have a working laptop or gaming console again.

Magnetic SMD Pick And Place

magnetic_pick_and_place

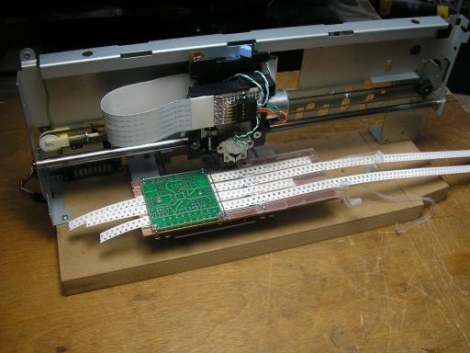
[svofski] sent us this pick and place robot (Google translation) that he found , and it’s quite unique. The majority of the components that make up this pick and place have been recycled from old computer equipment. The X-axis motion is accomplished using old printer parts, while an old CD-ROM drive was gutted to provide motion along the Y-axis. Floppy drive components were ultimately chosen to give the pick and place Z-axis motility.

What makes this pick and place unique however is the way in which components are moved. Most pick and place devices we have seen rely on suction in order to lift and carry components, but this one uses a magnet instead. The machine is used to build small circuit boards for a robotics platform offered on the builder’s web site, which primarily utilizes SMD parts. Once they realized that the majority of their small components were ferromagnetic, they built a hand-wound electromagnet to lift them. While the design limits the usage of the device to strictly ferromagnetic parts, they have a very specific need, which this fills perfectly.

Another unique aspect of this pick and place is the grooved table that sits under the workpiece. It is used to route up to four reels of SMD components, with the placement head providing all of the reel motion instead of relying on separate motors.

If you have a few minutes, be sure to check out the video of the pick and place at work.

555 Video Game

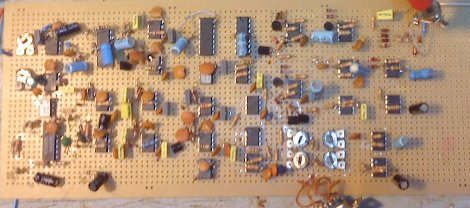
[Thrashbarg] is back up to some 555 timer madness again, this time with his sort of dodge ball video game. Featuring twenty three 555 timers, op amps (the LM324) and atari paddles slightly modded so the pots act as voltage dividers.

Output is on a monochrome composite tv signal, and the game plays like a dodge ball game where the object is to avoid the ball and take out the other player. You can also launch your own ball and deflect the oncoming attack. When hit the defeated player disappears from the screen for 3 seconds and then another round starts.

On a personal note this project hits close to home, as the project I had planned was a 555 based pong game, and just days before the deadline all I have is a wobbly sync generator, so seeing something close to what I had imagined, and working, makes me smile and feel a little better about my mental status.

Check out a short video after the break, and [Thrashbarg’s] previous 555 project, The Synthanola.

Continue reading “555 Video Game”

555 Timer-based Charge Controller

555_charging_controller_circuit

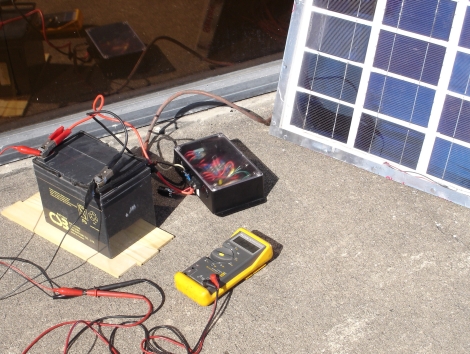
Several years ago [Michael Davis] built a charge controller for his wind turbine and published his construction plans online. This build became quite popular, especially among people that live in remote regions. He states that he is flooded with email each day with questions about his charge controller from people trying to troubleshoot its construction or from people who are unable to source the proper parts.

In order to make things easier for people, he decided to revisit his controller design to see what could be improved, and more importantly, what could be removed. The revision was shelved for awhile, but while in the process of working on another project, he realized that most of his original circuit could be easily replaced with a 555 timer. Since the 555 chip is so ubiquitous, he figured it was a fantastic way to simplify his charger, even if he wasn’t using the chip in the manner for which it was originally designed.

He continued revising his charger, sourcing very basic components and simplifying the circuitry enough that even he was able to build it correctly the first time around. Needless to say, this charging circuit will be his entry in the 555 Design Contest.

Be sure to keep reading for a quick video of his charger in action.

Continue reading “555 Timer-based Charge Controller”

Reverse Engineering A Mobile Phone E-paper Display

msp430_epaper_display

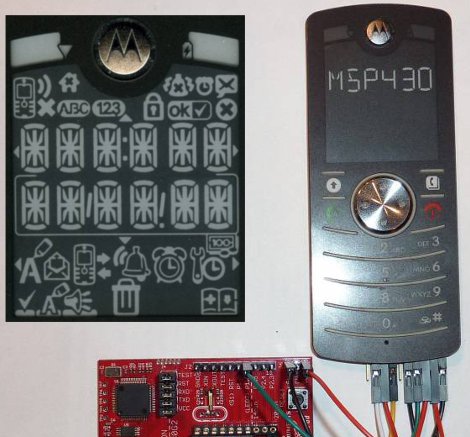
While e-paper is common among e-readers, there are very few, if any phones other than the MOTOFONE that exclusively use an e-paper display. [Steve] had one of these phones sitting around and thought it could be used to build a low-power clock. Since the bistable e-paper display can retain the currently active content even when power is removed, he would only need to update the clock once a minute, when the time changed.

Unfortunately for him, very little publicly-available documentation exists for the display controller Motorola used. To get an idea of how the display was driven, he had to sniff the SPI communications between the processor and the display. Once he had the basic commands down, he spent quite a bit of time figuring out how to activate the different segments of the display, due to what seems to be a rushed design process on Motorola’s part.

Now that [Steve] had reverse-engineered just about everything, he connected the phone to a TI MSP430 to drive the display. He programmed the LaunchPad to serve as a basic clock with great results, as you can see in the video below.

If your interest in e-paper hacking has been piqued, be sure to check out our previous e-paper coverage here.

Continue reading “Reverse Engineering A Mobile Phone E-paper Display”

Self-regulating Water Heater

netduino_controlled_energy_saving_water_heater

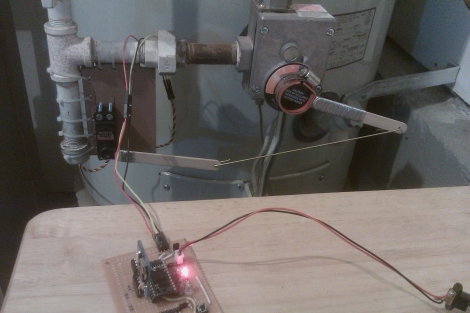
Most everyone is looking to live a little greener these days, with motivating factors typically being the preservation of the environment or financial considerations. [Fabien] fit into the latter category after realizing that about 25% of his monthly gas bill went to heating the water he and his family use each day. After a few calculations, he found that they only required hot water 68 of the 168 hours per week that the water heater was typically running. He figured the best way to save a few dollars was to rig the water heater to turn itself down when it wasn’t being used.

He connected a servo to the temperature control knob on his water heater, allowing it to be adjusted by a microcontroller. Having a rough idea as to the schedule his family keeps during an average week, he wrote an application for his Netduino that would actuate the servo when needed. A DS1307 real-time clock was wired to the Netduino for accurate timekeeping, so as to ensure [Fabien’s] wife never had to endure a cold shower.

It’s a shame that most water heaters don’t ship with some sort of programmable thermostat like you see with newer HVAC systems, but this hack is definitely a step in the right direction.

Continue reading to see his power-saving water heater in action.

Continue reading “Self-regulating Water Heater”