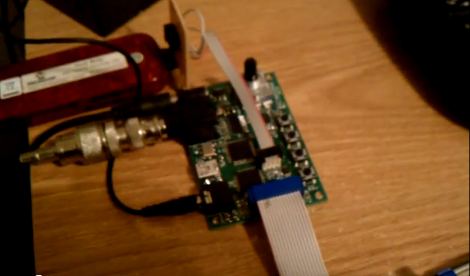
Microcontroller Comm With A Computer Monitor

Prolific Hack a Day author [Mike S] has been playing in his lab again and he’s come up with a neat way to talk to microcontrollers with an LCD monitor. The basic idea behind [Mike]’s work isn’t much different from the weird and/or cool Timex Datalink watch from the 1990s.

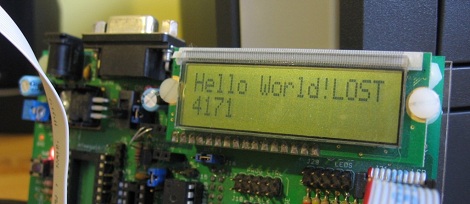
Despite the fancy dev board, the hardware is very simple – a photoresistor is pointed at a computer monitor and reads bits using Manchester encoding. The computer flashes a series of black and white screens thanks to a simple Javascript/HTML page, and data is (mostly) transmitted to the micro. [Mike] says he has about a failed message about 60% of the time, and he’s not quite sure where the problem is. He’s looking into another kind of Manchester encoding that uses samples instead of edges, so we hope everything works out for him.

This build is very similar – and was inspired by – an earlier post about microcontroller communication with flashing lights. Still, [Mike]’s build reminds us of the strangely futuristic Ironman watch we had in ’97. Check out [Mike]’s demo of his computer/micro comm link after the break and his code on github.

Continue reading “Microcontroller Comm With A Computer Monitor”

Tannenbaum Ticker, Even Though The Markets Close For Christmas

Maybe we’re a little bitter because we held on to our pumpkin futures well into November, but we’ve got to respect [Nick]’s stock ticker ornament. It’s an Internet-connected Christmas ornament that queries stock prices and displays the change with an RGB LED.

The build uses a Propeller Platform USB and the Propeller E-Net Module to pull stock quotes down from Google. With the attached source, selecting any traded company is easy enough; all that’s needed is to select a company is changing a line in the code. The Propeller pulls the quote every 30 seconds during the trading day, and parses it into a ‘percent changed’ format. The ornament glows red if the change is more than a 4% negative change, green for within 0.2% of open, and blue if more than a 4% positive change.

[Nick] is more of a ‘set it and forget it’ investor, so this ornament is a handy, passive way to keep an eye on his investments. Check out the demo vid after the break.

Continue reading “Tannenbaum Ticker, Even Though The Markets Close For Christmas”

How To Grow Your Own EL Wire DNA Helix Lamp

el-wire-helix-lamp

[LucidMovement] was looking for some crystal-based artwork and just couldn’t seem to find anything that fit the bill, so he decided to build something himself.

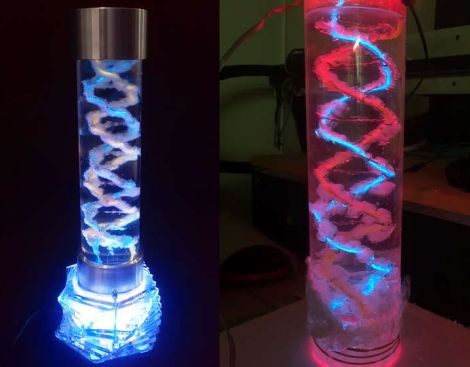
The inspiration for his desk lamp came from something we’re all familiar with, a DNA double-helix. To grow the crystals he built a helix-shaped growing substrate out of nichrome and EL wires, submerging them in a warm alum solution. Once he had a nice set of crystals, he mounted it in an acrylic tube, filling the air space with clear silicone to seal off the display. He then mounted the silicone-filled tube on top of a rotating acrylic stand that he had cut for the project. The stand is made from several sheets of acrylic and contains both the gearing for movement as well as RGB LEDs to light the display from the bottom.

The lamp looks great when sitting idle, but when he powers it on it really shines (no pun intended). [LucidMovement] put a ton of work into the lamp, and offers up all sorts of tips, tricks, and considerations for anyone looking to build their own. Be sure to check out his writeup for plenty more details, and stick around to see a short video of the lamp in action.

Continue reading “How To Grow Your Own EL Wire DNA Helix Lamp”

Handheld Jaguar Makes 32 Or 64 Bits Portable

There’s nothing wrong with portable NESs, Super Nintendos, N64, or even a portable Sega CD. What about a portable version the oft-maligned Atari Jaguar, though? [Evil Nod] pulled it off, and it looks great.

The build is fairly standard for a portable console. A PS1 screen is used for the display, and a cut up and re-wired controller provides the input. From what we see on the build log, moving the 104-pin cartridge slot onto ribbon cables was an exercise in patience. The case is absolutely phenomenal with a textured finish we would expect to see on an early 90s console. Of course, [Nod] kept the numeric keypad; there was space left over anyway.

We can’t rag on the Jaguar or [Nod]’s build. It’s a great execution and there’s an impressive library of games that include Worms, Rayman, Doom, and Myst. Still, we wonder what the build would look like with the Jaguar CD-ROM attached.

Arduino Notebook Cover Makes It Easy To Tinker Anywhere

arduino-notebook-cover

[Erv] was putting his holiday shopping list together and decided that instead of buying his friends something from the store, he would give them something a bit more useful. A former Electrical Engineer by trade, [Erv] typically prefers PIC microcontrollers, but he says that Arduinos are just so convenient to use for prototyping that he likes to always have one on hand.

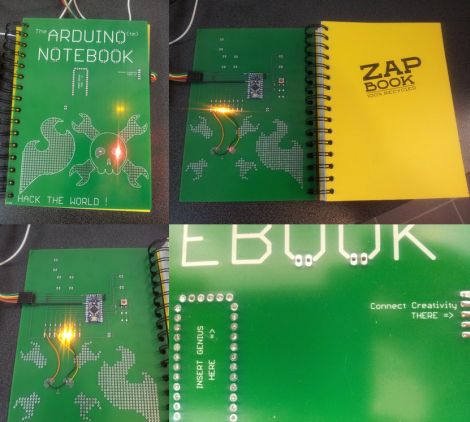
He figured that his friends might enjoy having easy access to an Arduino as well, so he made them some slick ZapBook covers which enable them to have a prototyping platform on hand at all times. The cover is made from a PCB and includes a socket for an Arduino Pro Mini, along with a handful of built-in LEDs. He has extended a few other I/O pins from the Arduino as well, but he says that the small solder bridges connecting the LEDs can be removed in a pinch, freeing up 8 additional pins with ease. We are pretty keen on the idea of an easily portable prototyping setup, though it doesn’t hurt that [Erv] incorporated a Hack a Day skull with light up eyes into his design either!

We’re not sure if he’s planning on releasing the schematics for the board, but the notebooks would be pretty useful for any hackerspaces hosting beginner Arduino programming classes.

How To Etch Your Own Solder Paste Stencils

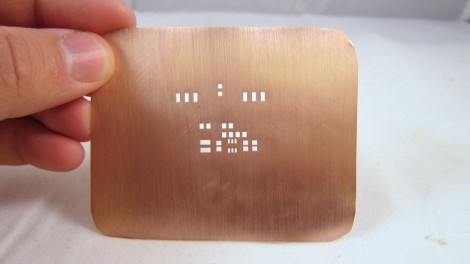
We’re kind of surprised we haven’t covered this concept before since it only uses techniques that are commonly avaialable for home PCB fabrication. [Ray] made this solder paste stencil out of a sheet of copper using the same etching techniques you would for a circuit board. He designed and printed a resist pattern, with toner everywhere except the places where there should be holes in the stencil. He transferred the toner to the copper using an iron.

The difference here should be obvious; this a thin copper sheet with no substrate. Because of that, you must protect the copper surface before etching. he covered the entire thing, both sides, in packing tape. After that it’s into the Cupric Chloride bath to dissolve the exposed parts. Once the tape and toner has been removed you can scree a precise amount of solder paste onto your boards.

This isn’t for everyone, but if you’re assembling many boards it’s not a bad approach. If the stencil is no longer used it can be recycled, but we do wonder how corrosion on the copper will affect the stencil’s performance.

The idea for this technique came to [Ray] from a guide that’s been around for years.

Scratch-built Software-Defined Radio

[Ben] is showing off some results from his Software-Define Radio project. The board seen above, which he designed from the ground up, is receiving a WWV radio broadcast. This is the atomic clock signal from Fort Collins, Colorado. The audio heard in the clip after the break is a bit noisy, but since he’s about 2000 miles from the origin of the signal we think he’s done really well!

The seed for this build was planted in [Ben’s] head back in July when he saw [Jeri Ellsworth’s] SDR project. He’s posted some of the build details up in a forum post. The approach is similar to [Jeri’s] but there are several key differences. He’s using a DS1085 programmable oscillator where she chose an FPGA for that purpose. Once his hardware demodulates and filters the incoming signal, a PIC32 does the rest of the work and outputs a PWM signal to an Op-Amp to generate audio.

Continue reading “Scratch-built Software-Defined Radio”