Reinventing The Clapper With A Knock-based Home Automation Controller

Clap On!… Clap Off!… was super awesome when The Clapper came out in the mid-eighties. Now [Mathieu Stephan] is trying to make the concept much more functional. He put together a controller that lets you knoch on walls to control things around the house. It’s called the Toktoktok project and uses small boxes to receive user input and control items like lamps and computers.

A piezo element picks up the noises made by a user. Above [Mathieu] demonstrates how sensitive the element is, picking up scratching and knocking anywhere along this wall and displaying it as a waveform on the computer monitor. Clever processing and filtering of these noises lets the device convert them into different commands. He covers all of this in the video after the break, then demonstrates a bunch of functionality such as waking up and starting audio playback from a computer just by tapping on the coffee table.

This isn’t the first time we’ve seen the concept. One of our favorites is this door lock which listens for the secret knock. But [Mathieu] is trying to extend the functionality and bring it to a more general market. Continue reading “Reinventing The Clapper With A Knock-based Home Automation Controller”

Building A Magnetic Rotary Encoder

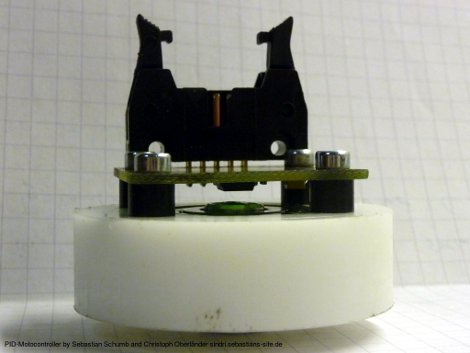
[Long Haired Hacker] has undertaken a high-resolution 3D printer build. He got his hands on some motors to drive the build platform but it doesn’t have a built-in encoder. He knows that optical encoder wheels can have problems due to dirt and grim as well as ambient light so he set out to find a better way of providing feedback to the controller. He ended up building his own magnetic rotary encoder which is shown above.

At the heart of the system is an AS5043 magnetic rotary sensor. The chip, which runs from $6.50-$11, can detect and report the rotation of a magnetic field with great precision. The rotation data can be read out in degrees using SPI, but it sounds like there’s also grey code output on a few pins if that suits your needs a bit better. The magnet which the chip measures is mounted in a sleeve milled to seat inside of a bearing ring.

The 3D printing method [Long Haired Hacker] has chosen uses a projector and light-cured resin to achieve the kind of results seen in this other hi-res printer.

Hard Resetting Your Ford Touch System The Easy Way

ford-sync-reset

[Jeff Clymer] owns a Ford Focus, and while he’s generally happy with the car, the “My Ford Touch/Sync” system can be buggy at times. He spends a lot of time in the car each day, so when the entertainment center locks up as it is frequently known to do, he has to turn off the car and pull a fuse to reset the system. Since pulling a fuse while on the road is pretty impractical, he decided to install a reset button, making system reboots a breeze.

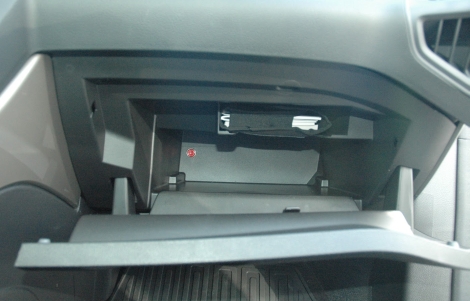
He started by disassembling various fuses until he found one with an easy to remove fusible link. Once it was in pieces, he soldered a pair of wires to the fuse terminals and connected everything to a normally closed momentary pushbutton switch. After adding an inline fuse holder and reinserting the original fuse, he installed the button into the back of his glove box

Now instead of physically removing the fuse each time his stereo locks up, he can simply push a button and be on his way. Here’s hoping a software fix is coming for [Jeff’s] car sooner rather than later!

Reverse Engineering A Nokia LCD

LCD displays taken from old Nokia phones have been a staple of the hardware makers for years now, so we’re very happy to see [Andy] reverse engineering a full color QVGA display so we can move our grayscale projects over to a full-color display.

The screen in a Nokia 2730, 5000, and 7100 cell phone is a wonder of technology – its 18-bit color with a very high-resolution piqued [Andy]’s interest. He bought a second-hand Nokia 2730 off of eBay and started taking it apart. After checking out the schematics for the phone, [Andy] had a few breakout boards made; especially useful since he found a few connectors as well.

With a great deal of Googling, [Andy] found another lost soul who successfully broke into a similar LCD display and discovered it was command-compatible with a Magnachip LCD controller. The only way forward was to send a few of these commands over to the display and watch what happens.

[Andy] managed get pixels drawn on the screen, and found a few interesting features: hardware scrolling is enabled, as is changing between portrait or landscape orientations. From a second-hand phone on eBay, [Andy] now has a very nice QVGA display. We’re calling this a win, but you can judge the video after the break for yourself.

Continue reading “Reverse Engineering A Nokia LCD”

Hackaday Links March 8th, 2012

Solder Your Pin headers Straight

straight-header solder

If you’re worried about how to solder your pin headers straight, why not try this simple trick and put them into a breadboard before soldering?

Etiquette for Open Source Projects

soapbox Phillip Torrone

If you use or develop open source projects, it’s worth checking out [Phillip Torrone]’s Unspoken rules of Open Source article. You may not HAVE to do all the things he says, but it’s certainly a good starting point for being ethical with your hacks.

The [GoAmateur] Camera Mount

go-amateur camera mount for bike

If you can’t afford a professional camera mount for your bike, why not make one yourself? As pointed out in the article, normal cameras aren’t really made for this, so do so at your own risk. If this isn’t shoddy enough for you, why not make a mount for your 4 year old dumb-phone (Env2) out of a block of wood?

A 3D Printer BOM

If you’re wondering how much a 3D printer will cost you, or where to source the parts, this Bill of Materials for a Prusa Mendel should help. We would assume this project will be updated as everything is built, so be sure to check back!

MakerBot Assembly Time-Lapse

makerbot time lapse

Along the same lines, if you’re wondering about getting into 3D printing, this time-lapse of the Thing-O-Matic being assembled may give you some insight into what’s involved in getting one functional!

Toaster Oven Reflow Soldering Roundup

SMD components have a lot of advantages over the through-hole parts our fathers and grandfathers soldered. Working with these tiny surface mount components requires a larger investment than a soldering iron and a wire-wrap gun, though. Here’s a few reflow ovens that were sent in over the past week or two.

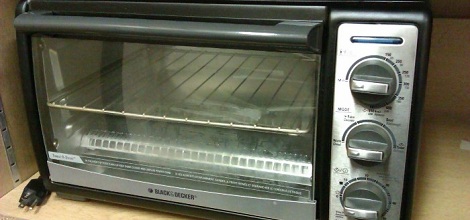
[ramsay] bought a 110 V toaster oven off of eBay. Even though [ramsay] is in England and has 230 V mains, everything in the oven is mechanical and works just fine with a higher voltage. His first test didn’t go quite as planned; the solder paste wasn’t melting at 120° C, so he cranked up the temperature and learned that the FR in FR-4 stands for flame retardant. Never deterred, [ramsay] decided to build a controller so the temperature ramps up and cools off at the right rates for the flux and paste to do their thing.

Solder paste has a temperature profile that requires the board to be kept at a temperature between 150° and 180° C for a minute or so before climbing up to 220° for a second so the solder will melt. [Nicolas] had the interesting idea of putting a USB port in his toaster oven and storing the heating profiles on his desktop. The build uses an MSP430 microcontroller to turn the relays powering heating elements on and off. [Nick] is working on a C# desktop app to monitor and regulate the oven temperature from his computer, so we’re fairly interested in seeing the final results.

Watching the SMD self-alignment videos on YouTube is a lot more fun than messing around with tweezers, stereo microscopes, and extremely fine soldering irons. If you’ve got a better idea for a toaster/reflow oven, send it in on our tip line and we’ll check it out.

Glove-based Touch Screen From A CRT Monitor

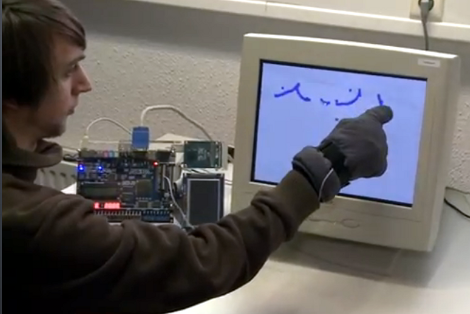
Here’s a bulky old CRT monitor used as a touch-screen without any alterations. It doesn’t use an overlay, but instead detects position using phototransistors in the fingertips of a glove.

Most LCD-based touch screens use some type overlay, like these resistive sensors. But cathode-ray-tube monitors function in a fundamentally different way from LCD screens, using an electron gun and ring of magnets to direct a beam across the screen. The inside of the screen is coated with phosphors which glow when excited by electrons. This project harness that property, using a photo transistor in both the pointer and middle finger of the glove. An FPGA drives the monitor and reads from the sensors. It can extrapolate the position of the phototransistors on the display based on the passing electron beam, and use that as cursor data.

Check out the video after the break to see this in action. It’s fairy accurate, but we’re sure the system can be tightened up a bit from this first prototype. There developers also mention that the system has a bit of trouble with darker shades.

Continue reading “Glove-based Touch Screen From A CRT Monitor”