Feedback For Automated Water And Food Pet Dispensers

pet-food-and-water-automation

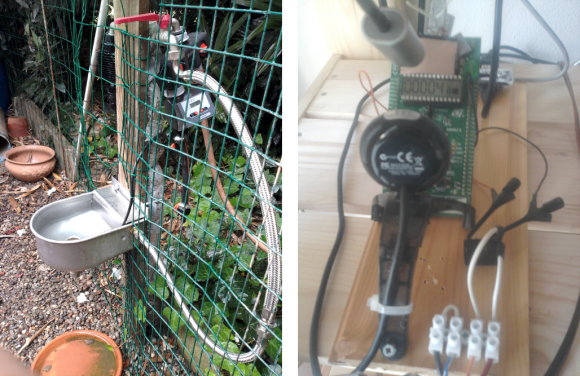
[Enrico] figured out a way to fully automate his pet food and water. The system is in two parts, the water trough as seen on the left, and the food dispenser whose control hardware is shown on the right. The system is even hooked up to the network so that he can make sure it didn’t break down while he was away.

The water dispenser uses parts from a sprinkler system. Since it’s mounted outdoors it doesn’t matter if the water overflows a little bit. So [Enrico] set up the timer to run the water for three minutes every day. This acts as a backup system since the trough already has the ability to refill itself.

The food dispenser started as a commercial unit. To get feedback from the system he added a couple of magnets to the agitation motor and reads them with a hall effect sensor. In addition to an IP camera that monitors the area around the feeder (so [Enrico] can actually see his dog eating) there is a webcam which monitors the STM32 Discovery board which monitors the feeder. It tracks the number of times the dispenser has run.

HDD POV Clock Takes The Best From Those That Came Before It

hdd-pov-clock

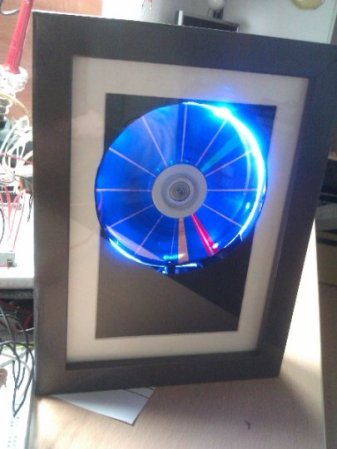
The concept behind this clock has been seen before, but [Dieter] tried to combine the best aspects of several projects into his HDD POV clock (translated). The basic principle of the design is to cut a slot into the top platter of the hard drive. This will let the light from some LEDs shine through. By carefully synchronizing the LED with the spinning platter a set of differently colored hands can be shown to mark time. We’ve been looking at the project for several minutes now and we’re not quite sure if the lines marking the 5-minute segments on the clock are generated in the same way as the hands, or if they’re marks on a faceplate on top of the platters. Check out the clip after the break and let us know what you think.

Past HDD clock project include this one, or this other one. Some of the design improvements include a better motor driver (which [Dieter] pulled from an old VCR) and the inclusion of an RTC chip to keep accurate time without the need to be connected to a computer. We also think it’s a nice touch to sandwich the hardware between two picture frames for a nice finished look.

Continue reading “HDD POV Clock Takes The Best From Those That Came Before It”

3d Printed Hexapod Robot

3d-printed-hexapod

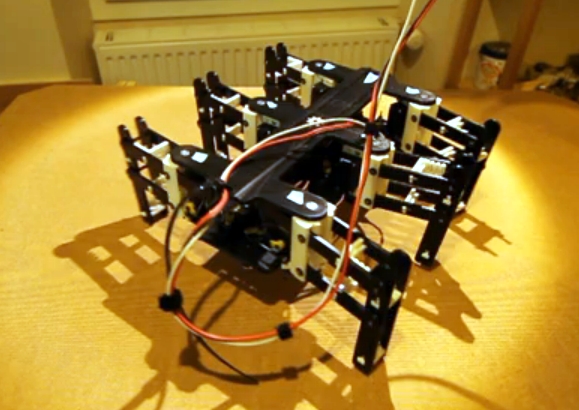
This hexapod was made almost entirely via 3d printing (translated). The parts that you need to supply include a few fasteners to make connections, twelve servo motors, and a method of driving them. As you can see in the video after the break, all those parts come together into a little robot that functions quite well. The only thing that we think is missing are some grippy feet to help prevent slipping.

[Hugo] calls the project Bleuette. It is completely open source, with the cad files and source code available on his Github repository. There is additional information in the wiki page of that repo. This gives us a good look at the electronic design. He’s controlling the legs with an Arduino, but it’s all dependent on his own shield which features a PIC 18F452 to take care of the signals used to drive all of the servo motors. The board also has some peripherals to monitor the current draw and regulate the incoming power.

Continue reading “3d Printed Hexapod Robot”

Modulator Box Connects IPod To Tesla Coil

tesla-coil-modulator

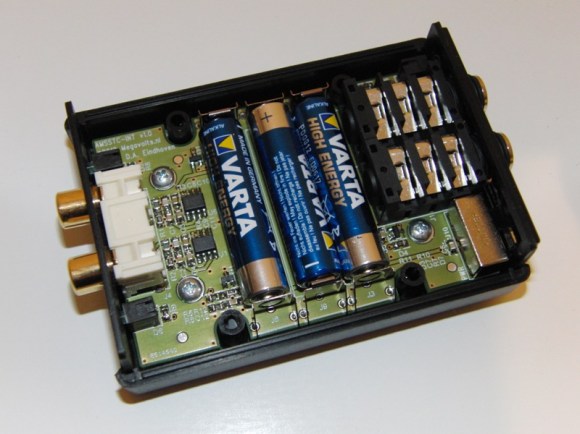
This pass through audio modulator lets you playback stereo audio on two Tesla coils. But don’t fret, you can just use mono files if you only have one coil on hand. On one side there are inputs that connect to the audio source. The other side drives the Tesla coil, switching it on and off based on the relationship between a reference voltage and the audio signal. As you can hear in the video after the break this sounds great as long as you have the right kind of source audio.

The song played in that clip is the Duke Nukem 3D theme. [Daniel] started with a MIDI file and removed the chimes and drums to make the playback a little cleaner. The demo uses just one coil because the other was destroyed during testing when feedback between the two became a problem.

For some reason this reminds us of that singing Tesla coil hat. If you’re already on our mailing list (sign up in the sidebar) you know we’re getting pretty close to unveiling our own awesome Tesla coil project. It doesn’t sing… yet.

Continue reading “Modulator Box Connects IPod To Tesla Coil”

Really, Really Geeky Wedding Invitations

invitation

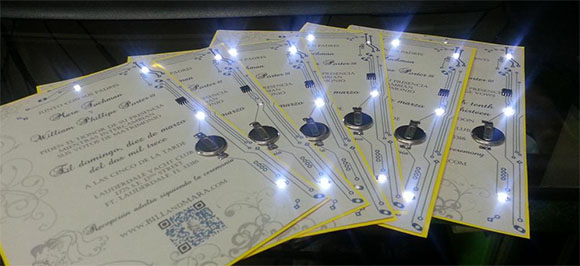
Being real, ultimate geeks, [Bill] and [Mara] didn’t want to settle for plain, paper-based wedding invitations. No, they wanted something cooler, and came up with their own DIY electronic wedding invitations.

Since they would be making the invitations themselves, [Bill] and [Mara] needed a simple circuit that could be easily mass produced. They turned to the classic microcontroller-powered blinking LED circuit powered by an ATtiny13.

The first order of business was producing 50 printed circuit boards for each of the invitations. For this, [Bill] picked up an Xerox Phaser laser printer off of ebay and a few sheets of copper-clad kapton film. The etch resist was printed directly onto the kapton film and etched in a bath of ferric chloride, effectively making a flexible PCB.

These circuit boards were soldered up and laminated between the printed invitation and the card stock cutter with the help of a Silhouette Cameo paper cutter. After the cards were assembled, the battery was wired up and the cards shipped out.

The microcontroller inside the card was programmed to be asleep most of the time, waking up only every few seconds to check a light sensor to determine if the card was opened or not. If the microcontroller sensed the card was open, the lights began blinking, making it one of the most memorable wedding invitations [Bill] and [Mara]’s guests will ever receive.

You can check out a demo of the invitations after the break.

Continue reading “Really, Really Geeky Wedding Invitations”

Controlling A Raspberry Pi With Real Life Redstone

minepi

We’ve seen computers built in Minecraft out of redstone, the game’s version of electricity, circuits, and digital logic. We’ve even seen a few redstone contraptions controlling real-world devices. [Angus]’ build, though, takes things to a whole new level. He’s created a bridge between Minecraft circuits and their real life counterparts using a Raspberry Pi.

[Angus]’ build relies on a mod for Minecraft servers running as a Bukkit plugin. Blocks powered by redstone are labeled with an in-game sign, and messages regarding the state of a block are passed over the network using the MQTT protocol.

The hardware side of the build is a Raspberry Pi with a PiFace expansion board. With this setup, [Angus] can control LEDs on the PiFace by toggling Minecraft levers, or light up redstone lamps using the PiFace’s buttons.

If you’d like to try this out for yourself, you can grab the Bukkit plugin over on [Angus]’s git. Check out the video of the real life redstone in action after the break.

Continue reading “Controlling A Raspberry Pi With Real Life Redstone”

Mr. Tea Is A Hot Plate And Magnetic Stirrer In The Same Enclosure

mr-tea-stir-and-hot-plate

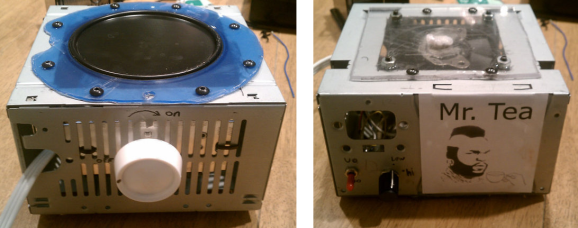
Not being a coffee drinker [Hunter Scott] wanted a way to make tea while lurking in his workshop. Well it’s not exactly rocket science, as all you need is water at the right temperature and a vessel in which the tea can be steeped. But we do commend him on not only building a nice little hot plate enclosure, but rolling a magnetic stirrer into the other side of the box.

You heard us right, the stirrer is not combined with the plate, but resides on the underside of the same PSU enclosure. The plate itself is from a unit he bought at the store and cannibalized. The light switch dimmer lets him adjust the heat it puts out. When not hot, he can flip it over and use the stir plate. This consists of a hard drive magnet attached to a PC fan. For the stirrer itself he encased a neodymium magnet in some thermoplastic. The magnetic combination works well together with a demonstration which shows it stirring water through the base of a tea-cup.