Hit The Polls Before Friday

astronot Don’t forget to vote in the newest round of Astronaut or Not. In addition to deciding which projects should be recognized as “Too Cool for Kickstarter”, you will be eligible for the voter lottery.

What is this voter lottery we speak of? On Friday we’ll draw a random number and see if that hacker profile on Hackaday.io has voted at least once in this round, which started on Monday.

If they voted they’ll received a prize package packed with all kinds of prototyping hardware. This cycle offers several breakout boards, a bunch of programmers and debuggers, as well as a digital multimeter and a bench power supply (full list here). For the hackers who haven’t registered a vote? Nothing!

We’ll be drawing the number from a hotel room in Vegas since we’ll be there for DEFCON. If you’re also attending the conference track us down to show off your own hardware or just to grab some stickers.

Reverse Engineering A NAND Flash Device Management Algorithm

unsoldered flash chip

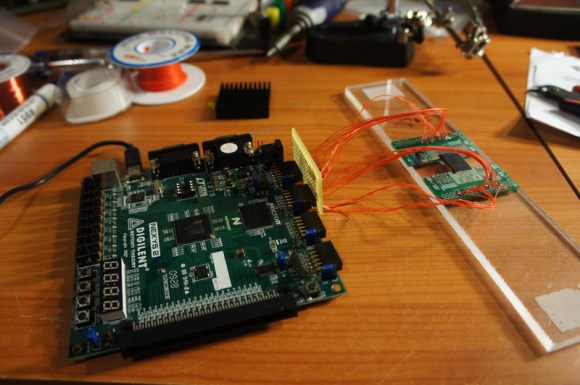
Put your hand under you chin as here comes a 6 months long jaw-dropping reverse engineering work: getting the data back from a (not so) broken SD card. As you can guess from the picture above, [Joshua]’s first step was to desolder the card’s Flash chip as the tear-down revealed that only the integrated SD-to-NAND Flash controller was damaged. The flash was then soldered on a breadboard so it could be connected to a Digilent Nexys-2 FPGA board. [Joshua] managed to find a similar Flash datasheet, checked that his wire-made bus was reliable and generated two 12GiB dump files on his computer.

In order to extract meaningful data from the dumps he first had to understand how SD-to-NAND controllers work. In his great write-up he provides us with a background of the Flash technology, so our readers can better understand the challenges we face with today’s chips. As flash memories integrate more storage space while keeping the same size, they become less reliable and have nifty problems that should be taken care of. Controllers therefore have to perform data whitening (so neighboring blocks of data don’t have similar content), spread data writes uniformly around the flash (so physical blocks have the same life expectancy) and finally support error correcting codes (so damaged bits can still be recovered). We’ll let our users imagine how complex reverse engineering the implementation of such techniques is when you don’t know anything about the controller. [Joshua] therefore had to do a lot of research, perform a lot of statistical analysis on the data he extracted and when nothing else was possible, use bruteforce…

Paperclip Lock Picking Sets

Lockpicking has become a trademark skill of hackers all across the world, and is regularly taught at hackerspaces and maker faires. But a lot of the time, the sets have already been made or bought online somewhere. However, [Sean] has demonstrated how to create a lock picking set with ordinary paperclips in the video embedded at the end of this post. Wikihow also has these awesome instructions on how to build them.

What’s great is that the material for these picks are easily found. There are other ways to fashion a set together. For example, street sweeper bristles can be used. And electrical metal tape is a good material as well, but these paperclip sets are, by far, the most accessible. Pretty much anywhere that has office stationary supplies will have mounds of these little metal clips lying around.

But how well do they work? Have you made a paperclip lock picking set before?

If so, let us know in the comments, and tell us how well they did.

Continue reading “Paperclip Lock Picking Sets”

Raspberry Pi Spies On Your Front Door

doorbell pictures

One of [Sander]’s first projects with a Raspberry Pi was to get it to send messages to his iPhone. From there he decided to take it a step further and wire the tiny computer up to his doorbell, creating a system that can send push messages to his phone whenever someone is at the front door.

[Sander]’s doorbell is wireless, and he decided to keep all of its original functionality. All it took to signal the Pi was a simple circuit tied to the doorbell’s status LED which turns off whenever the doorbell is pushed.

The Raspberry Pi runs a python program that handles the GPIO pin which is wired to the doorbell. When the doorbell is pushed, the program processes and sends the push notification while taking pictures of the visitor with an attached webcam. The pictures are included in the message so [Sander] can see who is at the front door. The code for the project is included on his project page.

This project rang a bell for us since we’ve seen projects using a Raspberry Pi and push notifications. None of them so far have included a webcam or utilized an existing wireless doorbell though, and this is a great step forward!

Sniffing NRF24L01+ Traffic With Wireshark

Wireshark trace

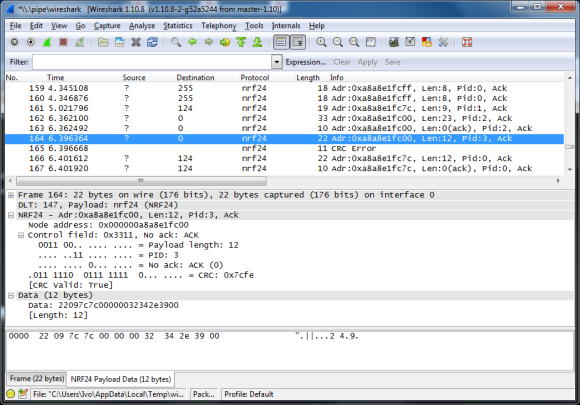
We’re sure that some of our readers are familiar with the difficult task that debugging/sniffing nRF24L01+ communications can be. Well, [Ivo] developed a sniffing platform based on an Arduino Uno, a single nRF24L01+ module and a computer running the popular network protocol analyzer Wireshark (part1, part2, part3 of his write-up).

As these very cheap modules don’t include a promiscuous mode to listen to all frames being sent on a particular channel, [Ivo] uses for his application a variation of [Travis Goodspeed]’s technique to sniff Enhance Shockburst messages. In short, it consists in setting a shorter than usual address, setting a fix payload length and deactivating the CRC feature. The Arduino Uno connected to the nRF24L01+ is therefore in charge of forwarding the sniffed frames to the computer. An application that [Ivo] wrote parses the received data and forwards it to wireshark, on which can be set various filters to only display the information you’re interested in.

The Arduino Yun Shield

YUN

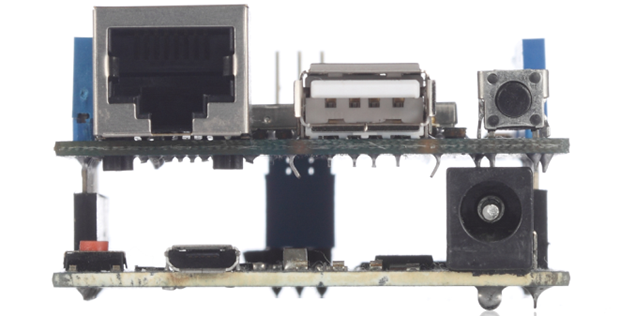
A few years ago, the most common method to put an Arduino project on the web was to add a small router loaded up with OpenWrt, wire up a serial connection, and use this router as a bridge to the Internet. This odd arrangement was possibly because the existing Arduino Ethernet and WiFi shields were too expensive or not capable enough, but either way the Arduino crew took notice and released the Arduino Yun: an Arduino with an SoC running Linux with an Ethernet port. It’s pretty much the same thing as an Arduino wired up to a router, with the added bonus of having tons of libraries available.

Since the Yun is basically a SoC grafted onto an Arduino, we’re surprised we haven’t seen something like this before. It’s an Arduino shield that adds a Linux SoC, WiFi, Ethernet, and USB Host to any Arduino board from the Uno, to the Duemilanove and Mega. It is basically identical to the Arduino Yun, and like the Yun it’s completely open for anyone to remix, share, and reuse.

The Yun shield found on the Dragino website features a small SoC running OpenWrt, separated from the rest of the Arduino board with a serial connection. The Linux side of the stack features a 400MHz AR9331 (the same processor as the Yun), 16 MB of Flash, and 64 MB of RAM for running a built-in web server and sending all the sensor data an Arduino can gather up to the cloud (Yun, by the way, means cloud).

All the hardware files are available on the Yun shield repo, with the Dragino HE module being the most difficult part to source.

Hardware “Security” And A DMCA Takedown Notice

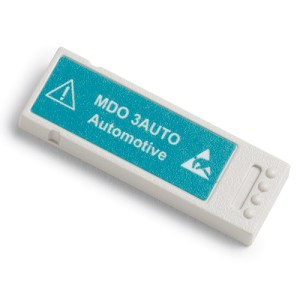
tektronix-autoLast week we published a post about how it was discovered through trial and error that Tektronix application modules are designed with laughable security. We’ll get to that part of it in a minute. We received a DMCA Takedown Notice from Tektronix (which you can read after the break) demanding that we remove the post. We have altered the original post, but we believe our coverage of this story is valid and we don’t agree that the post should be completely removed.

First off, Tektronix sells the modules to unlock the features already present on the Oscilloscope in questions. We’re operating on the moral assumption that using these features without paying their asking price is wrong. If you want the features they’ve developed you should pay for them.

The real story here is that Tektronix designed a woefully weak system for unlocking these modules. Learn from this. If you’re ever designing a hardware key, don’t do it like this!

An EEPROM, a connector, and a plain text string of characters which is already published publicly on their website is all that is necessary to unlock these “crippled” features. Let’s just say that again: apparently every hardware key is the same and just uses a plain-text string found on their website which is not encrypted or obfuscated. If you were selling these keys for $2.99 perhaps this would be adequate, but Tek values these modules at $500 apiece.

If you were designing this system wouldn’t it be worth using an encryption key pair based on the serial number or some other piece of unique information? How do you think this should have been done? Leave your comment below.

Continue reading “Hardware “Security” And A DMCA Takedown Notice”