Improving Active Loads

[Texane]’s job requires testing a few boards under a set of loads, and although the lab at work has some professional tools for this it seemed like a great opportunity to try out the Re:load 2. It’s a nifty little active load that’s available can of course be improved with an injection of solder and silicon.

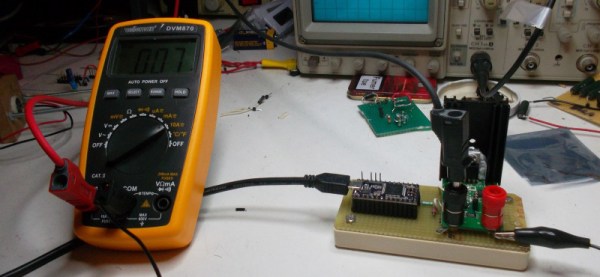
While the Re:load 2 is a nice, simple device that can turn up to 12 Watts directly into heat, it’s not programmable. The ability to create and save load profiles would be a handy feature to have, so [Texane] took a Teensy 3.1 microcontroller and installed a resistor divider in front of the Re:load’s amplifier. A simple script running on a computer allows [Texane] to set the amount of current dumped and automate ramps and timers.

There is a more fundamental problem with the Re:load; the lowest possible current that can be dumped into a heat sink is 90mA. [Texane] replace the amplifier with a zero-drift amp that brought that 90mA figure down to 7mA.

Of course the Re:load and Teensy 3.1 are sold in the Hackaday store, but if you’re looking for a ready-built solution for a computer-controlled active load you can always check out the Re:load Pro, a fancy-smanchy model that has an LCD. The Pro costs more, and [Texane] just told you how to get the same features with the less expensive model we’re selling, though…

Hackaday Links Column Banner

Hackaday Links: May 3, 2015

Everybody loves How It’s Made, right? How about 3D printers? The third greatest thing to come out of Canada featured Lulzbot in their most recent episode. It’s eight minutes of fun, but shame the puns weren’t better. Robertson drives and the Avro Arrow, if you’re wondering.

Speaking of 3D printers, a lot of printers are made of aluminum extrusion. Has anyone tried something like this? It’s an idea that’s been around for a while but we can’t seem to find anyone actually using 3D printed extrusion.

CastARs are shipping out, and someone made a holodeck with retroreflective material. It’s an inflatable dome that’s attached to a regular ‘ol tent that works as a positive pressure airlock. If you’re looking to replicate this, try it with hexagons and pentagons. That should be easier than the orange-slice gores.

For some reason we can’t comprehend, USB ports are now power ports. There’s still a lot of stuff that uses 9 and 12V, and for that there’s the USB 912. It’ll work better with one of those USB battery packs.

Want to see what the Raspberry Pi 2 looks like with a Flir? NOQ2 has you covered.

Remember the Speccy? In the manual, there was an exercise left to the reader: reproduce [Mahler]’s first symphony with the BEEP command. It took a Raspberry Pi (only for synchronizing several Speccys), but it’s finally done.

Weekend Proves Hardware Wins Hackathons

Teams hacking on hardware won big this weekend in New York. There were ten teams that answered Hackaday’s call as we hosted the first ever hardware hackathon at the Tech Crunch Disrupt NYC. These teams were thrown into the mix with all of the software hackers TC was hosting and rose to the top. Eight out of our ten teams won!

As we suspected, having something physical to show off is a huge bonus compared to those showing apps and webpages alone. Recipe for awesome: Mix in the huge talent pool brought by the hardware hackers participating, then season with a dash of experience from mentors like [Kenji Larson], [Johngineer], [Bil Herd], [Chris Gammell], and many more.

Out of over 100 teams, first runner-up went to PicoRico, which built a data collection system for the suspension of a mountain bike. The Twillio prize went to Stove Top Sensor for Paranoid, Stubburn Older Parents which adds cellphone and web connectivity to the stove, letting you check if you remembered to turn off the burns. The charismatic duo of fifteen-year-olds [Kristopher] and [Ilan] stole the show with their demonstration of Follow Plants which gives your produce a social media presence which you can then follow.

We recorded video and got the gritty details from everyone building hardware during the 20-hour frenzy. We’ll be sharing those stories throughout the week so make sure to check back!

tubenetradio

TubeNetRadio Project Modernizes 1959 Tube Radio

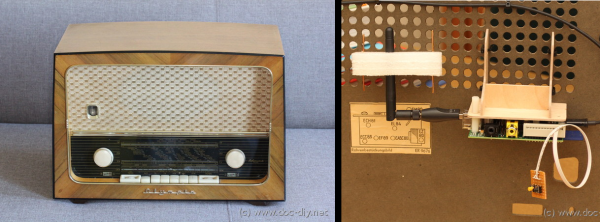
Years ago, [Luk] came across an old tube radio. He’s since wanted to convert it to an internet radio but never really got around to it. Now that we are living in the age when a micro computer can be had for a mere $35, [Luk] decided it was time to finish his long lost project.

He chose a Raspberry Pi for the brains of his project because it is an inexpensive and well documented product perfect for what he wanted to do. [Luk] had a goal, to modify the radio as little as possible in order to get it to play both internet radio and locally stored MP3s. The radio from 1959 is certainly old, but it had a feature you may not expect. It had an AUX input with a separate volume knob out front. As is the radio itself, the input was mono. To connect the Raspberry Pi to the radio, [Luk] had to make an 1/8th inch stereo to banana plug adapter, a great solution that did not require any modification to the original radio.

WiFi is accessed though an off-the-shelf USB wireless module. After evaluating tapping into a 5vdc source somewhere in the radio, it was decided to use a wall wart to power the Raspberry Pi. A plug for the wall wart was spliced in after the radio’s main on/off switch. That way the radio and Raspberry Pi both turn on and off together. There is plenty of room for all of these added components inside the radio’s case.

The RaspPi can be fully controlled over the WiFi network but has a couple buttons wired up to the GPIO pins for limited manual control. The buttons for these controls fit perfectly in the round vent holes in the back panel of the radio’s case. Although the buttons are visible, no permanent modifications had to be made! [Luk] reports that everything works great, as do the original functions of the radio.

robotic dog

Robot K-9 Scares Off The Daleks

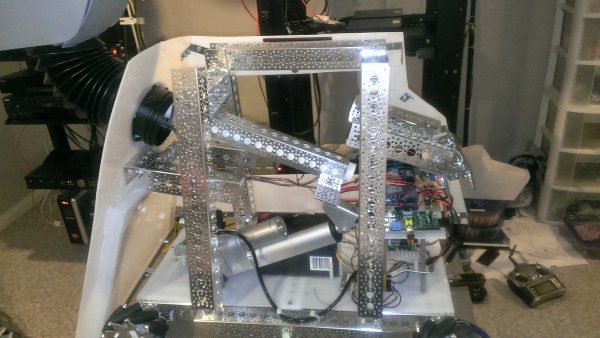
[Bithead942’s] love of the ever popular Dr Who series led her to develop a replica of the 4th Doctor’s robotic companion. It’s name is K-9, and was built from scratch in only 4 months. Its shell is made from HPDE – a light and bendable plastic. A custom plastic bender was constructed to get the angles just right, and custom laser cut parts were used in various places.

Its frame consists of aluminum channel, and is packed full of juicy electronics. An arduino with an XBee shield controls the remote voice, frickin’ laser and eye sensors. Another arduino is paired with a motor shield to control the linear actuator for the neck movement. And a Raspberry Pi keeps the LCD screen in order.

We’re not done, folks. Because this puppy is radio controlled, a custom controller is needed. Sparkfun’s Fio paired with another XBee is used along with a 16×2 LCD and various other electronics to keep the robot on an invisible leash.

Be sure to check out the blog site, as it goes into great detail on all the various parts used to construct this complicated but awesome project.

ESP8266 WiFi Throwies

A few years ago, someone figured out you can take an LED, a coin cell battery, and a magnet, tape them together, and throw them on every conceivable metallic surface. This was the creation of LED throwies, and the world was much worse off for its invention.

With the ESP-8266 WiFi module, we have a tiny, tiny device with a WiFi radio, and just enough processing power to do something interesting. What does that mean? WiFi throwies.

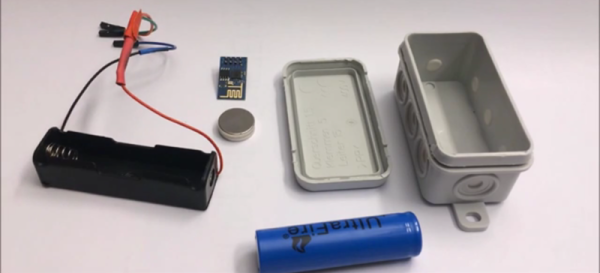
[Andreas Reischle] stuffed an ESP-8266 WiFi module and a lithium cell inside a weatherproof controller loaded up with magnets. On its own, these wouldn’t do much, but with the right combination of software, this little magnetic box can serve as an access point, serving up small JavaScript games to anyone who connects.

The software is based on the NodeMCU firmware and features a web server and a DNS server. The utility of a web server is obvious, and the DNS server redirects all traffic to the device’s index.html file, where a menu of small JavaScript games are presented.

It’s much better than polluting the world with LEDs and lithium; this one has Hunt the Wumpus on it.

Thanks [Oliver] for the tip.

Continue reading “ESP8266 WiFi Throwies”

Decoding And Replicating Xantrex Solar Charge Data

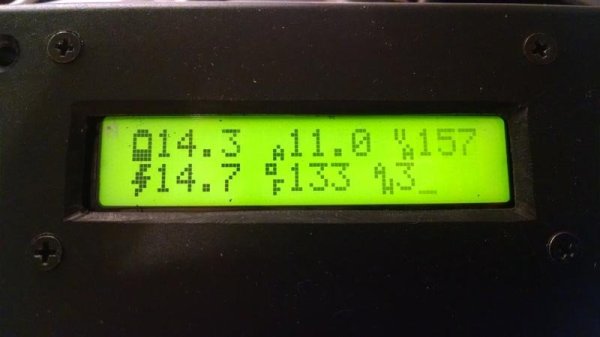
This is a story mostly of decoding data, but there is a happy ending that includes turning that decoding work into an open source receiver. Xantrex solar charge controllers monitor a lot of data about what is happening with your solar panels, and they stream it over RJ25 but you need their add-on hardware to receive it. [Eric Herbers] figured if the data is being transmitted, a resourceful hackers should be able to decode it. And he did just that with a little help from his friends in the Hackaday community.

We asked on Twitter what people were working on and [Eric] posted his scope screenshot. The conversation that followed helped point him in the right direction and others knowing about the project surely drove him to finish it. The decoding isn’t perfect, but achieve enough to decode and display voltage, amperage, and temperature. [Eric] built the display unit using an Arduino Pro Mini and a character LCD housed in you most common of black project boxes.